Woodworker's Journal 2002-26-3, страница 39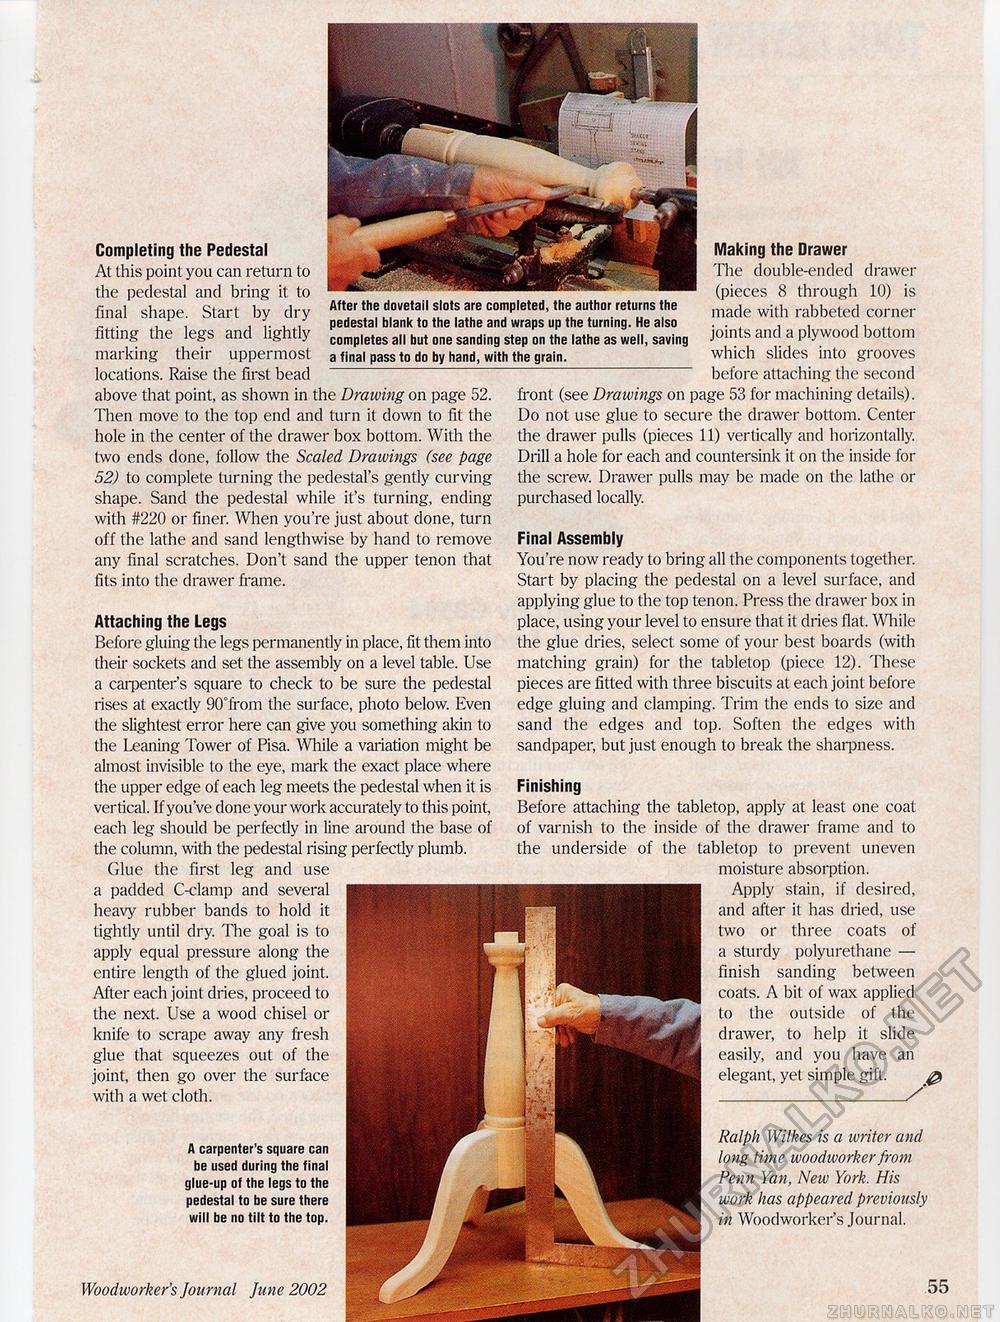
Completing the Pedestal At this point you can return to the pedestal and bring it to final shape. Start by dry fitting the legs and lightly marking their uppermost locations. Raise the first bead above that point, as shown in the Drawing on page 52. Then move to the top end and turn it down to fit the hole in the center of the drawer box bottom. With the two ends clone, follow the Scaled Drawings (see page 52) to complete turning the pedestal's gently curving shape. Sand the pedestal while it's turning, ending with #220 or finer. When you're just about done, turn off the lathe and sand lengthwise by hand to remove any final scratches. Don't sand the upper tenon that fits into the drawer frame. Attaching the Legs Before gluing the legs permanently in place, fit them into their sockets and set the assembly on a level table. Use a carpenter's square to check to be sure the pedestal rises at exactly 90°from the surface, photo below. Even the slightest error here can give you something akin to the Leaning Tower of Pisa. While a variation might be almost invisible lo the eye, mark the exact place where the upper edge of each leg meets the pedestal when it is vertical. If you've done your work accurately to this point, each leg should be perfectly in line around the base of the column, with the pedestal rising perfectly plumb. Glue the first leg and use a padded C-clamp and several heavy rubber bands to hold it tightly until dry. The goal is to apply equal pressure along the entire length of the glued joint. After each joint dries, proceed to the next. Use a wood chisel or knife to scrape away any fresh glue that squeezes out of the joint, then go over the surface with a wet cloth. After the dovetail slots are completed, the author returns the pedestal blank to the lathe and wraps up the turning. He also completes all but one sanding step on the lathe as well, saving a final pass to do by hand, with the grain. Making the Drawer The double-ended drawer (pieces 8 through 10) is made with rabbeted corner joints and a plywood bottom which slides into grooves before attaching the second front (see Drawings on page 53 for machining details). Do not use glue to secure the drawer bottom. Center the drawer pulls (pieces 11) vertically and horizontally. Drill a hole for each and countersink it on the inside for the screw. Drawer pulls may be made on the lathe or purchased locally. Final Assembly You're now ready to bring all the components together. Start by placing the pedestal on a level surface, and applying glue to the top tenon. Press the drawer box in place, using your level to ensure that it dries flat. While the glue dries, select some of your best boards (with matching grain) for the tabletop (piece 12). These pieces are fitted with three biscuits at each joint before edge gluing and clamping. Trim the ends to size and sand the edges and top. Soften the edges with sandpaper, but just enough lo break the sharpness. Finishing Before attaching the tabletop, apply at least one coat of varnish to the inside of the drawer frame and to the underside of the tabletop to prevent uneven moisture absorption. Apply stain, if desired, and after it has dried, use two or three coats of a sturdy polyurethane — finish sanding between coats. A bit of wax applied to the outside of the drawer, to help it slide easily, and you have an elegant, yet simple gift. i _S A carpenter's square can be used during the final glue-up of the legs to the pedestal to be sure there will be no tilt to the top. Ralph Wilkes is a writer and long time woodworker from Penn Yan, New York. His work has appeared previously in Woodworker's Journal. Woodworker's Journal June 2002 39 |


