Woodworker's Journal 2002-26-3, страница 37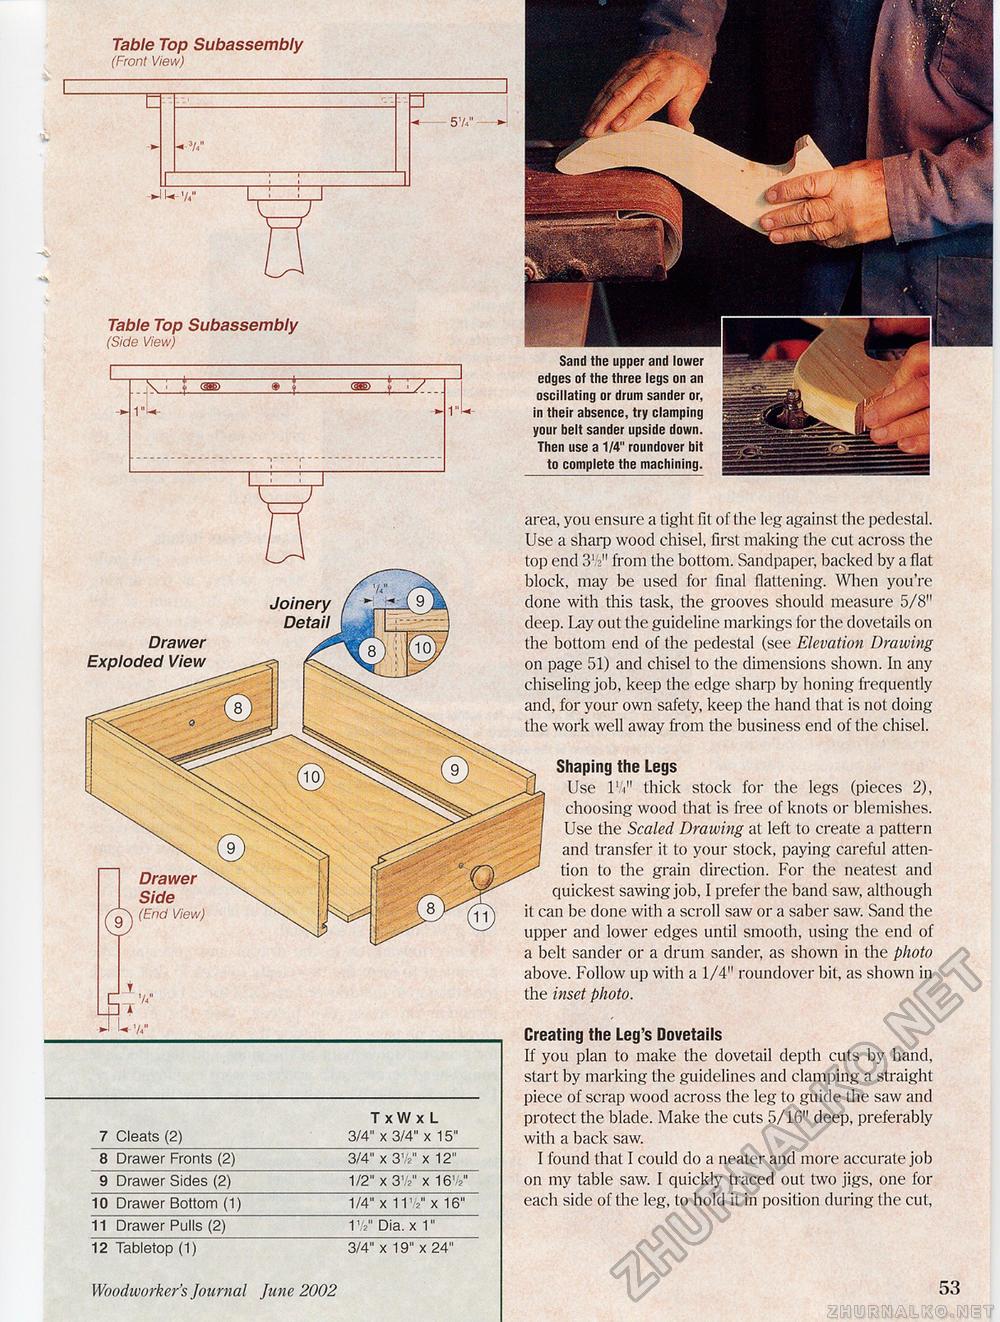
Table Top Subassembly (Side View) Table Top Subassembly (Front View) T xW x L 7 Cleats (2) 3/4" x 3/4" x 15" 8 Drawer Fronts (2) 3/4" x 3V x 12" 9 Drawer Sides (2) 1/2" x 3V x 16V 10 Drawer Bottom (1) 1/4" x 11V x 16" 11 Drawer Pulls (2) 1V Dia. x 1" 12 Tabletop (1) 3/4" x 19" x 24" Sand the upper and lower edges of the three legs on an oscillating or drum sander or, in their absence, try clamping your belt sander upside down. Then use a 1/4" roundover bit to complete the machining. area, you ensure a light fit of (lie leg against the pedestal. Use a sharp wood chisel, first making the cut across the top end 3' 2" from the bottom. Sandpaper, backed by a flat block, may be used for final flattening. When you're done with this task, the grooves should measure 5/8" deep. Ixiy out the guideline markings for the dovetails on the bottom end of the pedestal (see Elevation Drawing on page 51) and chisel to the dimensions shown. In any chiseling job, keep the edge sharp by honing frequently and, for your own safety, keep the hand that is not doing the work well away from the business end of the chisel. Shaping the Legs Use l11" thick stock for the legs (pieces 2), choosing wood that is free of knots or blemishes. Use the Scaled Drawing at left to create a pattern and transfer it to your stock, paying careful attention to the grain direction. For the neatest and quickest sawing job, I prefer the band saw, although it can be done with a scroll saw or a saber saw. Sand the upper and lower edges until smooth, using the end of a belt sander or a drum sander, as shown in the photo above. Follow up with a 1/4" roundover bit, as shown in the inset photo. Creating the Leg's Dovetails If you plan to make the dovetail depth cuts by hand, start by marking the guidelines and clamping a straight piece of scrap wood across the leg to guide the saw and protect the blade. Make the cuts 5/16" deep, preferably with a back saw. I found that I could do a neater and more accurate job on my table saw. I quickly traced out two jigs, one for each side of the leg, to hold it in position during the cut, Drawer Exploded View Drawer Side Q (End View) Joinery Detail Woodworker's Journal June 2002 53 |
||||||||||||||||||


