Woodworker's Journal 2002-26-3, страница 38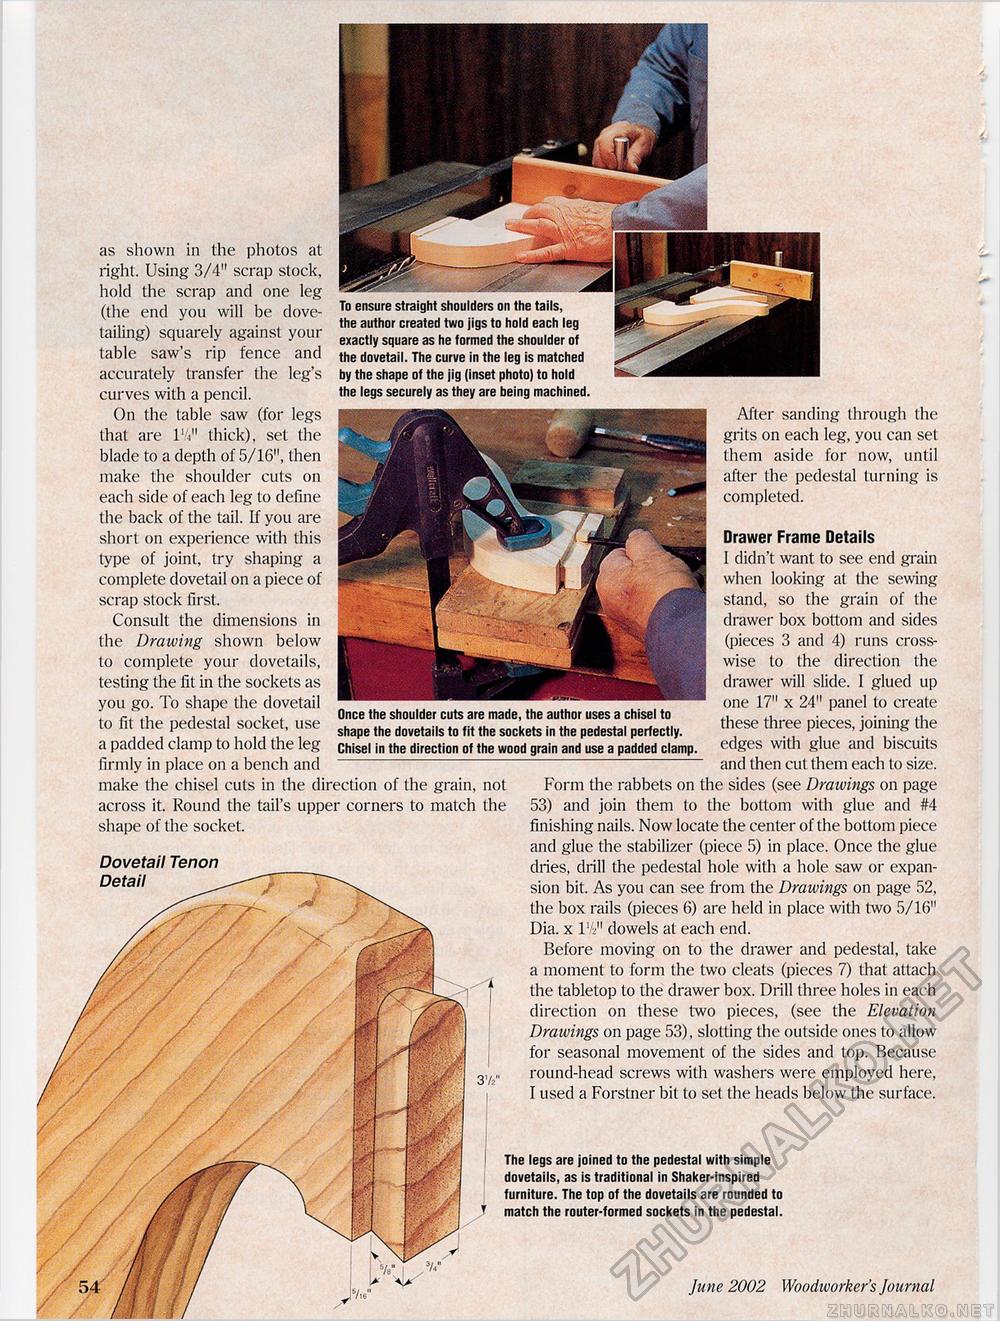
To ensure straight shoulders on the tails, the author created two jigs to hold each leg exactly square as he formed the shoulder of the dovetail. The curve in the leg is matched by the shape of the jig (inset photo) to hold the legs securely as they are being machined. as shown in the photos at right. Using 3/4" scrap stock, hold the scrap and one leg (the end you will be dovetailing) squarely against your table saw's rip fence and accurately transfer the leg's curves with a pencil. On the table saw (for legs that are l'V thick), set the blade to a depth of 5/16", then make the shoulder cuts on each side of each leg to define the back of the tail. If you are short on experience with this type of joint, try shaping a complete dovetail on a piece of scrap stock first. Consult the dimensions in the Drawing shown below to complete your dovetails, testing the fit in the sockets as you go. To shape the dovetail to fit the pedestal socket, use a padded clamp to hold the leg firmly in place on a bench and make the chisel cuts in the direction of the grain, not across it. Round the tail's upper corners to match the shape of the socket. Dovetail Tenon Detail Once the shoulder cuts are made, the author uses a chisel to shape the dovetails to fit the sockets in the pedestal perfectly. Chisel in the direction of the wood grain and use a padded clamp. After sanding through the grits on each leg, you can set them aside for now, until after the pedestal turning is completed. Drawer Frame Details I didn't want to see end grain when looking at the sewing stand, so the grain of the drawer box bottom and sides (pieces 3 and 4) runs crosswise to the direction the drawer will slide. I glued up one 17" x 24" panel to create these three pieces, joining the edges with glue and biscuits and then cut them each to size. Form the rabbets on the sides (see Drawings on page 53) and join them to the bottom with glue and #4 finishing nails. Now locate the center of the bottom piece and glue the stabilizer (piece 5) in place. Once the glue dries, drill the pedestal hole with a hole saw or expansion bit. As you can see from the Drawings on page 52, the box rails (pieces 6) are held in place with two 5/16" Dia. x l'/z" dowels at each end. Before moving on to the drawer and pedestal, take a moment to form the two cleats (pieces 7) that attach the tabletop to the drawer box. Drill three holes in each direction on these two pieces, (see the Elevation Drawings on page 53), slotting the outside ones to allow for seasonal movement of the sides and top. Because round-head screws with washers were employed here, I used a Forstner bit to set the heads below the surface. The legs are joined to the pedestal with simple dovetails, as is traditional in Shaker-inspired furniture. The top of the dovetails are rounded to match the router-formed sockets in the pedestal. 38 June 2002 Woodworker's Journal |


