Woodworker's Journal 2004-28-4, страница 26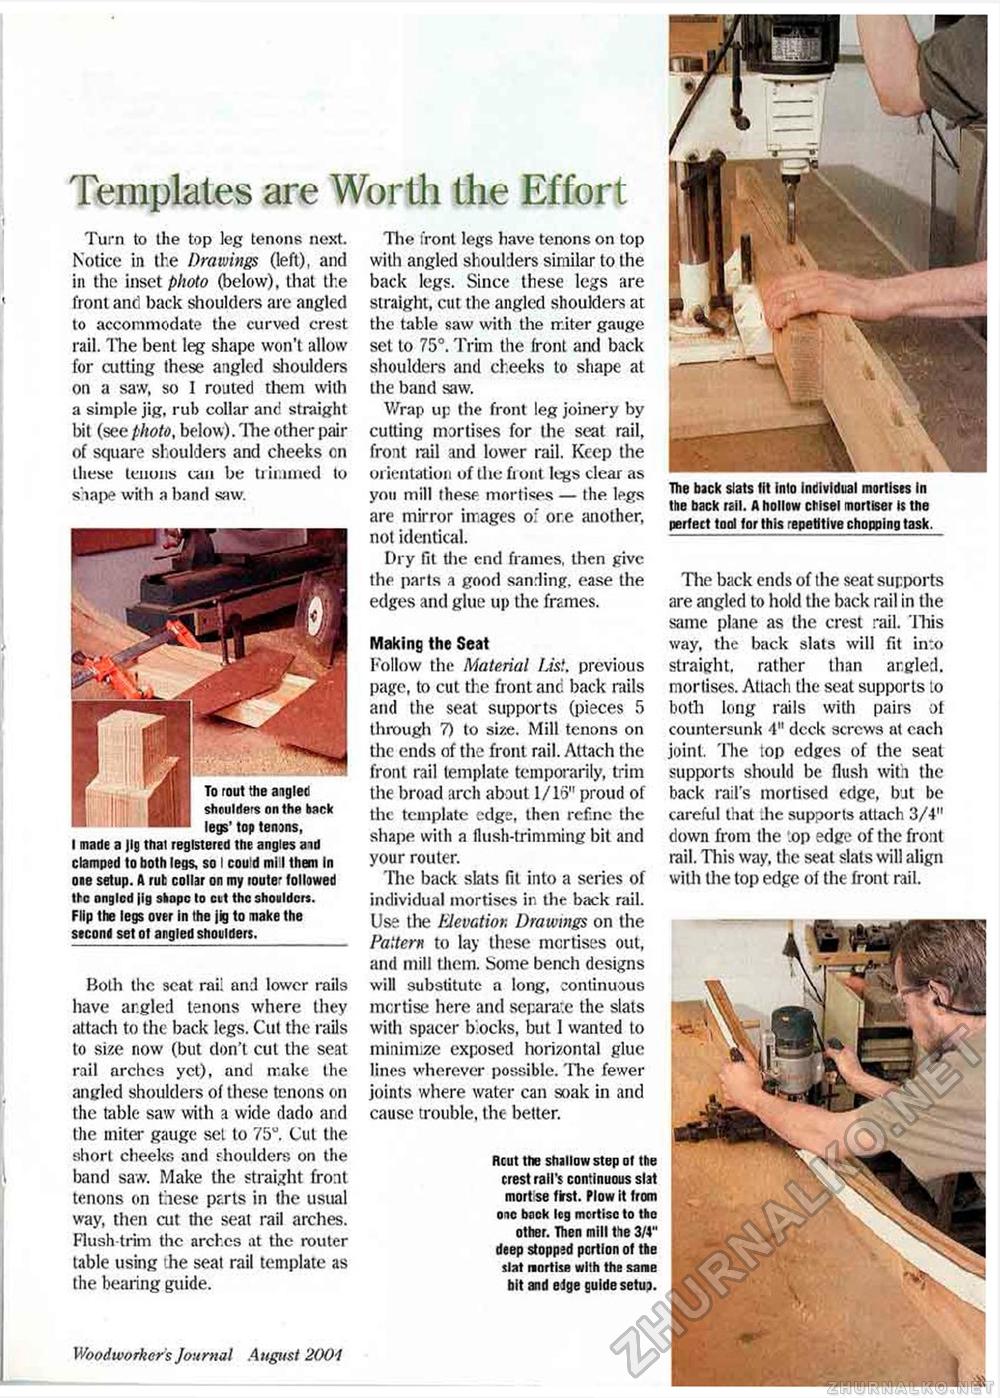
Templates are Worth the Effort Both the scat rail and lower rails have ar.gled tenons where they attach to the back legs. Cut the rails to size now (but don't cut the seat rail arches yet), and make the angled shoulders of these tenons on the table saw with a wide dado and the miter gauge set to 75°. Cut the short cheeks and shoulders on the band saw. Make the straight front tenons on these parts in the usual way, then cut the seat rail arches. Flush-trim the arches at the router table using the seat rail template as the bearing guide. Woodworker s Journal August 2001 Rcut the shallow step ot the crest rail's continuous slat mortse first. Plow it from one back leg mcrtisc to the other. Then mill the 3/4" deep stopped portion of the slat mortise with the same bit and eige guide setua. Turn to the top leg tenons next. Notice in the Drawings (left), and in the inset photo (below), that the front and back shoulders are angled to accommodate the curved crest rail. 'Hie bent leg shape won't allow for cutting these angled shoulders on a saw, so I routed them with a simple jig, rub collar and straight bit (see photo, below)/lite other pair of square shoulders and cheeks on these tenons can be ti ir.imed to s'lai*? with a band saw. To rout the angled shoulders on the back legs' top tenans, I made a Jig that registered the angles aid clamped to both legs, so I could mi I them in one setup. A rub collar on my router followed the onglcd jig sbopc to cut the shoulders. Flip the legs over in the jig to make the second set of angled shoulders. The front legs have tenons on top with angled shoulders similar to the back legs. Since these legs are straight, cut the angled shoulders at the table saw with the miter gauge set to 75°. Trim the front and back shoulders and cheeks lo shape at the band saw. Wrap up the front le« joinery by cutting mortises for the seat rail, front mil and lower rail. Keep the orientation of the front legs clear as you mill these mortises — the legs are mirror images of ore another, not identical. Dry fit the end frames, then give the parts a good sanding, ease the edges and glue up the frames. Making the Seat hollow the Material List, previous page, to cut the front and back rails and the seat supports (pieces 5 through 7) to size. Mill tenons on the ends of the front rail. Attach the front rail template temporarily, trim the broad arch about 1/1»3" proud of the template edge, then refine the shape with a flush-trimming bit and your router. The back slats fit into a series of individual mortises in the back rail. Use the Elevation Drawings on the Pattern to lay these mortises out, and mill them. Some bench designs will substitute a long, continuous mortise here and separate the slats with spacer b ocks, but I wanted to minimize exposed horizontal glue lines wherever possible. The fewer joints where water can soak in and cause trouble, the better. The back slats tit inlo individual mortises in the back rail. A hollow chisel mortiser is the perfect tool for this repetitive chopping task. The back ends of the seat supports are angled to hold the back rail in the same plane as the crest rail, lliis way, the back slats will fit into straight, rather than argled. mortises. Attach the seal supports lo both long rails with pairs ot countersunk 4" deck screws at each joint. The top edges of the seat supports should be flush with the back tail's mortised edge, but be careful that .he supports attach 3/4" down from the .op edge of the front rail. This way, the seal slats will align with the lop edge of the front rail. |


