Woodworker's Journal 2004-28-4, страница 27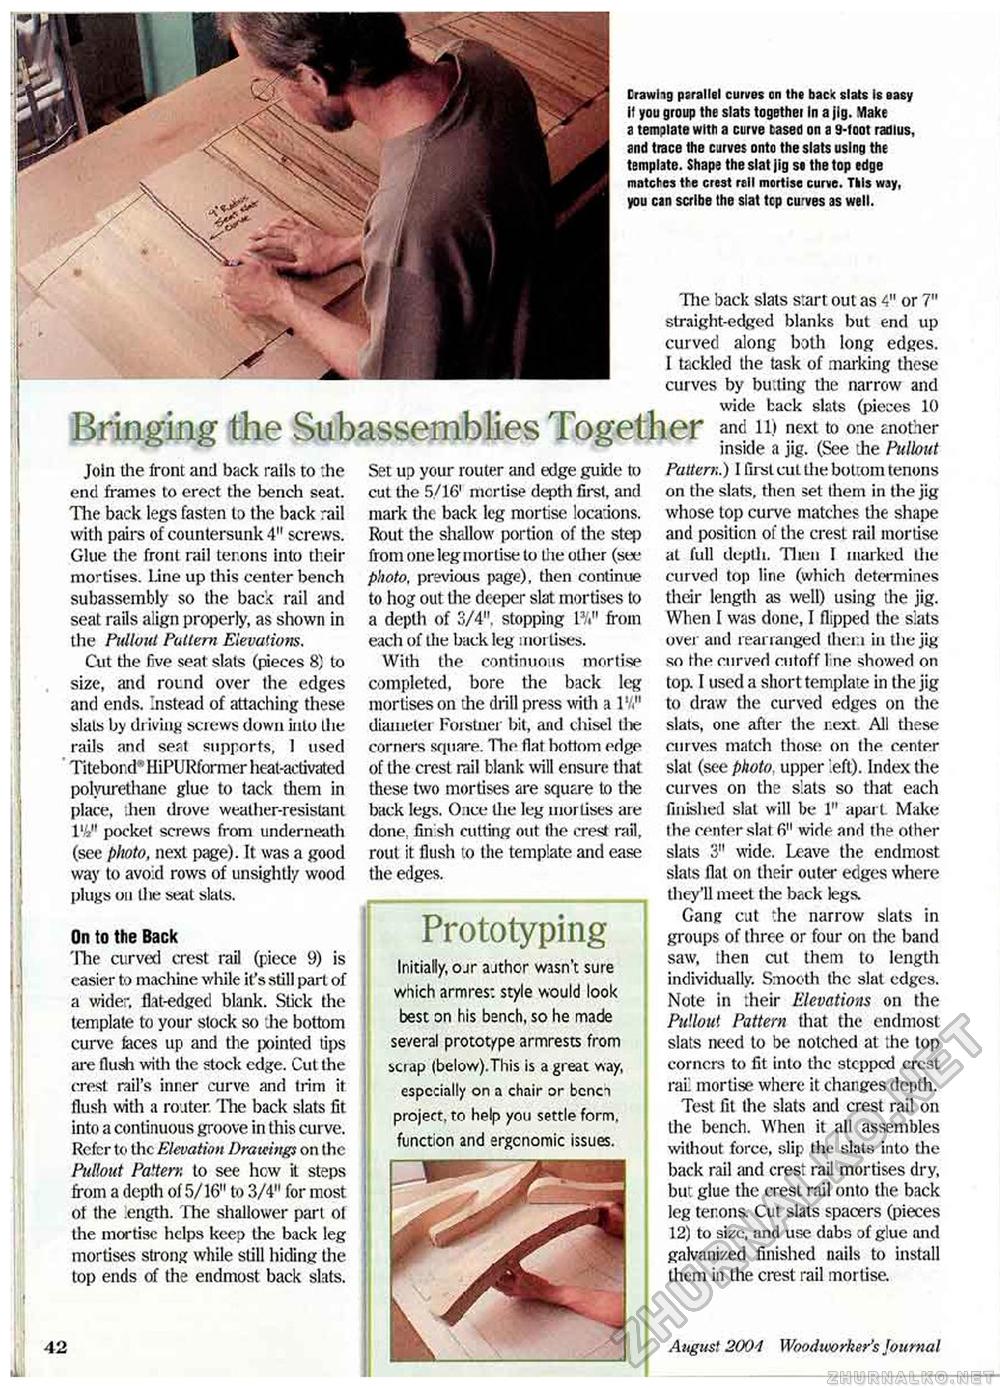
Crawlig parallel curves on the back slats is easy it you group the slats together In a jig. Ylake a template with a curve tased on a 9-foot radius, and trace the curves onto the slats using the template. Shape the slat jig se the top edge matclies the crest rell mortise curve. This way, you can scribe the slat tcp curves as well. 27 August 2004 Woodworker's Journal The back slats start out as 4" or 7" straight-edged blanks but end up curved along both long edges. 1 tackled the task of marking these curves by butting the narrow and wide hack slats (pieces 10 Bringing the Subassemblies .together pi id »«t* nsde a rr (Spp Hp PuDnut Join the front and back rails to the end frames to erect the bench seat. The back legs fasten to the back rail with pairs of countersunk 4" screws. Glue the front rail ter.ons into their mortises. Line up this center bench subassembly so the back rail and seat rails align properly, as shown in the Pullout Pattern Elevations. Cut the five seat slats (pieces 8) to size, and round over the edges and ends. Instead of attaching these slab by driving screws down into the rails and seat supports, I used Titebond' HiPURformer heat-activated polvurethane glut? to tack them in place, .lien drove weather-resistant l'-V pocket screws from underneath (see photo, next page). It was a good way to avoid rows of unsightly wood plugs oil the seat slats. On to the Back 'Hie curved crest rail (piece 9) is easier to machine while it's still part of a wider, flat-edged blank. Stick the template to your stock so the bottom curve faces up and the pointed tips are flush with the stock edge. Cut the crest rail's inner curve and trim it flush with a router. 'Hie back slats fit into a continuous groove in this curve. Refer to the Elevation Drawings on the Pullout Patten; to see hew it steps from a depth of 5/16" to 3/4" for most ot the length. The shallower part of the mortise helps keep the back leg mortises strong while still hiding the lop ends of the end most back slats. Set up your router and edge guide to cut the 5/16' mortise depth first, and mark the back leg mortise locations. Rout the shallow portion of the step from one leg mortise to the other (see photo, previous page), then continue to hog out the deeper slat mortises to a depth of 3/4". stopping PA" from each of the back leg mortises. With the continuous mortise completed, bore the back leg mortises on the drill press with a IV/1 diameter ForsUier bit, and chisel tlie corners square. The Hat bottom edge of the crcst rail blank will ensure that these two mortises are square to the back legs. Once the leg mortises are done, finish cutting out the crest rail, rout it flush to the template and ease the edges. Prototyping Initially, ojr ajthor wasn't sure which armrest style would look best on his bench, so he made several prototype armrests from icrap (below). This is a great way, especially on a chair or bcnci project, to help you settle form, function and ergcnomic issues. inside a jig. (See the Pullout Patten;.) 1 first cut the bottom tenons on the slats, then set them in the jig whose top curve matches the shape and position of the crest rail mortise at full depth. Then I marked Uie curved top line (which determines their length as well) using the jig. When I was done, I flipped the slats over and rearranged them in the jig so the curved cutoff I ne showed on top. I used a short template in the jig to draw the curved edges on the slats, one after the next All these curves match those on the center slat (see photo, upper eft). Index the curves on the slats so that each finished slat will be 1" apart Make the center slat fi" wide and the other slats 3" wide. Leave the endmost slats flat on their outer edges where they'll meet the back legs. Ganjr cut the narrow slats in groups of three or four on the band saw, then ait them to length individually. Smooth the slat edges. Note in their Elevations on the Pullout Pattern that the endmost slats need to be notched at ;he top corners to fit into the stepped crest rail mortise where it changes depth. Test fit the slats and crest rail on the bench. When it all assembles without force, slip the slats into the back rail and crest rail mortises dry, but glue the crest rail onto the back leg tenons. Cut slats spacers (pieces 12) to size, and use dabs of glue and galvanized finished nails to install them in the crest rail mortise. |


