Woodworker's Journal 2004-28-4, страница 30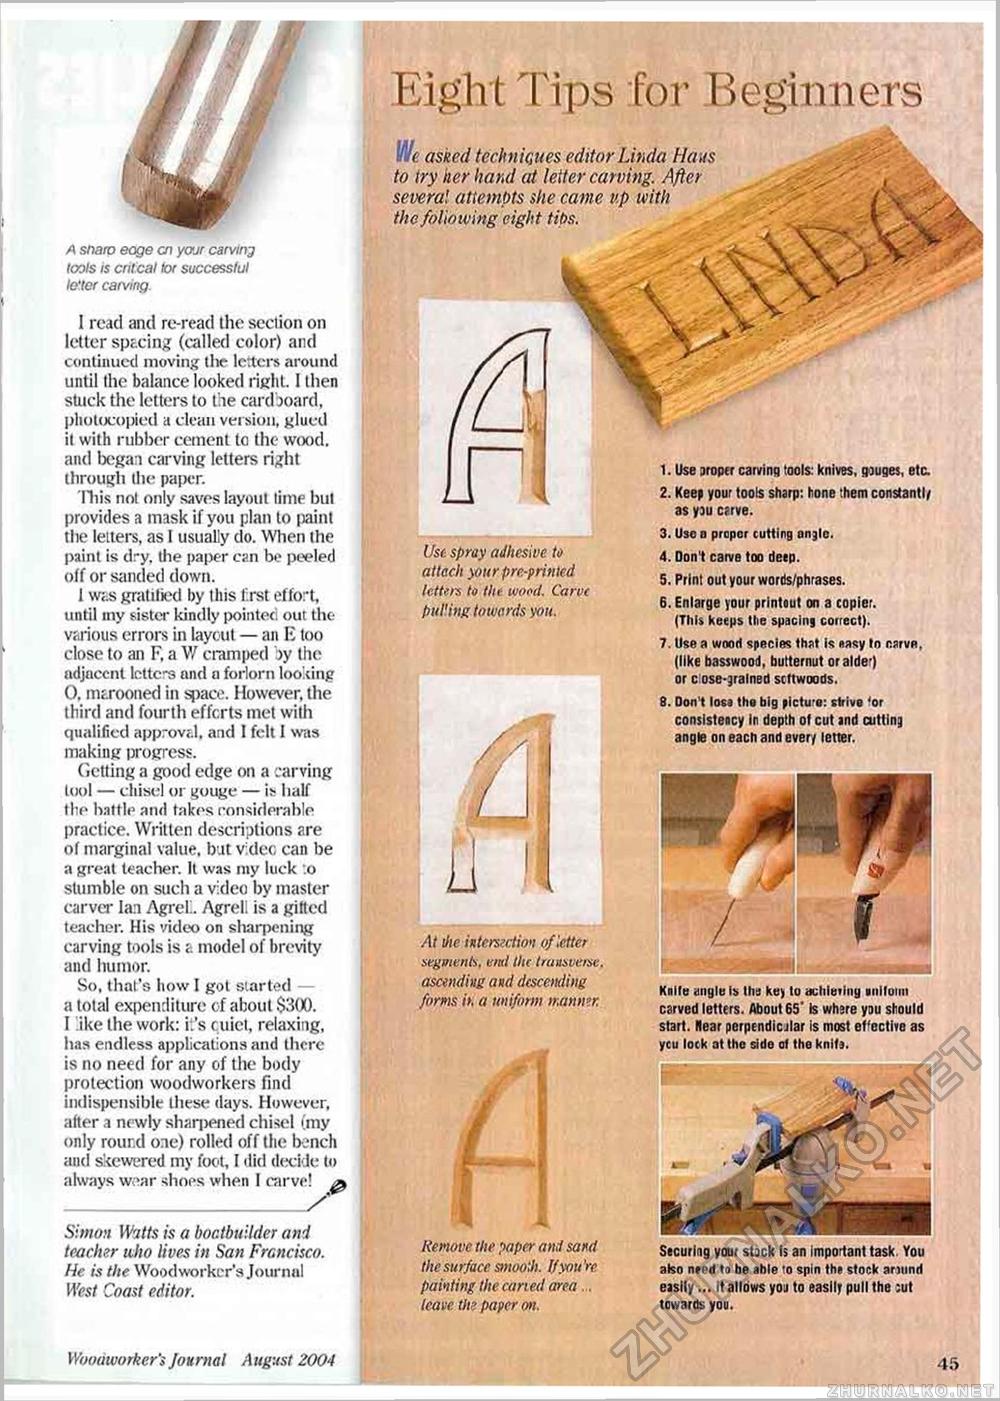
A snaro eoge cn your carving loots is Crit;C3l tor successful le'.ter carving. I read and re-read the section on letter spacing (called color) and continued moving the letters around until the balance looked right. I then stuck the letters to the cardboard, photocopied a clean version, glued it with rubber cement to the wood, and began carving letters right through the paper. This not only saves layout lime but provides a mask if you plan to paint the letters, as 1 usually do. When the paint is dry. the paper can be peeled off or sanded down. 1 was gratilied by this first effort, until my sister kindly pointed out the various errors in layout — an K too close to an F. a W cramped by the? adjaecnt letter's and a forlorn looking 0. marooned in space. However, the third and fourth efforts met with qualified approval, and I felt I was making progress. Getting a good edge on a carving tool — chisel or gouge — i> half the battle and takes considerable practice. Written descriptions are of marginal value, but video can be a great teacher. It was my luck o stumble on such a video by master carver Ian AgreL Agrell is a gifted teacher. His video on sharpening carving tools is a model of brevity and humor. So, that's how I got started a total expenditure of about $300. I ike the work: i.'s cuiet, relaxing, has endless applications and there is no need for any of the body protection woodworkers find indispensible these days. However, after a newly sharpened chisel (my only round one) rolled off the bench and skewered my foot, I did decide to ahvavs wear shops when 1 carve! _/ Simon Watts is a boctbuilder and teacher who lives in San Francisco. Me is the Woodworker's Journal West Coast editor. Remove the paper and sand the surface smooth. Uyou're painting the carted area ... leave the paper on. easily... it allows you to easily pull the :ut towards you. Use spray adhesive to attach your pre-printed letters to the wood. Carve pUXing towards you. At ihe intersection of letter segments, end the transverse, ascending and descending forms i>, a uniform manner. 1. Use proper carving tools: knives, gauges, etc. 2. Keep your tools sharp: hone them constantly as yau carve. 3. Use a proper cutting angle. 4. Don't carve too deep. 5. Print out your words/phrases. 6. Enlarge your printout on a copier. (This keeps the spacing correct). 7. Use a wood specie? that is easy tn carvn, (like basswood, butternut or alder) or ciose-gralned scttwoods. 8. Don't losa the big picture: strive for consistency in depth of cut and cutting angle on each and ever/ letter. Knife <ingle is thu key to achieving uniluim carved letters. About 65' is where you should start. Near perpendicjlar is most effective as ycu lock at the side of the knifa. We asked techniques editor Linda Haus to try her hand at letter carving. After several attempts she came up with the following eight tips. Woodworker's Journal A ugust 2004 45 |


