Woodworker's Journal 2004-28-4, страница 28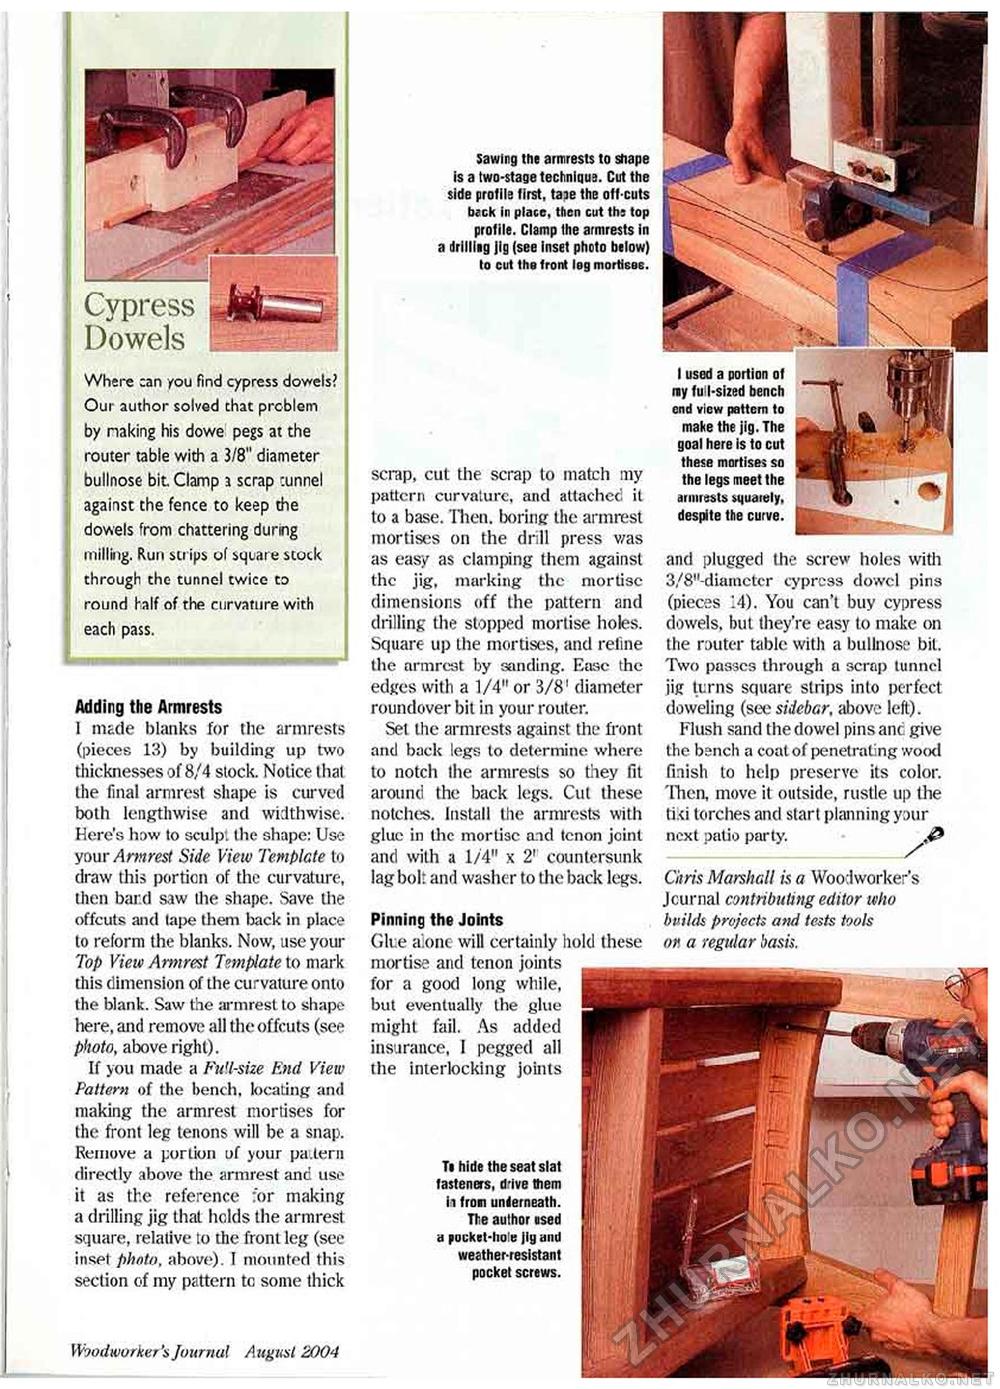
Dowels 9 Where can you find cypress dowels? Our author solved chat problem by making his dowe pegs at the router table with a 3/8" diameter bullnose bit Clamp a scrap cunnel against the fence to keep the dowels from chattering during milling. Run strips of square stock through the tunnel twice to round half of the curvature with each pass. Adding the Armrests I made blanks for the armrests (pieces 13) by building up two thicknesses of 8/4 stock. Notice thai the final armrest shape is curved both lengthwise and widthwise. Here's how to sculp, the shape: Use youv Armrest Side View Template to draw this portion of the curvature, then bard saw ihe shape. Save the offcuts and tape them back in place to reform the blanks. Now, use your Top View Ann rest Template to mark this dimension of the curvature onto the blank. Saw the armrest to shape here, and remove all the offcuts (see photo, above right). If you made a Full-size End View Pattern of the bench, locating and making the armrest mortises for the front leg tenons will be a snap. Remove a portion of your pa.tern directly above the armrest and use it as the reference for making a drilling jig that holds the armrest square, relative to the front leg (see inset photo, above). I mounted this section of my pattern to some thick Woodworker's Journal A ugust 2004 28 Sawing the armrests to shape is a two-stage techniqua. Cut the side profile first, taae the off-cuts beck in place, then cut ths top profile. Clamp the armrests in a drill fag Jig (see inset photo below) to cut the front leg mortises. Ta hide the seat slat fasteners, dive them h from underneath. The author used a pocket-hole Jig and weather-resistant pocket screws. scrap, cut the scrap to match my pattern curvature, and attached it to a base. Then, boring the armrest mortises on the drill press was as easy as clamping them against the jig, marking the mortise dimensions off the pattern and drilling the stopped mortise holes. Square up the mortises, and refine the armrest by sanding. Ease the edges with a 1/4" or 3/8' diameter roundover bit in your router. Set the armrests against the front and back legs lo determine where to notch Ihe armrests so they fit around the back legs. Cut these notches. Install the armrests with glue in the mortise and tenon joint and with a 1/4" x 2' countersunk lag bolt and washer to the* back legs. Pinning the Joints Glue aione will certainly hold these mortise and tenon joints for a good long while, but eventually the glue might fail. As added insurance, I pegged all the interlocking joints I used a portion of ray fu l-sized bench end view pattern to make the jig. The goal here is to cut these mortises so the legs meet the armrests squaiely. despite the curve. and plugged the screw holes with 3/8"-diamctcr cypress dowel pins (pieces 14). You can't buy cypress dowels, bui they're easy to make on the router table with a bullnose bit. Two passes through a scrap tunnel jig turns square strips into perfect doweling (see sidebar, above left). Flush sand the dowel pinsanc give the bench a coal of penetrating wood finish to help preserve its color. Then, move it outside, rustle up the tixi torches and start planning your next patio party. _-_ Chris Marshall is a Woodworker's Journal contributing editor who builds projects and tests tools on a regular bash. |


