Woodworker's Journal 2004-28-4, страница 38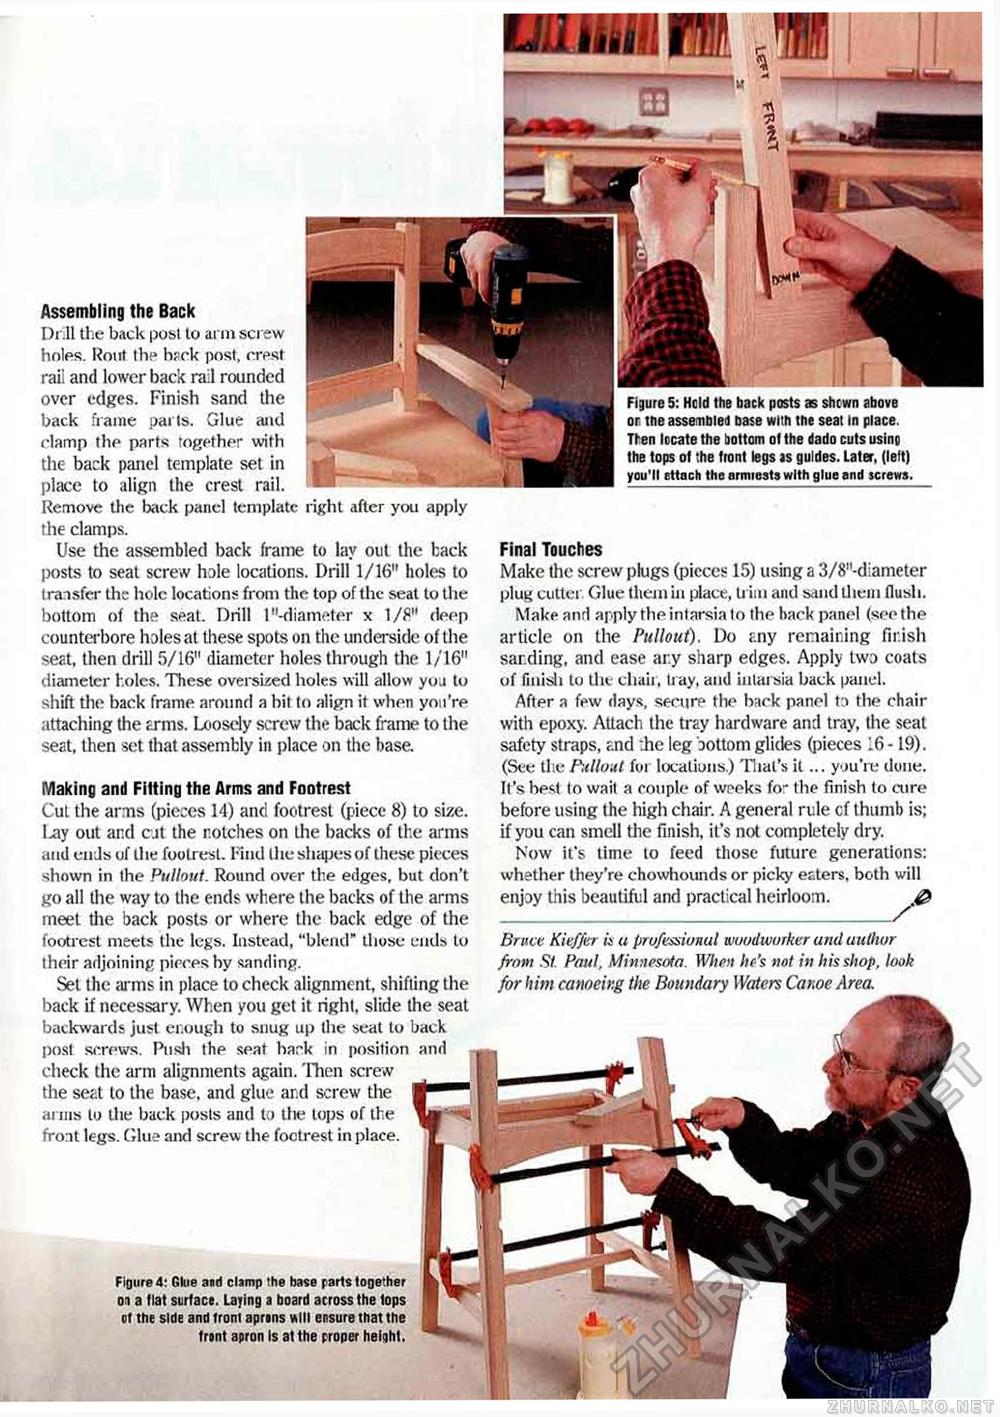
Assembling the Back Drill the back post to arm screw holes. Rout the hack post, crest rail and lower back rail rounded over edges. Finish sand the back frame parts. Glue and ^^^ clamp the parts together with the back panel template set in gj? place to align the crest rail. U Remove the back panel template right after you apply the clamps. Use the assembled back frame to lay out the back posts to seat screw lisle locations. Drill 1/16" holes to transfer the hole locations from the top of the seat to the bottom of the seat. Drill 1 "-diameter x 1/fl" deep counterbore holes at these spots on the underside of the seat, then drill 5/16" diameter holes through the 1/16" diameter holes. These oversized holes will allow you to shift the back frame around a bit to align it when you're attaching the arms. Loosely screw the back frame to the seat, then set that assembly in place on the base. Making and Fitting the Arms and Footrest Cut the arms (pieces 14) and footrest (piece 8) to size, l-ay out and cut the notches on the backs of the arms and ends of the footrest. Find the shapes of these pieces shown in the Pullout. Round over the edges, but don't go all the way to the ends where the backs of the arms meet the back posts or where the back edge of the footrest meets the legs. Instead, "blend" those ends to their adjoining pieces by sanding. Set the arms in place to check alignment, shifting the back if necessary. When you get it right, slide the seat backwards just enough to snug up the seat to back post screws. Push the seat hank in position and check the arm alignments again. Then screw the seat lo the base, and glue and screw the ai his to the back posts and to the tops of the front legs. Glue and screw the foctrest in place. Figure 5: Hold the back posts as shewn above or the assembled base with the seat in place. Tien locate the bottom of the dado cuts using the tops of the front legs as guides. Later, (left) you'll ettach the armiests with glue and screws. Final Touches Make the screw plugs (pieces 15) using a 3/8"-d:ameter plug cutter. Glue them in place, trim and sand them flush. Make anrl apply the intarsia to the hack panel (see the article on the Pullout). Do any remaining finish sanding, and ease any sharp edges. Apply two coats of finish to the chair, tray, and intarsia back panel. After a few days, secure the back panel to the chair with epoxy. Attach the tray hardware and tray, the seat safety straps, and :he leg bottom glides (pieces 16-19). (See the Pullout foi locations.) That's it... you're done. It's best to wait a couple of weeks for the finish to cure before using the high chair. A general rule cf thumb is; if you can smell the finish, it's not completely dry. Now it's lime lo feed those future generations: whether they're chowhounds or picky eaters, both will enjoy this beautiful and practical heirloom. @ Bruce Kief far ii a professional woodworker and author from St Paul, Minnesota. When he's not in his shop, look for him canoeing the Boundary Waters Canoe Area. Figured: Glue and clamp the base parts together on a flat surface. Laying a board across the tops ot the side and front aprons Mill ensure that the front apron Is at the proper height. |


