Woodworker's Journal 2004-28-4, страница 35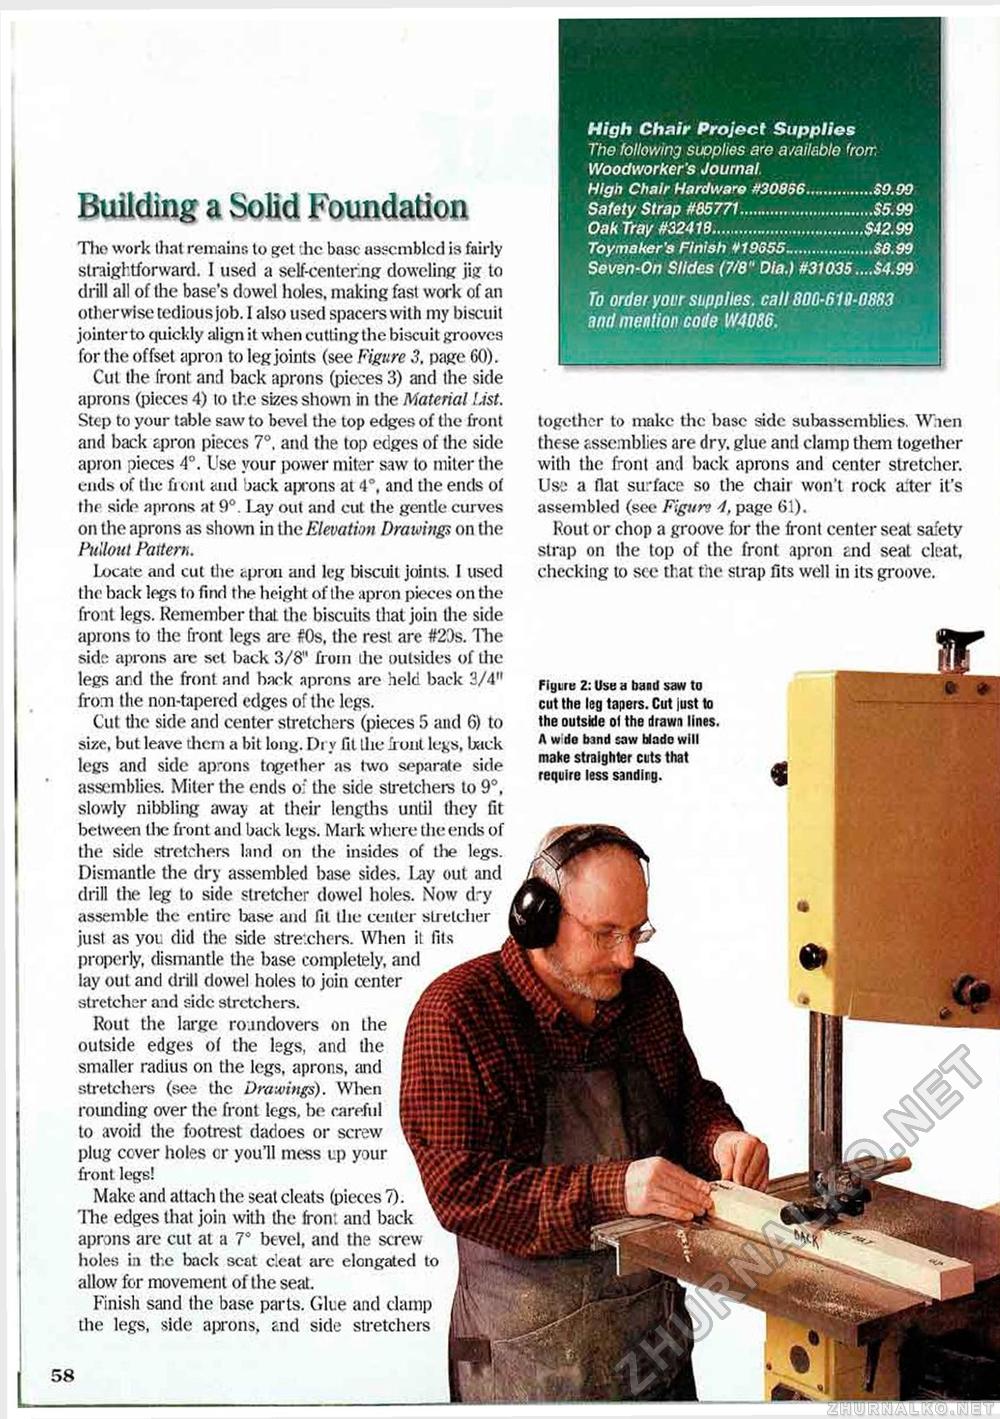
L High Chair Project Supplies The following suoplies are a/ailablo (rorr. Woodworker's Journal. High Chair Hardware #30856...............$9.90 Safety Strap #85771..............................$5.99 Oak Tray #32413..................................$42.99 Toymaker's Flni3h ¥19555-..................$8.99 Seven-On Slides (7/8" Dla.) #31035 ....$4.99 To order your supplies, call 800-610-0883 and mention code W4086. Building a Solid Foundation together to make the base side subassemblies. When these assemblies are dry. glue and clamp them together with the front and back aprons and center stretcher. Use a flat surface so the chair won't rock alter it's assembled (see Figure 4, page 61). Rout or chop a groove for the front center seat safety strap on the top of the front apron End seat cleat, checking to see that the strap fits well in its groove. The work that remains to gel the base assembled is fairly straightforward. I used a self-centering doweling jig to drill all of the base's dowel holes, making fast work of an otherwise tedious job. 1 also used spacers with my biscuit jointer to quickly align it when cutting the biscuit grooves for the offset apron to leg joints (see Figure 3. page 60). Cut the front and back aprons (pieces 3) and the side aprons (pieces 4) to the sizes shown in the Material List. Step to your table saw to bevel the top edges of the front and back apron pieces 7°. and the top edges of the side apron pieces 4°. Use your power miter saw to miter the ends of the front and back aprons at 4°, and the ends of the side aprons at 9°. I-ay out and cut the gentle curves on the aprons as shown in the Elevation Drawings on the Pullout Pattern. Locate and cut the cproti and leg biscuit joints. I used the back legs to find the height of the apron pieces on the front legs. Remember thai the biscuits that join the side aprons to the front legs are #0s. the rest are #2i)s. The sids aprons air set back 3/8" from the outsides of the legs and the front and hack aprons are held back 3/4" from the non-tapered edges of the legs. Cut the side and center stretchers (pieces 5 and 6) to size, but leave diem a bit lony. Di y fit the front legs, back legs and side aprons together as two separate side assemblies. Miter the ends o;' the side sU'etchers to 9°. slowly nibbling away at their lengths until they fit between the front and back legs. Mark where the ends of the side stretchers land on the insides of the legs. Dismantle the dry assembled base sides. Ixiy out and drill the leg to side stretcher dowel holes. Now dry assemble the entire base and fit the center stretcher just as yot. did the side stretchers. When it Ills properly, dismantle the base completely, and lay out and drill dowel holes to join center stretcher and side stretchers. Rout the large roundovers on the outside edges of the legs, and the smaller radius on the legs, aprons, and stretchers (see the Drawings). When rounding over the front legs, be careful to avoid the footrest dadoes or screw plug cover holes or you'll mess up your front legs! Make and attach the seat cleats (pieces 7). 'Hie edges that join with the front and back aprons are cut at a V bevel, and the screw holes in the back scat cleat arc elongated to allow for movement of the seat. Finish sand the base parts. Glue and damp the legs, side aprons, and side stretchers Figure 2: Use a band saw to cut the leg tapers. Cut just to the outside ol the drawn lines. A w do bind saw Mado will make stralghter cuts that require less sandirg. |


