Woodworker's Journal 2004-28-4, страница 37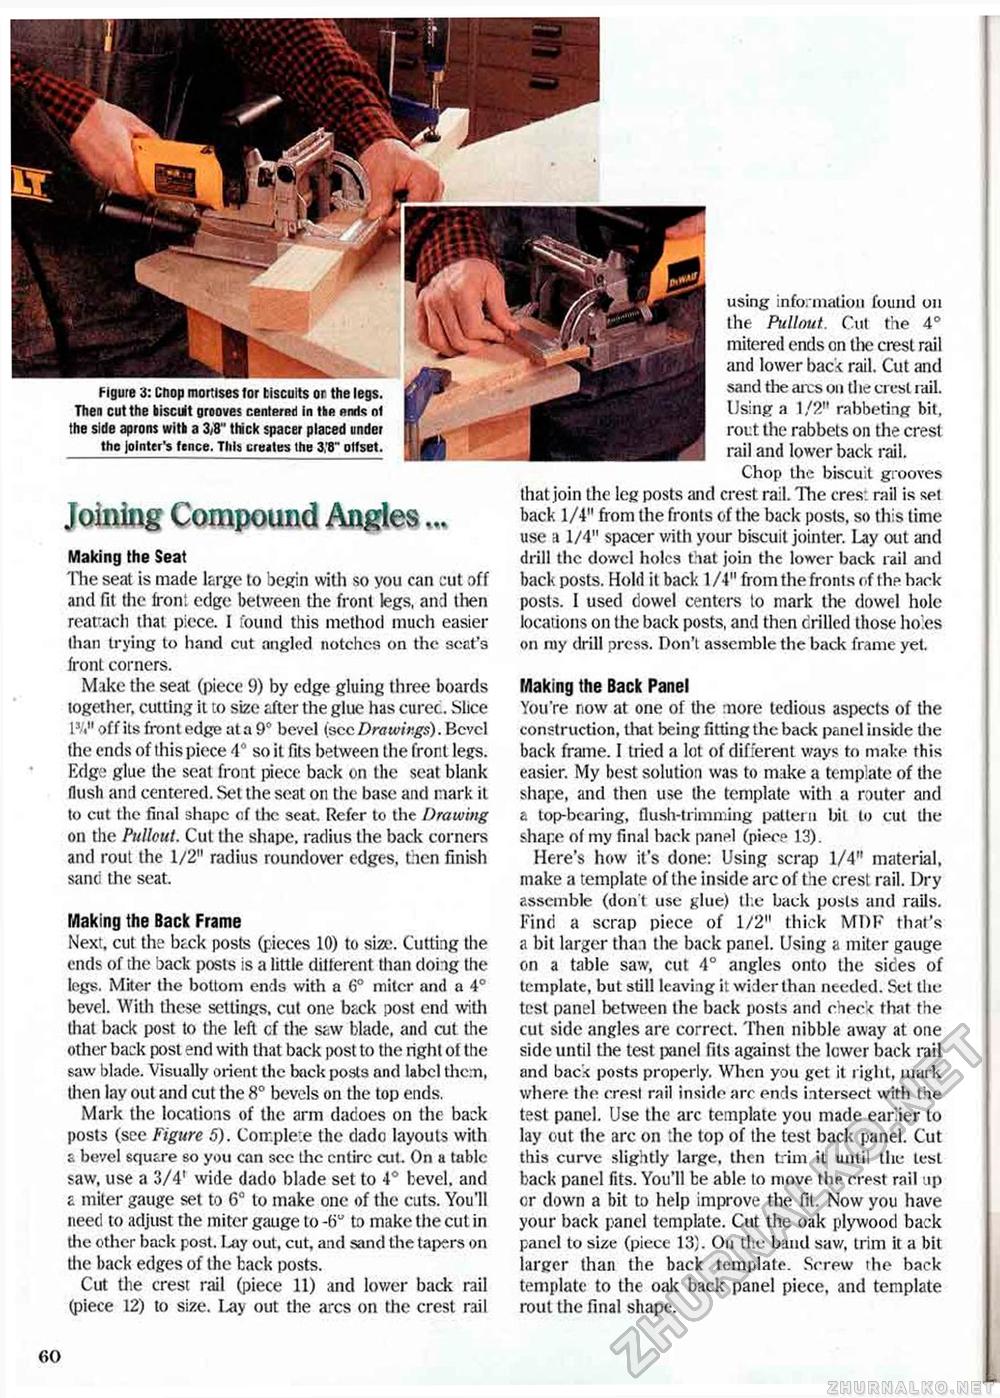
Figure 3: Chop mortises tor tiscults or the legs. Then cut the biscuit grooves centerad in tbe prate of the side aprons with a 3/8" thick spacer placed under the jointer's fence. Tills creates the 3:8" olfset. Joining Compound Angles... Making the Seat The seat is made large to begin with so you can cut .off and fit the front edge between the front legs, and then reattach that piece. 1 found this method much easier than trying to hand cut angled notches on the seat's front corners. Make the seat (piece 9) by edge gluing three boards together, cutting it to size after the glue has cured. Slice off its front edge at a 9° bevel (see Drawings). Bevel the ends of this piece 4® so it fits between the front legs. Edge glue the seat front piece back on the seat blank flush and centered. Set the scat on the base and mark it to cut the final shape of tlx* seat. Refer to the Drawing on the Pullout. Cut the shape, radius the back corners and rout the 1/2" radius roundover edges, then finish sanci the seat. Making the Back Frame Next, cut the back posts (pieces 10) to size. Cutting the ends of the back posts is a little ditterent than doing the legs. Miter the bottom ends with a 6° miter and a 4° bevel. With Ihese settings, cut one back post end with that back post to the left cf the saw blade, and cut the other back post end with that back post to the right of the saw blade. Visually orient the back posts and label them, then lay out and cut the 8° bevels on the top ends. Mark the locations of the arm dadoes on the back posts (see Figure 5). Con.ple:e the dado layouts with & bevel squt.re so you can see the entire cut. On a table saw, use a 3/4' wide dado blade set to 4° bevel, and a miter gauge set to 6° to make one of the cuts. You'll need to adjust the miter gauge to -6U to make the cut in the other back post. Lay out, cut, and sand the tapers on the back edges of the back posts. Cut the crest rail (piece 11) and lower back rail (piece 12) to size. I .ay out the arcs on the crest rail using information found on the Pullout. Cut the 4° mitered ends on the crest rail and lower back rail. Cut and sand the airs oil the crest rail. Using a 1/2" rabbeting bit. rout the rabbets on the crest rail and lower back rail. Chop the biscuit grooves that join the leg posts and crest rail. The cres: rail is set back 1/4" from the fronts of the back posts, so this time use a 1/4" spacer with your biscuit jointer. Lay ait and drill the dowel holes that join the lower back rail and back posts. Hold it back 1 /4" from the fronts of the back posts. 1 used dowel centers to mark the dowel hole locations on the back posts, and then drilled those ho.es on niy drill press. Don't assemble the back frame yet. Making the Back Panel You're now at one of the more tedious aspects of the construction, that being fitting the back panel inside die back frame. I tried a lot of different ways to make this easier. My best solution was to make a template of the shape, and then use the template with a router and a top-bearing, flush-trimming pattern bit to cut the shape of my final back pan^l (piece 13). Here's how it's done: Using scrap 1/4" material, make a template of the inside arc of the crest rail. Dry assemble (don't use glue) the back posts and rails. Find a scrap piece of 1/2" thick MDF that's a bit larger than the back panel. Using a miter gauge on a table saw, cut 4° angles onto the sides of template, but still leaving it wider than needed. Set the test panel between the back posts and chec-c that the cut side angles are correct. Then nibble away at one side until the test panel fits against the lower back rail and baci< posts properly. When you get it right, mark where the crest rail inside arc ends intersect with the test panel. Use the arc template you made earlier to lay out the arc on :hc top of the test back panel. Cut this curve slightly large, then trim it until the test back panel fits. You'll be able to move the crest rail up or down a bit to help improve the fit. Now you have your back panel template. Cut the oak plywood back panel to size (piece 13). On the band saw, trim it a bit larger than the back template. Screw the back template to the oak back panel piece, and template rout the final shape. 60 |


