Woodworker's Journal 2004-28-6, страница 38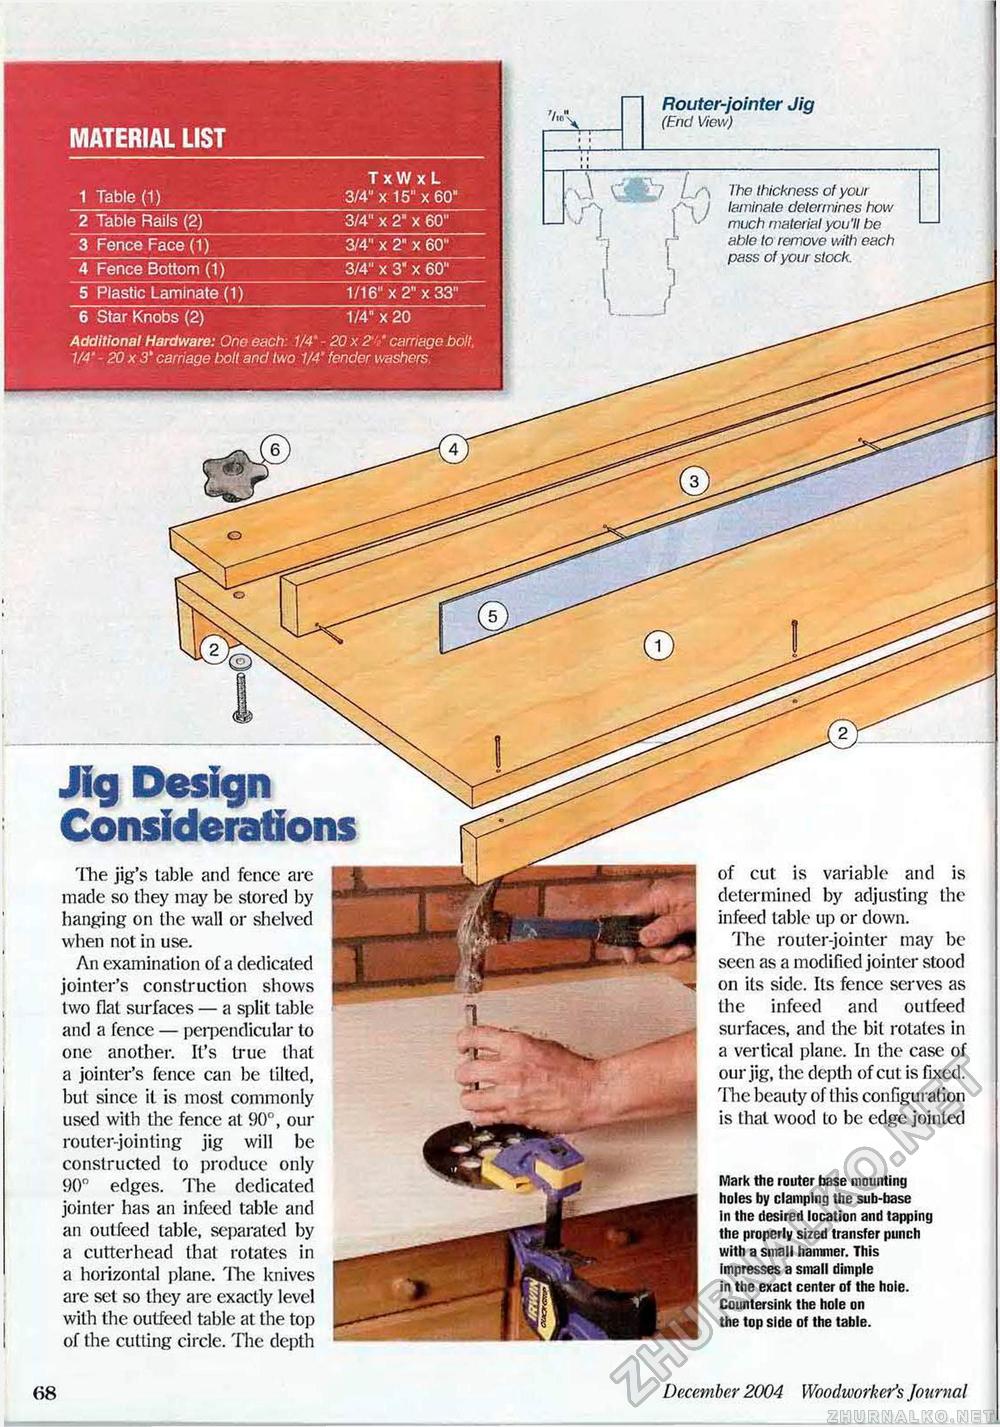
5 Plastic Laminate (1)_1/16" x 2" x 33" 5 Plastic Laminate (1)_1/16" x 2" x 33" 6 Star Knobs (2) 1/4" x 20 Additional Hardware: One each: 1/4* - 20 x 2 ' carriage bolt, 1/4' 20x3' carriage bolt and two 1/4V fender washers Router-jointer Jig (End View) The thickness of your laminate determines how much material you'll be able to remove with each pass of your stock. Jig Design Considerations The jig's table and fence are made so they may be stored by hanging on the wall or shelved when not in use. An examination of a dedicated jointer's construction shows two flat surfaces — a split table and a fence — perpendicular to one another. It's true that a jointer's fence can be tilted, but since it is most commonly used with the fence at 90°, our router-jointing jig will be constructed to produce only 90° edges. The dedicated jointer has an infeed table and an outfeed table, separated by a cutter head thai rotates in a horizontal plane. 'Hie knives are set so they are exactly level with the outfeed table at the top of the cutting circle. The depth i of cut is variable and is determined by adjusting the infeed table up or down. The router-jointer may be seen as a modified jointer stood on its side. Its fence serves as the infeed and outfeed surfaces, and the bit rotates in a vertical plane. In the case of our jig, the depth of cut is fixed. Tlie beauty of this configuration is that wood to be edge jointed Mark the router base mounting holes by clamping the sub-base In the desired location and tapping the properly sized transfer punch with a small hammer. This impresses a small dimple in the exact center of the hoie. Countersink the hole on the top side of the table. 38 December 2004 Woodworker's Journal |
||||||||||||


