Woodworker's Journal 2004-28-6, страница 39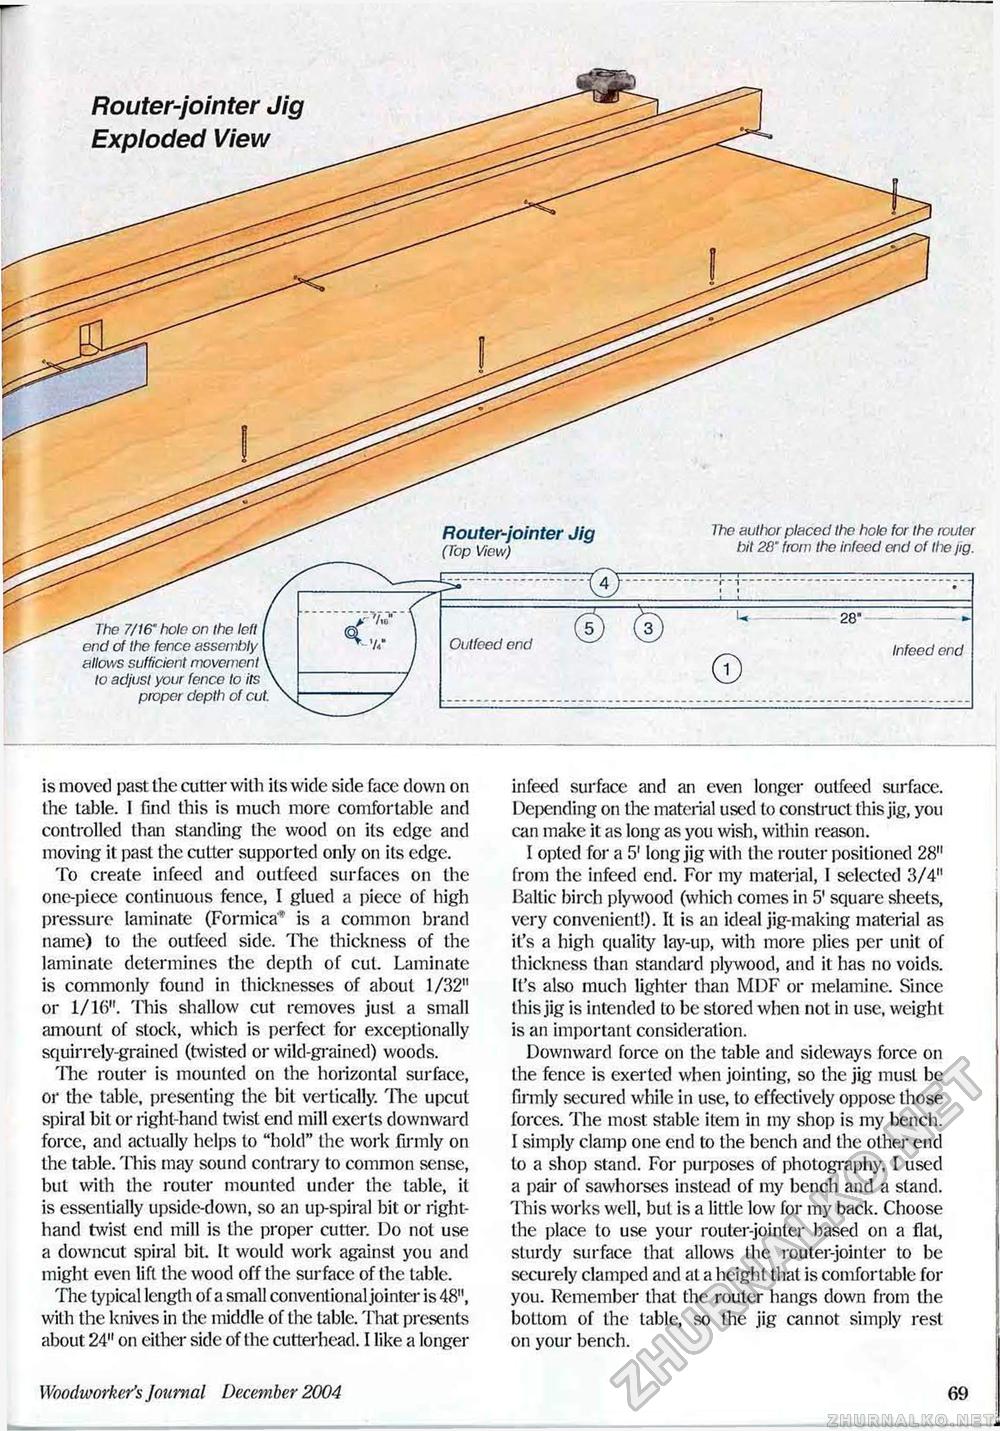
Router-jointer Jig Exploded View The 7/16" hole on the left end of the fence assembly allows sufficient movement to adjust your fence to its proper depth of cut. Router-jointer Jig (Top View) Outfeed end The author placed the hole for the router bit 28" from the tnfeed end of the jig. Infeed end is moved past the cutter with its wide side face down on the table. 1 find this is much more comfortable and controlled than standing the wood on its edge and moving it past the cutter supported only on its edge. To create infeed and outfeed surfaces on the one-piece continuous fence, I glued a piece of high pressure laminate (Formica' is a common brand name) to the outfeed side. 'Hie thickness of the laminate determines the depth of cut. Laminate is commonly found in thicknesses of about 1/32" or 1/16". This shallow cut removes just a small amount of stock, which is perfect for exceptionally squirrely-grained (twisted or wild-grained) woods. 'Hie router is mounted on the horizontal surface, or the table, presenting the bit vertically. The upcut spiral bit or right-hand twist end mill exerts downward force, and actually helps to "hold" the work firmly on the table. This may sound contrary to common sense, but with the router mounted under the table, it is essentially upside-down, so an up-spiral bit or right-hand twist end mill is the proper cutter. Do not use a downcut spiral bit It would work against you and might even lift the wood off the surface of the table. The typical length of a small conventional jointer is 48", with the knives in the middle of the table. That presents about 24" on either side of the cutterhead. I like a longer infeed surface and an even longer outfeed surface. Depending on the material used to construct this jig, you can make it as long as you wish, within reason. I opted for a 5' long jig with the router positioned 28" from the infeed end. For my material, I selected 3/4" Baltic birch plywood (which comes in 5' square sheets, very convenient!). It is an ideal jig-making material as it's a high quality lay-up, with more plies per unit of thickness than standard plywood, and it has no voids. It's also much lighter than MDF or melamine. Since this jig is intended to be stored when not in use, weight is an important consideration. Downward force on the table and sideways force on the fence is exerted when jointing, so the jig must be firmly secured while in use, to effectively oppose those forces. The most stable item in my shop is my bench. I simply clamp one end to the bench and the other end to a shop stand. For purposes of photography, I used a pair of sawhorses instead of my bench and a stand. This works well, but is a little low for my back. Choose the place to use your router-jointer based on a flat, sturdy surface that allows the router-jointer to be securely clamped and at a height that is comfortable for you. Remember that the router hangs clown from the bottom of the table, so the jig cannot simply rest on your bench. Woodworker's Journal Decernber 2004 69 |


