Woodworker's Journal 2004-Winter, страница 25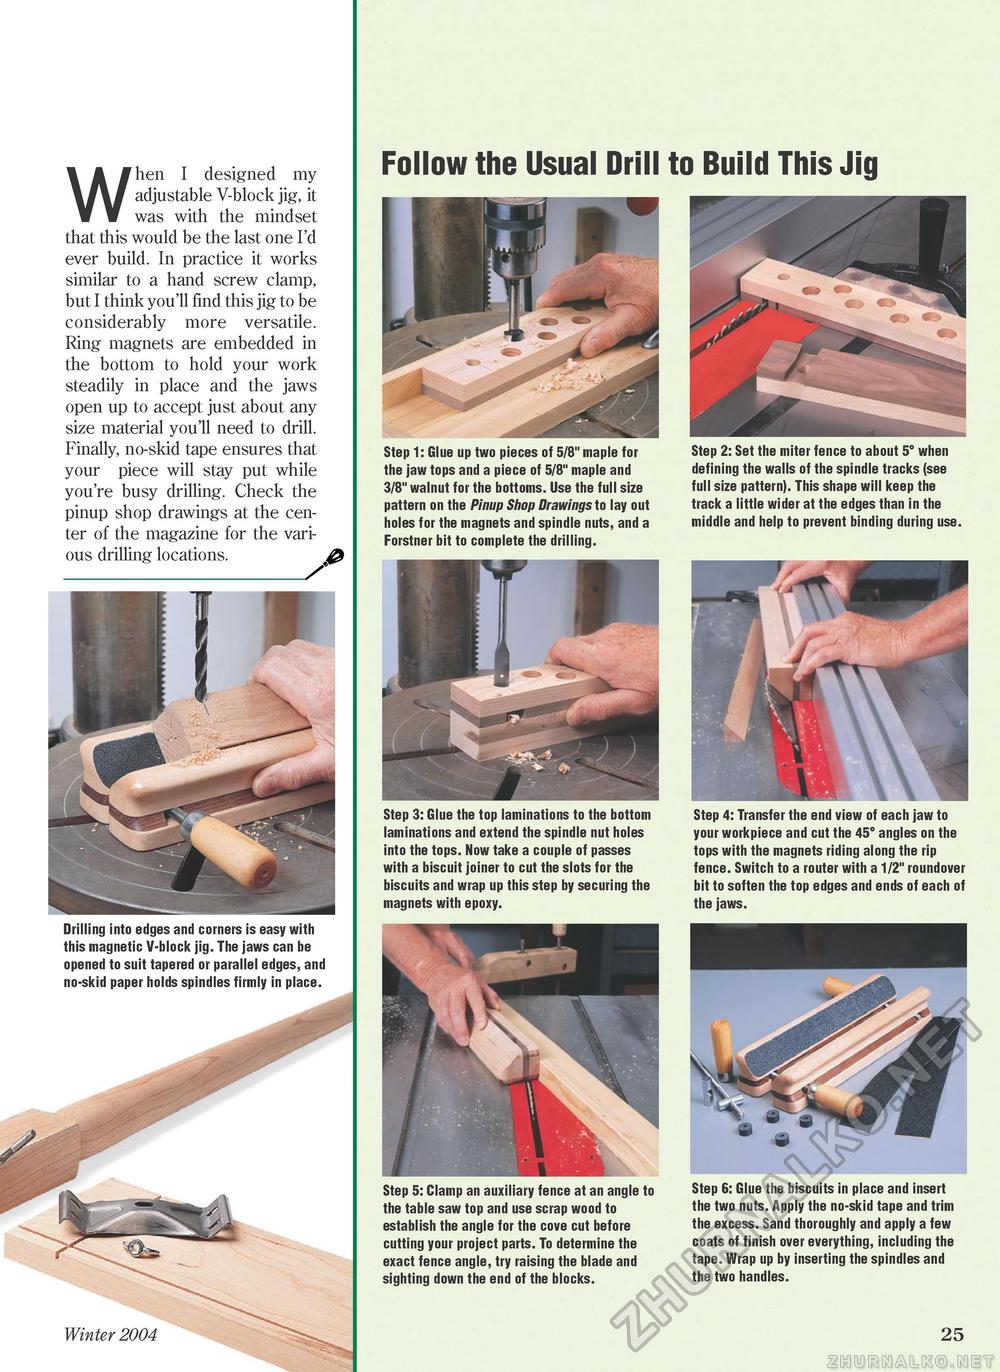
When I designed my adjustable V-block jig, it was with the mindset that this would be the last one I'd ever build. In practice it works similar to a hand screw clamp, but I think you'll find this jig to be considerably more versatile. Ring magnets are embedded in the bottom to hold your work steadily in place and the jaws open up to accept just about any size material you'll need to drill. Finally, no-skid tape ensures that your piece will stay put while you're busy drilling. Check the pinup shop drawings at the center of the magazine for the various drilling locations. ^ Drilling into edges and corners is easy with this magnetic V-block jig. The jaws can be opened to suit tapered or parallel edges, and no-skid paper holds spindles firmly in place. Follow the Usual Drill to Build This Jig Step 1: Glue up two pieces of 5/8" maple for the jaw tops and a piece of 5/8" maple and 3/8" walnut for the bottoms. Use the full size pattern on the Pinup Shop Drawings to lay out holes for the magnets and spindle nuts, and a Forstner bit to complete the drilling. Step 2: Set the miter fence to about 5° when defining the walls of the spindle tracks (see full size pattern). This shape will keep the track a little wider at the edges than in the middle and help to prevent binding during use. Step 3: Glue the top laminations to the bottom laminations and extend the spindle nut holes into the tops. Now take a couple of passes with a biscuit joiner to cut the slots for the biscuits and wrap up this step by securing the magnets with epoxy. Step 4: Transfer the end view of each jaw to your workpiece and cut the 45° angles on the tops with the magnets riding along the rip fence. Switch to a router with a 1/2" roundover bit to soften the top edges and ends of each of the jaws. Step 5: Clamp an auxiliary fence at an angle to the table saw top and use scrap wood to establish the angle for the cove cut before cutting your project parts. To determine the exact fence angle, try raising the blade and sighting down the end of the blocks. Winter 2004 Step 6: Glue the biscuits in place and insert the two nuts. Apply the no-skid tape and trim the excess. Sand thoroughly and apply a few coats of finish over everything, including the tape. Wrap up by inserting the spindles and the two handles. 25 |


