Woodworker's Journal 2004-Winter, страница 28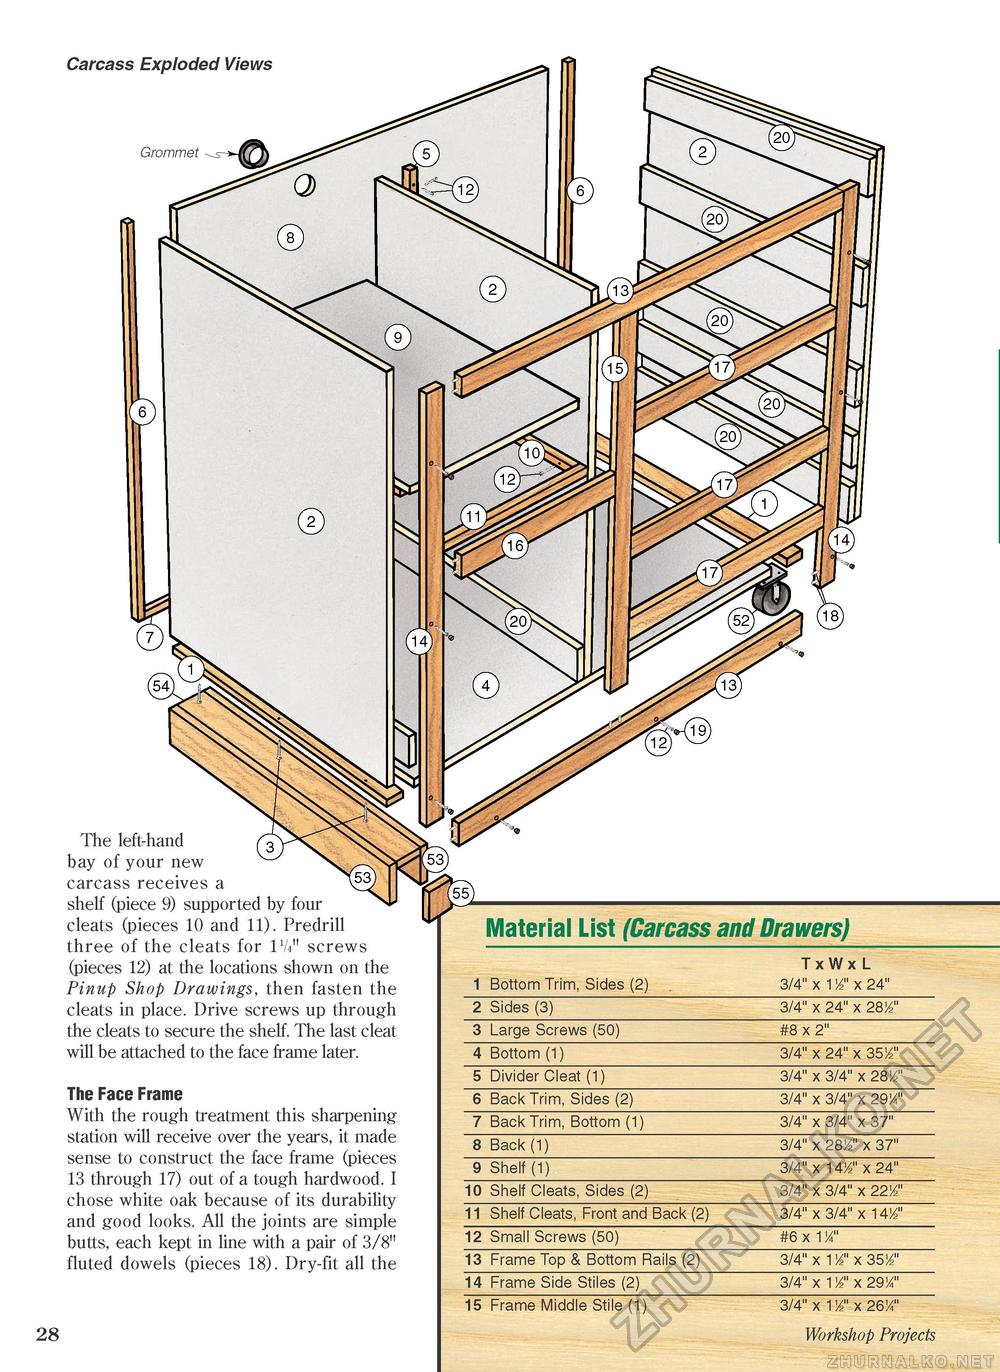
Carcass Exploded Views Grommet The left-hand bay of your new carcass receives a shelf (piece 9) supported by four cleats (pieces 10 and 11). Predrill three of the cleats for lVi" screws (pieces 12) at the locations shown on the Pinup Shop Drawings, then fasten the cleats in place. Drive screws up through the cleats to secure the shelf. The last cleat will be attached to the face frame later. The Face Frame With the rough treatment this sharpening station will receive over the years, it made sense to construct the face frame (pieces 13 through 17) out of a tough hardwood. I chose white oak because of its durability and good looks. All the joints are simple butts, each kept in line with a pair of 3/8" fluted dowels (pieces 18). Dry-fit all the 28 Material List (Carcass and Drawers)
* Workshop Projects |


