Woodworker's Journal 2004-Winter, страница 53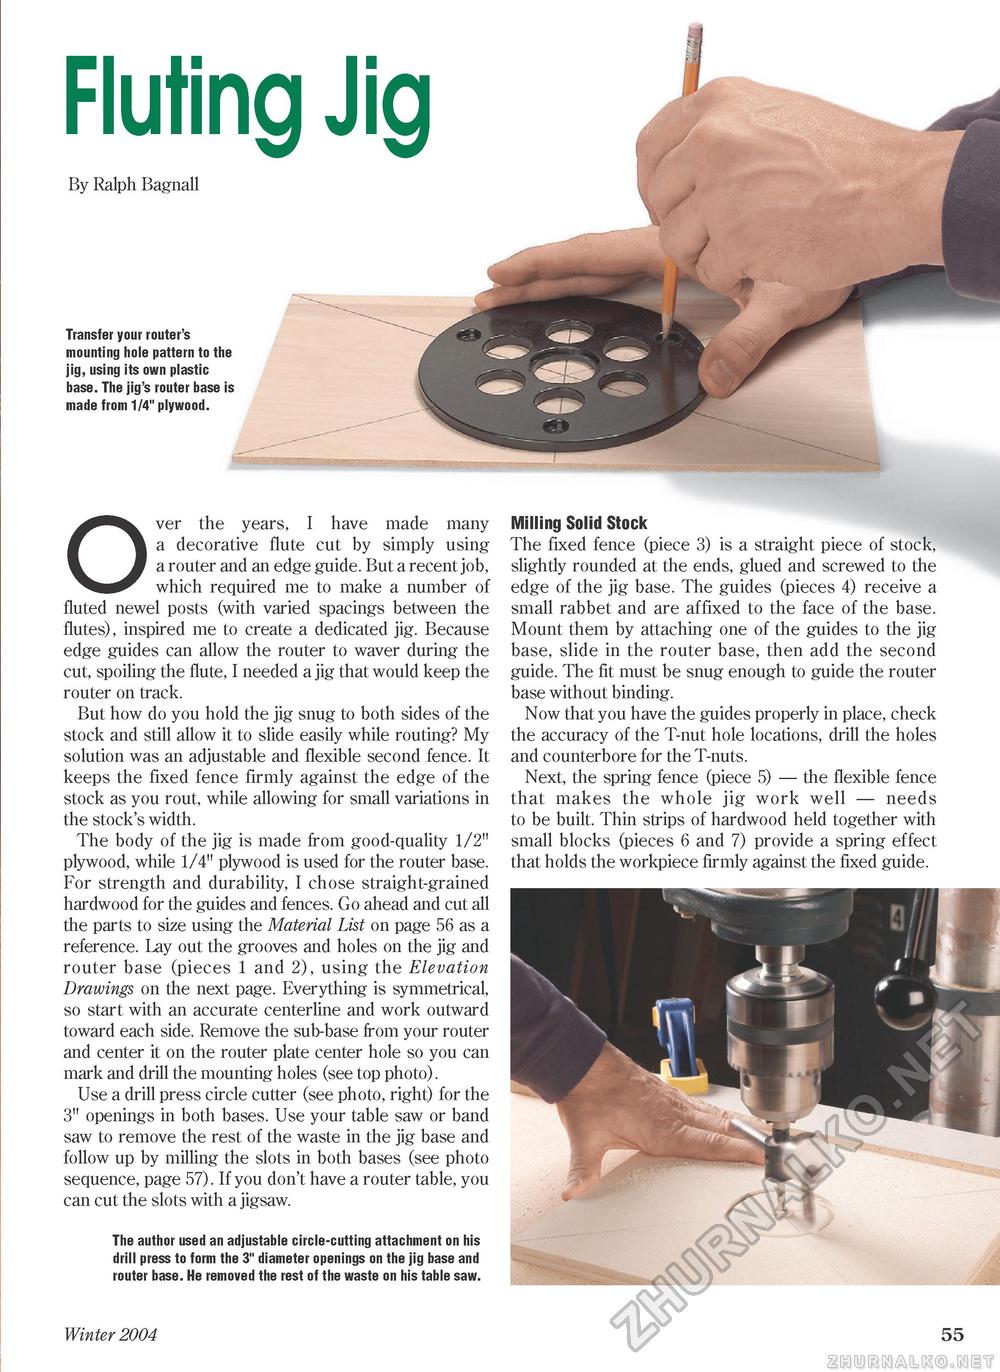
Fluting Jig By Ralph Bagnall Transfer your router's mounting hole pattern to the jig, using its own plastic base. The jig's router base is made from 1/4" plywood. Over the years, I have made many a decorative flute cut by simply using a router and an edge guide. But a recent job, which required me to make a number of fluted newel posts (with varied spacings between the flutes), inspired me to create a dedicated jig. Because edge guides can allow the router to waver during the cut, spoiling the flute, I needed a jig that would keep the router on track. But how do you hold the jig snug to both sides of the stock and still allow it to slide easily while routing? My solution was an adjustable and flexible second fence. It keeps the fixed fence firmly against the edge of the stock as you rout, while allowing for small variations in the stock's width. The body of the jig is made from good-quality 1/2" plywood, while 1/4" plywood is used for the router base. For strength and durability, I chose straight-grained hardwood for the guides and fences. Go ahead and cut all the parts to size using the Material List on page 56 as a reference. Lay out the grooves and holes on the jig and router base (pieces 1 and 2), using the Elevation Drawings on the next page. Everything is symmetrical, so start with an accurate centerline and work outward toward each side. Remove the sub-base from your router and center it on the router plate center hole so you can mark and drill the mounting holes (see top photo). Use a drill press circle cutter (see photo, right) for the 3" openings in both bases. Use your table saw or band saw to remove the rest of the waste in the jig base and follow up by milling the slots in both bases (see photo sequence, page 57). If you don't have a router table, you can cut the slots with a jigsaw. The author used an adjustable circle-cutting attachment on his drill press to form the 3" diameter openings on the jig base and router base. He removed the rest of the waste on his table saw. Milling Solid Stock The fixed fence (piece 3) is a straight piece of stock, slightly rounded at the ends, glued and screwed to the edge of the jig base. The guides (pieces 4) receive a small rabbet and are affixed to the face of the base. Mount them by attaching one of the guides to the jig base, slide in the router base, then add the second guide. The fit must be snug enough to guide the router base without binding. Now that you have the guides properly in place, check the accuracy of the T-nut hole locations, drill the holes and counterbore for the T-nuts. Next, the spring fence (piece 5) — the flexible fence that makes the whole jig work well — needs to be built. Thin strips of hardwood held together with small blocks (pieces 6 and 7) provide a spring effect that holds the workpiece firmly against the fixed guide. Winter 2004 55 |


