Woodworker's Journal 2004-Winter, страница 50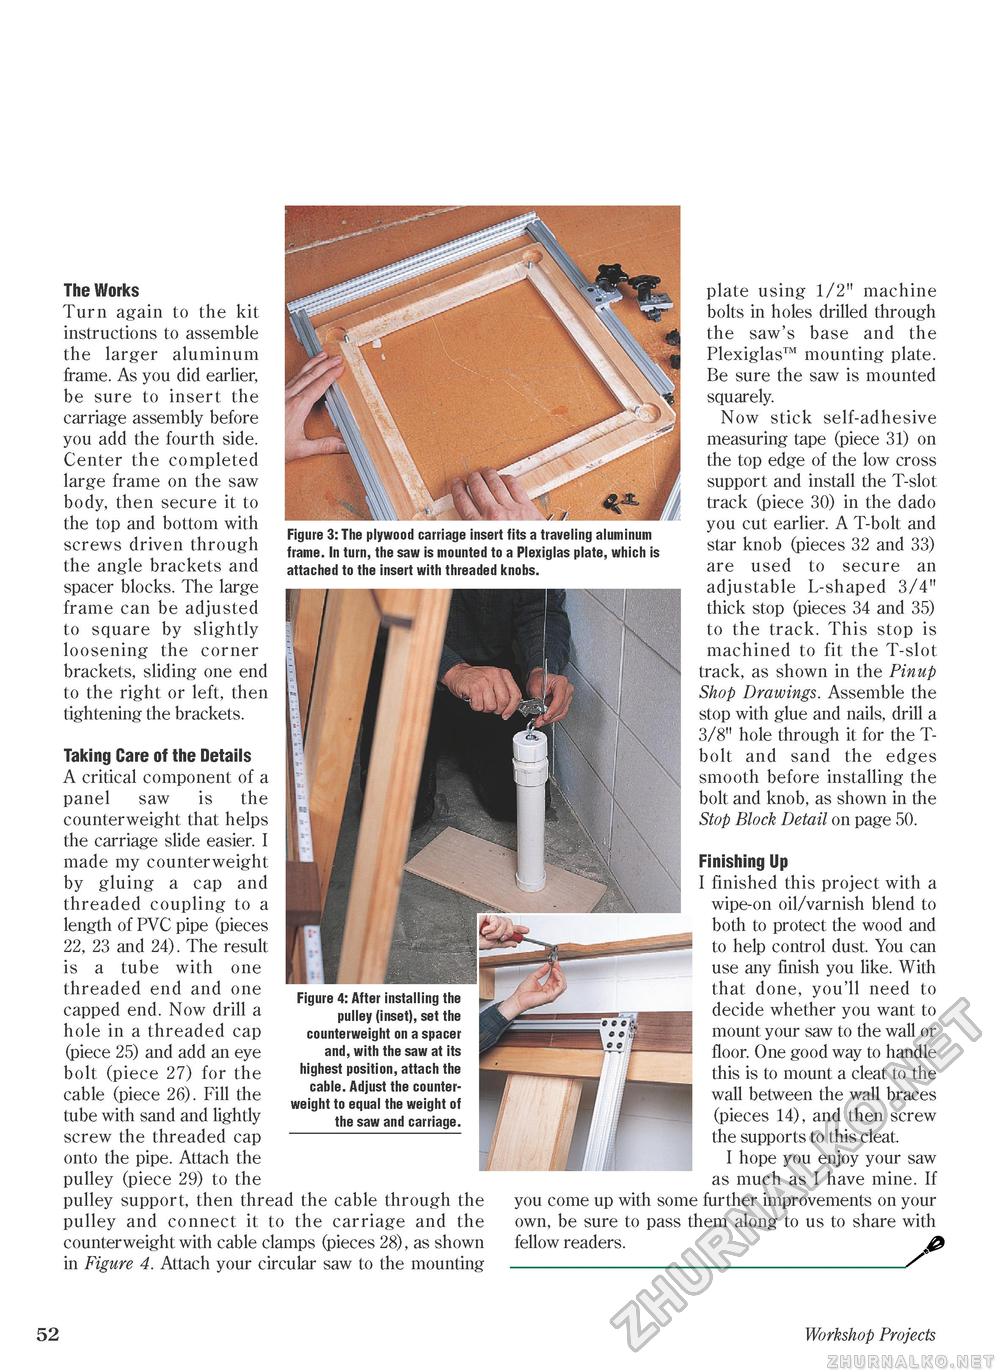
Figure 3: The plywood carriage insert fits a traveling aluminum frame. In turn, the saw is mounted to a Plexiglas plate, which is attached to the insert with threaded knobs. The Works Turn again to the kit instructions to assemble the larger aluminum frame. As you did earlier, be sure to insert the carriage assembly before you add the fourth side. Center the completed large frame on the saw body, then secure it to the top and bottom with screws driven through the angle brackets and spacer blocks. The large frame can be adjusted to square by slightly loosening the corner brackets, sliding one end to the right or left, then tightening the brackets. Taking Care of the Details A critical component of a panel saw is the counterweight that helps the carriage slide easier. I made my counterweight by gluing a cap and threaded coupling to a length of PVC pipe (pieces 22, 23 and 24). The result is a tube with one threaded end and one capped end. Now drill a hole in a threaded cap (piece 25) and add an eye bolt (piece 27) for the cable (piece 26). Fill the tube with sand and lightly screw the threaded cap onto the pipe. Attach the pulley (piece 29) to the pulley support, then thread the cable through the pulley and connect it to the carriage and the counterweight with cable clamps (pieces 28), as shown in Figure 4. Attach your circular saw to the mounting Figure 4: After installing the pulley (inset), set the counterweight on a spacer and, with the saw at its highest position, attach the cable. Adjust the counterweight to equal the weight of the saw and carriage. plate using 1/2" machine bolts in holes drilled through the saw's base and the Plexiglas™ mounting plate. Be sure the saw is mounted squarely. Now stick self-adhesive measuring tape (piece 31) on the top edge of the low cross support and install the T-slot track (piece 30) in the dado you cut earlier. A T-bolt and star knob (pieces 32 and 33) are used to secure an adjustable L-shaped 3/4" thick stop (pieces 34 and 35) to the track. This stop is machined to fit the T-slot track, as shown in the Pinup Shop Drawings. Assemble the stop with glue and nails, drill a 3/8" hole through it for the T-bolt and sand the edges smooth before installing the bolt and knob, as shown in the Stop Block Detail on page 50. Finishing Up I finished this project with a wipe-on oil/varnish blend to both to protect the wood and to help control dust. You can use any finish you like. With that done, you'll need to decide whether you want to mount your saw to the wall or floor. One good way to handle this is to mount a cleat to the wall between the wall braces (pieces 14), and then screw the supports to this cleat. I hope you enjoy your saw as much as I have mine. If you come up with some further improvements on your own, be sure to pass them along to us to share with fellow readers. 52 * Workshop Projects |


