Woodworker's Journal 2004-Winter, страница 55
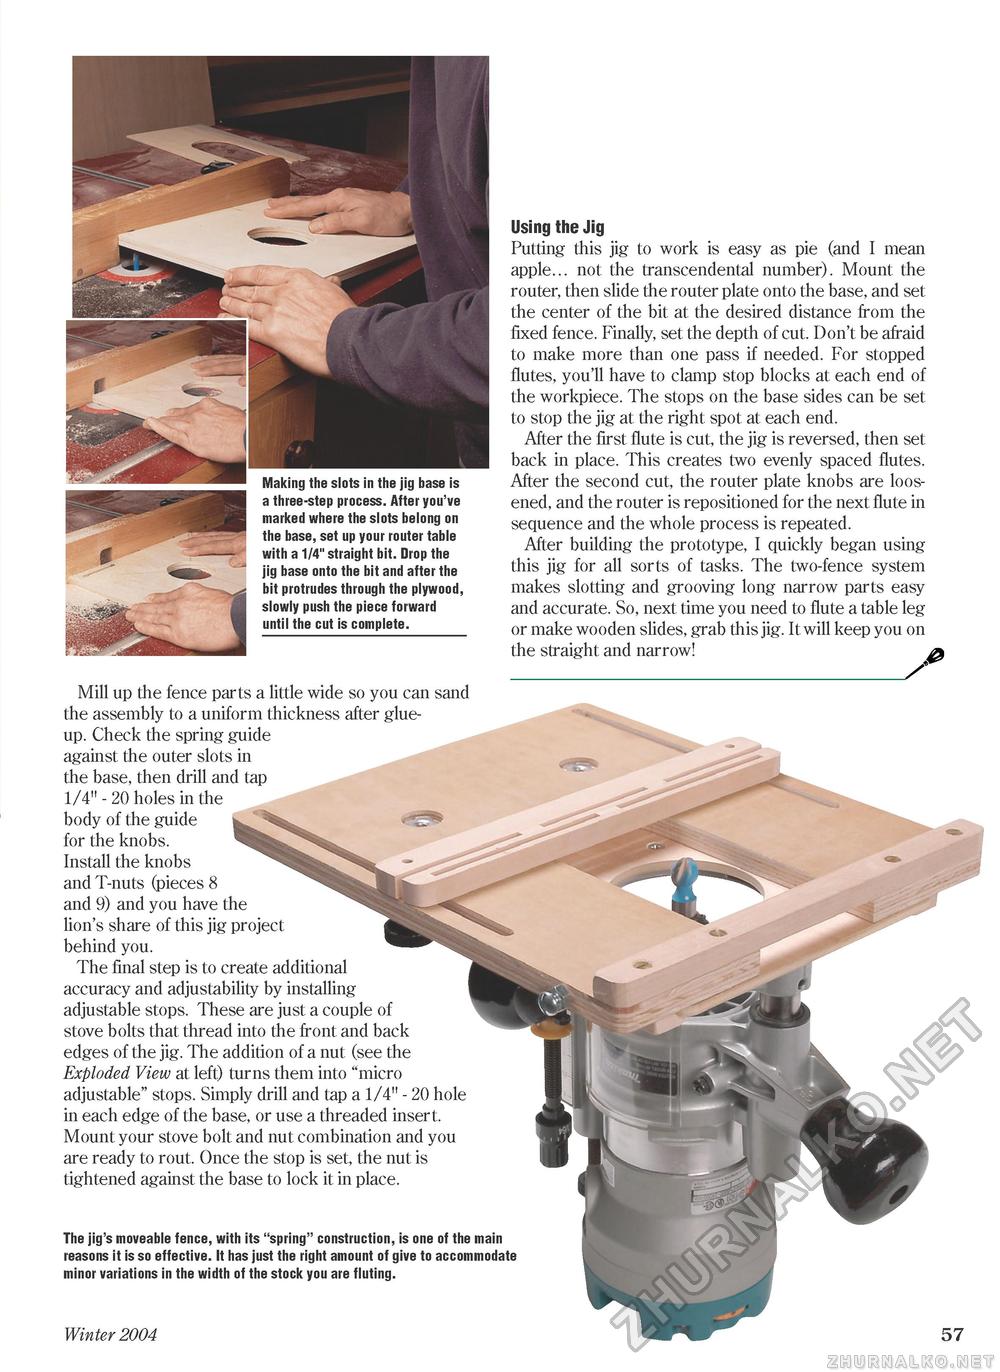
Making the slots in the jig base is a three-step process. After you've marked where the slots belong on the base, set up your router table with a 1/4" straight bit. Drop the jig base onto the bit and after the bit protrudes through the plywood, slowly push the piece forward until the cut is complete. Mill up the fence parts a little wide so you can sand the assembly to a uniform thickness after glue-up. Check the spring guide against the outer slots in the base, then drill and tap 1/4" - 20 holes in the body of the guide for the knobs. Install the knobs and T-nuts (pieces 8 and 9) and you have the lion's share of this jig project behind you. The final step is to create additional accuracy and adjustability by installing adjustable stops. These are just a couple of stove bolts that thread into the front and back edges of the jig. The addition of a nut (see the Exploded View at left) turns them into "micro adjustable" stops. Simply drill and tap a 1/4" - 20 hole in each edge of the base, or use a threaded insert. Mount your stove bolt and nut combination and you are ready to rout. Once the stop is set, the nut is tightened against the base to lock it in place. The jig's moveable fence, with its "spring" construction, is one of the main reasons it is so effective. It has just the right amount of give to accommodate minor variations in the width of the stock you are fluting. Using the Jig Putting this jig to work is easy as pie (and I mean apple... not the transcendental number). Mount the router, then slide the router plate onto the base, and set the center of the bit at the desired distance from the fixed fence. Finally, set the depth of cut. Don't be afraid to make more than one pass if needed. For stopped flutes, you'll have to clamp stop blocks at each end of the workpiece. The stops on the base sides can be set to stop the jig at the right spot at each end. After the first flute is cut, the jig is reversed, then set back in place. This creates two evenly spaced flutes. After the second cut, the router plate knobs are loosened, and the router is repositioned for the next flute in sequence and the whole process is repeated. After building the prototype, I quickly began using this jig for all sorts of tasks. The two-fence system makes slotting and grooving long narrow parts easy and accurate. So, next time you need to flute a table leg or make wooden slides, grab this jig. It will keep you on the straight and narrow! £ _S Winter 2004 57 |


