Woodworker's Journal 2004-Winter, страница 58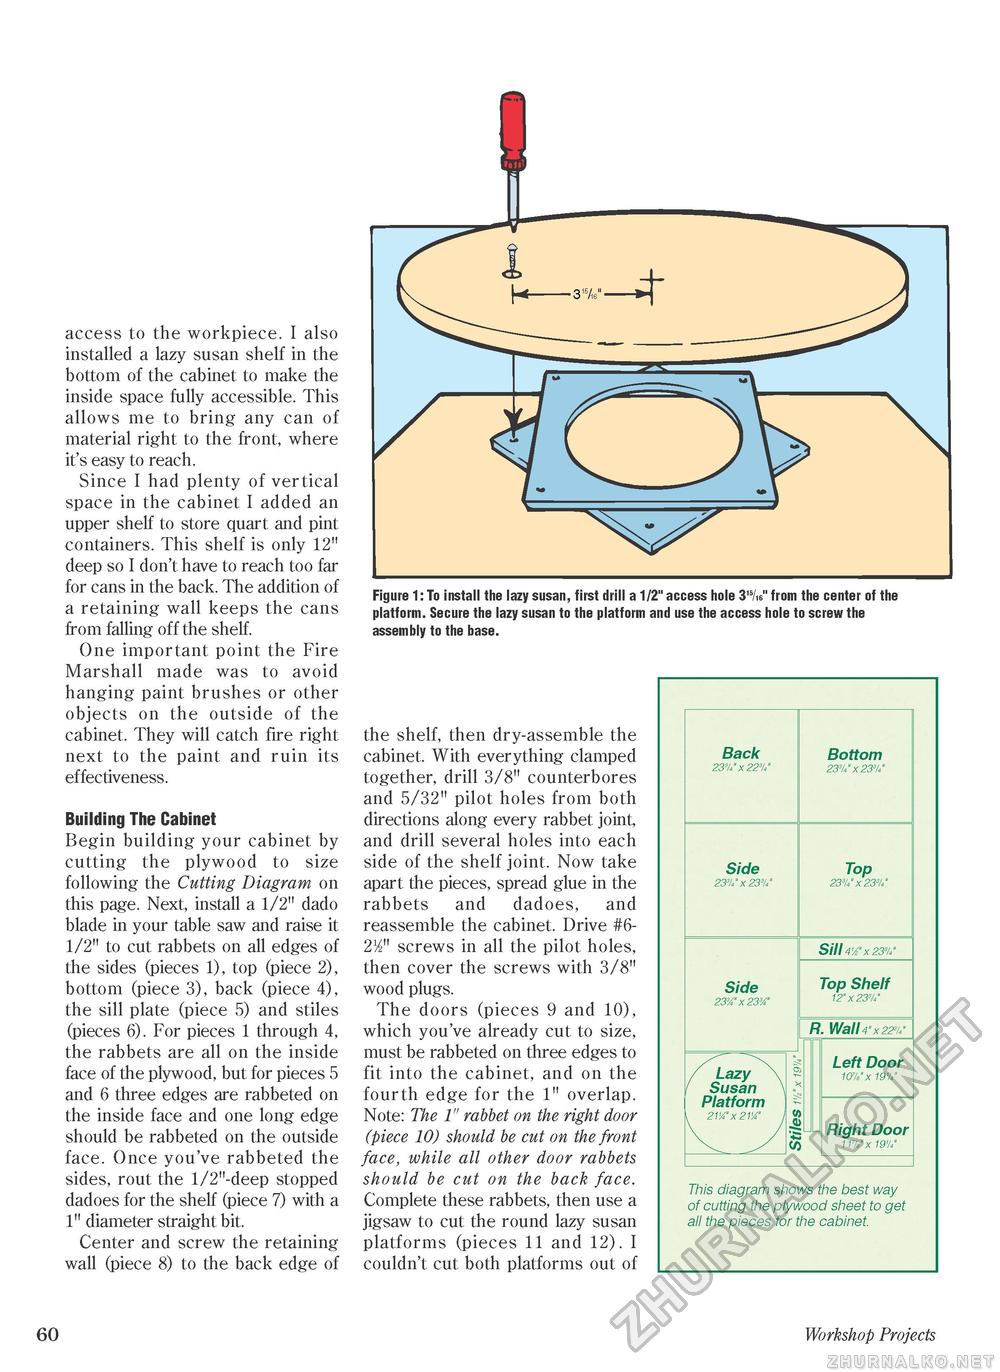
access to the workpiece. I also installed a lazy susan shelf in the bottom of the cabinet to make the inside space fully accessible. This allows me to bring any can of material right to the front, where it's easy to reach. Since I had plenty of vertical space in the cabinet I added an upper shelf to store quart and pint containers. This shelf is only 12" deep so I don't have to reach too far for cans in the back. The addition of a retaining wall keeps the cans from falling off the shelf. One important point the Fire Marshall made was to avoid hanging paint brushes or other objects on the outside of the cabinet. They will catch fire right next to the paint and ruin its effectiveness. Building The Cabinet Begin building your cabinet by cutting the plywood to size following the Cutting Diagram on this page. Next, install a 1/2" dado blade in your table saw and raise it 1/2" to cut rabbets on all edges of the sides (pieces 1), top (piece 2), bottom (piece 3), back (piece 4), the sill plate (piece 5) and stiles (pieces 6). For pieces 1 through 4, the rabbets are all on the inside face of the plywood, but for pieces 5 and 6 three edges are rabbeted on the inside face and one long edge should be rabbeted on the outside face. Once you've rabbeted the sides, rout the 1/2"-deep stopped dadoes for the shelf (piece 7) with a 1" diameter straight bit. Center and screw the retaining wall (piece 8) to the back edge of platform. Secure the lazy susan to the platform and use the access hole to screw the assembly to the base. the shelf, then dry-assemble the cabinet. With everything clamped together, drill 3/8" counterbores and 5/32" pilot holes from both directions along every rabbet joint, and drill several holes into each side of the shelf joint. Now take apart the pieces, spread glue in the rabbets and dadoes, and reassemble the cabinet. Drive #62/2" screws in all the pilot holes, then cover the screws with 3/8" wood plugs. The doors (pieces 9 and 10), which you've already cut to size, must be rabbeted on three edges to fit into the cabinet, and on the fourth edge for the 1" overlap. Note: The 1" rabbet on the right door (piece 10) should be cut on the front face, while all other door rabbets should be cut on the back face. Complete these rabbets, then use a jigsaw to cut the round lazy susan platforms (pieces 11 and 12). I couldn't cut both platforms out of
This diagram shows the best way of cutting the plywood sheet to get all the pieces for the cabinet. This diagram shows the best way of cutting the plywood sheet to get all the pieces for the cabinet. 60 * Workshop Projects |
|||||||||||||||||||||||||


