Woodworker's Journal 2004-Winter, страница 59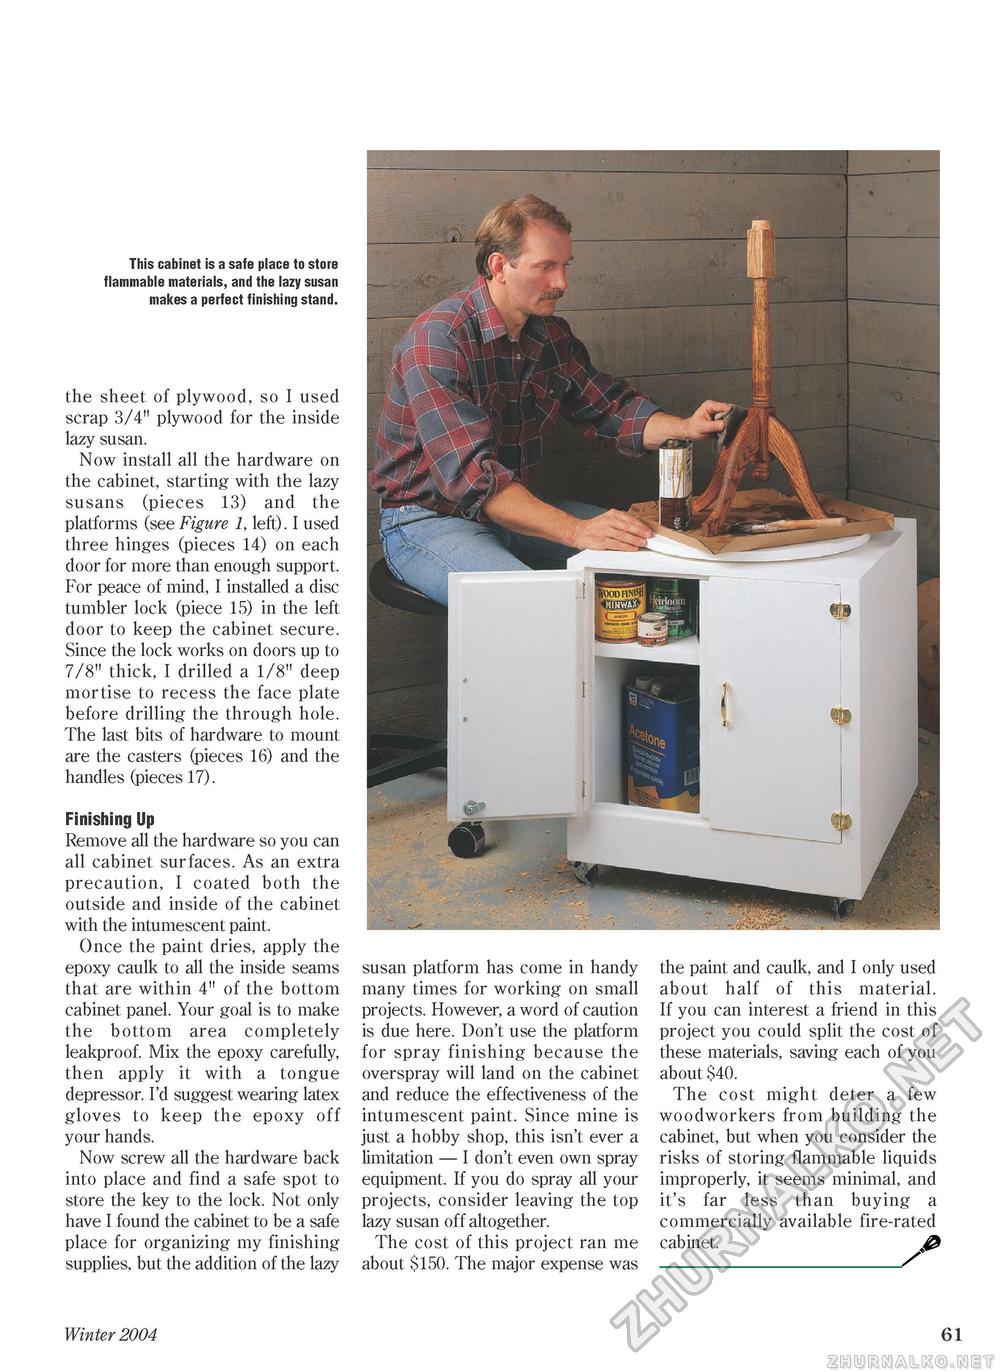
This cabinet is a safe place to store flammable materials, and the lazy susan makes a perfect finishing stand. the sheet of plywood, so I used scrap 3/4" plywood for the inside lazy susan. Now install all the hardware on the cabinet, starting with the lazy susans (pieces 13) and the platforms (see Figure 1, left). I used three hinges (pieces 14) on each door for more than enough support. For peace of mind, I installed a disc tumbler lock (piece 15) in the left door to keep the cabinet secure. Since the lock works on doors up to 7/8" thick, I drilled a 1/8" deep mortise to recess the face plate before drilling the through hole. The last bits of hardware to mount are the casters (pieces 16) and the handles (pieces 17). Finishing Up Remove all the hardware so you can all cabinet surfaces. As an extra precaution, I coated both the outside and inside of the cabinet with the intumescent paint. Once the paint dries, apply the epoxy caulk to all the inside seams that are within 4" of the bottom cabinet panel. Your goal is to make the bottom area completely leakproof. Mix the epoxy carefully, then apply it with a tongue depressor. I'd suggest wearing latex gloves to keep the epoxy off your hands. Now screw all the hardware back into place and find a safe spot to store the key to the lock. Not only have I found the cabinet to be a safe place for organizing my finishing supplies, but the addition of the lazy susan platform has come in handy many times for working on small projects. However, a word of caution is due here. Don't use the platform for spray finishing because the overspray will land on the cabinet and reduce the effectiveness of the intumescent paint. Since mine is just a hobby shop, this isn't ever a limitation — I don't even own spray equipment. If you do spray all your projects, consider leaving the top lazy susan off altogether. The cost of this project ran me about $150. The major expense was the paint and caulk, and I only used about half of this material. If you can interest a friend in this project you could split the cost of these materials, saving each of you about $40. The cost might deter a few woodworkers from building the cabinet, but when you consider the risks of storing flammable liquids improperly, it seems minimal, and it's far less than buying a commercially available fire-rated cabinet. £ Winter 2004 61 |


