Woodworker's Journal 2006-30-2, страница 25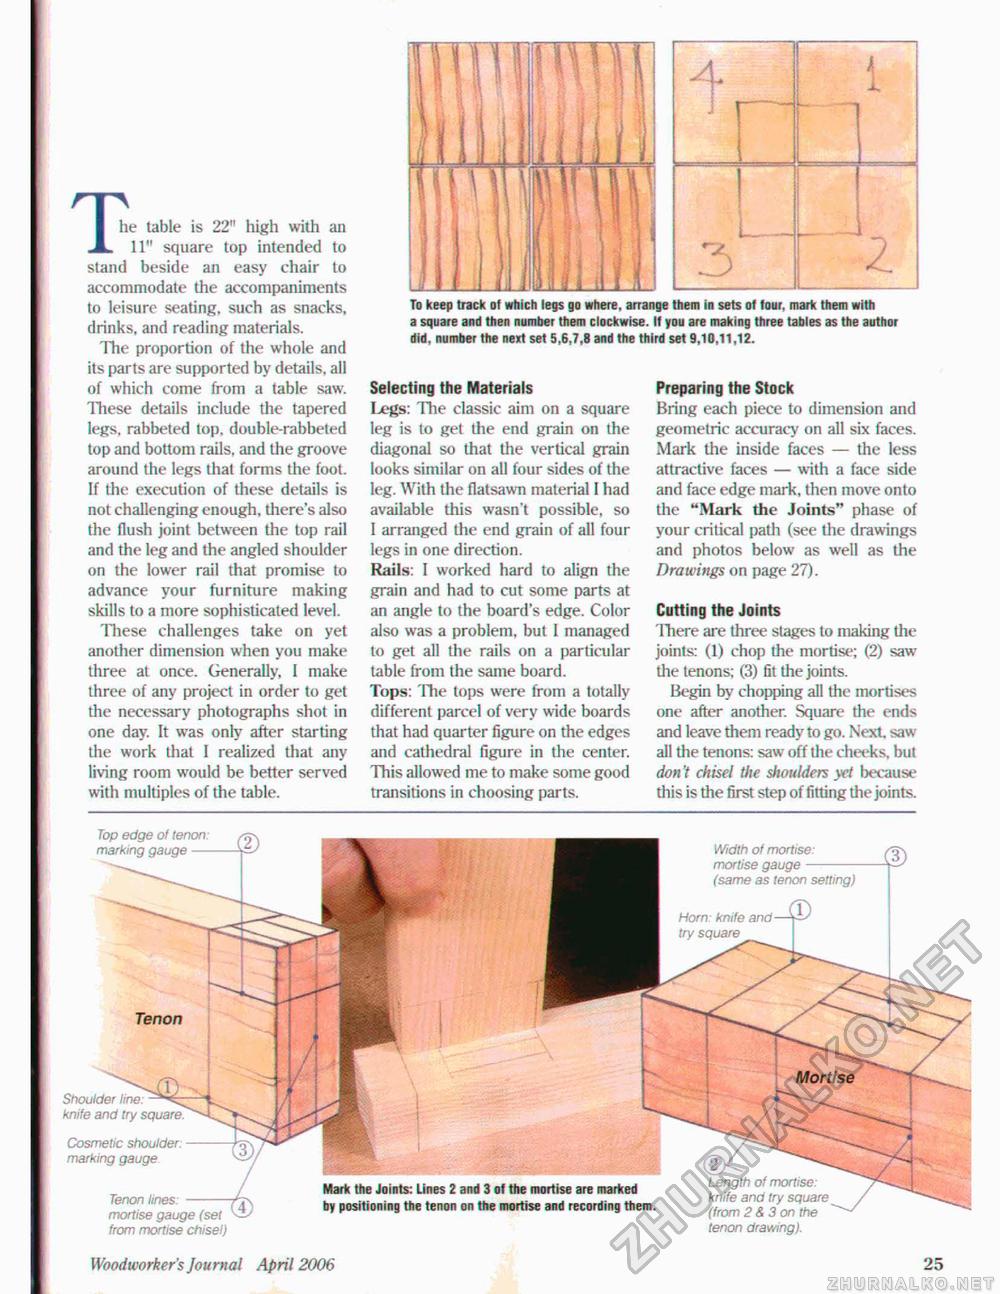
To keep track of which legs go where, arrange them in sets of four, mark them with a square and then number them clockwise. If you are making three tables as the author did, number the next set 5,6,7,B and the third set 9,10,11,12. Mortise he table is 22" high with an .X. 11" square top intended to stand beside an easy chair to accommodate the accompaniments to leisure seating, such as snacks, drinks, and reading materials. The proportion of the whole and its parts are supported by details, all of which come from a table saw. These details include the tapered legs, rabbeted top. double-rabbeted top and bottom rails, and the groove around the legs that forms the foot. If the execution of these details is not challenging enough, there's also the flush joint between the top rail and the leg and the angled shoulder on the lower rail that promise to advance your furniture making skills to a more sophisticated level. These challenges take on yet another dimension when you make three at once. Generally, I make three of any project in order to get the necessary photographs shot in one day. It was only after starting the work that 1 realized that any living room would be better served with multiples of the table. Selecting the Materials Ixgs: The classic aim on a square leg is to get the end grain on the diagonal so that the vertical grain looks similar on all four sides of the leg. With the flatsawn material 1 had available this wasn't possible, so I arranged the end grain of all four legs in one direction. Rails: I worked hard to align the grain and had to cut some parts at an angle to the board's edge. Color also was a problem, but I managed to get all the rails on a particular table from the same board, tops: The tops were from a totally different parcel of very wide boards that had quarter figure on the edges and cathedral figure in the center. This allowed me to make some good transitions in choosing parts. Preparing the Stock Bring each piece to dimension and geometric accuracy on all six faces. Mark the inside faces — the less attractive faces — with a face side and face edge mark, then move onto the "Mark the Joints" phase of your critical path (see the drawings and photos below as well as the Drawings on page 27). Cutting the Joints There are three stages to making the joints: (1) chop the mortise; (2) saw the tenons; (3) fit the joints. Begin by chopping all the mortises one after another. Square the ends and leave diem ready to go. Next saw-all the tenons: saw off the cheeks, but don't chisel the shoulders yet because this is the first step of fitting the joints. Top edge of tenon. marking gauge- Shoulder line:1 knife and try squared Cosmetic shoulder, marking gauge Tenon lines: - mortise gauge (set from mortise chisel) Length of mortise: knife and try square (from 2 & 3 on the tenon drawing). Horn: knife and— try square Mark the Joints: Lines 2 and 3 of the mortise are marked by positioning the tenon on the mortise and recording them. Width of mortise: mortise gauge- (same as tenon netting) Woodworker's Journal April 2006 25 |


