Woodworker's Journal 2006-30-2, страница 47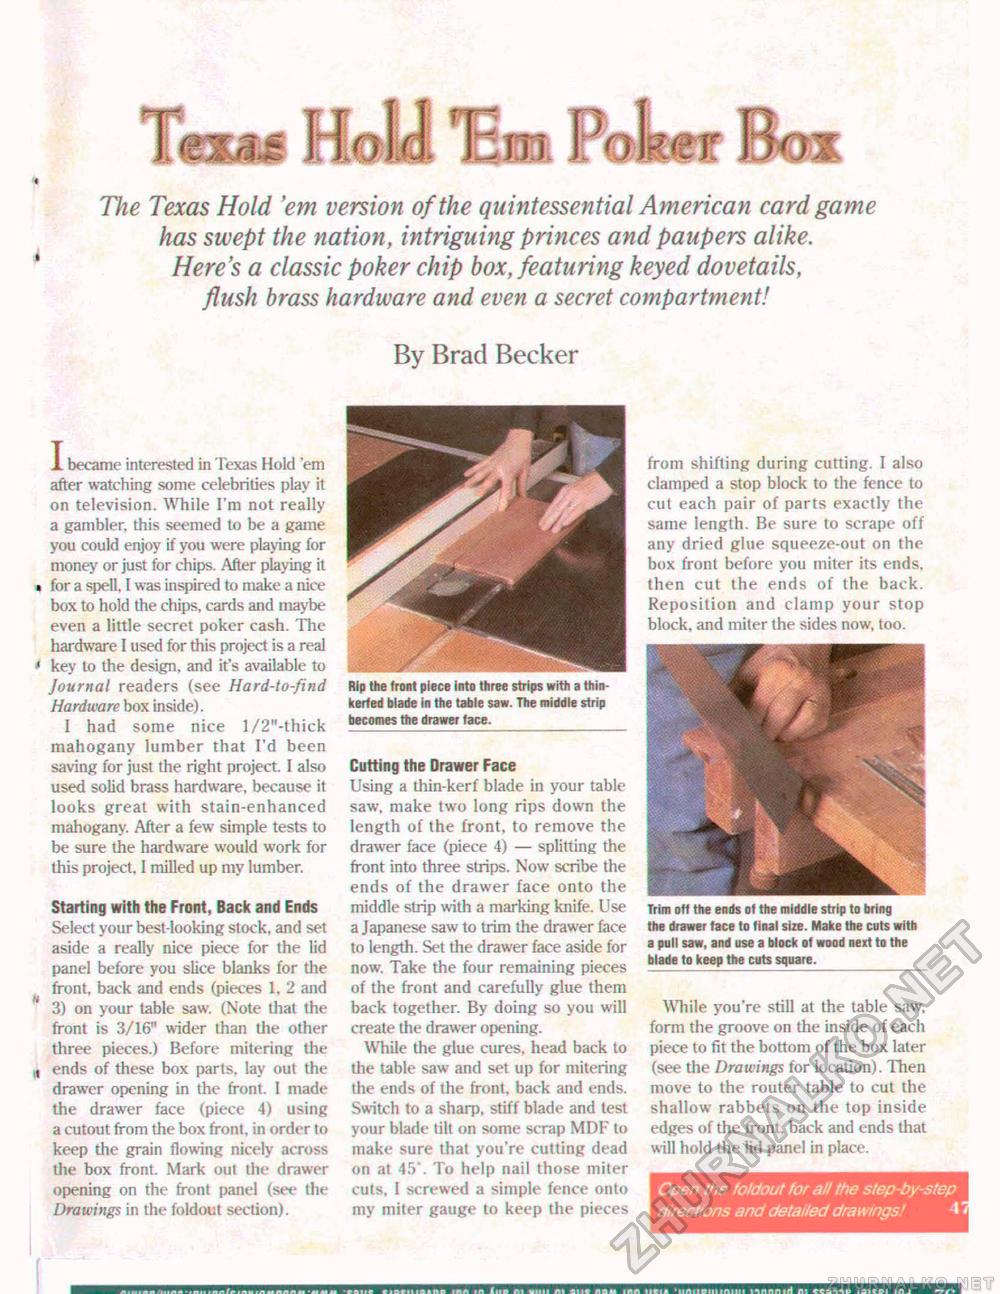
The Texas Hold 'em version of the quintessential American card game has swept the nation, intriguing princes and paupers alike. Here's a classic poker chip box, featuring keyed dovetails, flush brass hardware and even a secret compartment! By Brad Becker I became interested in Texas Hold 'em after watching some celebrities play it on television. While I'm not really a gambler, this seemed to be a game you could enjoy if you were playing for money or just for chips. After playing it * for a spell, I was inspired to make a nice box to hold the chips, cards and maybe even a little secret poker cash. The hardware I used for this project is a real 1 key to the design, and it's available to Journal readers (see Hard-to-find Hardware box inside). I had some nice l/2"-thick mahogany lumber that I'd been saving for just the right project. I also used solid brass hardware, because it looks great with stain-enhanced mahogany. After a few simple tests to be sure the hardware would work for this project, 1 milled up my lumber. Starting with the Front, Back and Ends Select your best-looking stock, and set aside a really nice piece for the lid panel before you slice blanks for the front, back and ends (pieces 1, 2 and 3) on your table saw. (Note that the front is 3/16" wider than the other three pieces.) Before mitering the n ends of these box parts, lay out the drawer opening in the front. I made the drawer face (piece 4) using a cutout from the box front, in order to keep the grain flowing nicely across the box front. Mark out the drawer opening on the front panel (see the Drawings in the foldout section). Rip the front piece into three strips with a thin-kerfed blade in the table saw. The middle strip becomes tiie drawer face. Cutting the Drawer Face Using a thin-kerf blade in your table saw, make two long rips down the length of the front, to remove the drawer face (piece 4) — splitting the front into three strips. Now scribe the ends of the drawer face onto the middle strip with a marking knife. Use a Japanese saw to trim the drawer face to length. Set the drawer face aside for now. Take the four remaining pieces of the front and carefully glue them back together. By doing so you will create the drawer opening. While the glue cures, head back to the table saw and set up for mitering the ends of the front, back and ends. Switch to a sharp, stiff blade and test your blade tilt on some scrap MDF to make sure thai you're cutting dead on at 45*. To help nail those miter cuts. I screwed a simple fence onto my miter gauge to keep the pieces While you're still at the table saw, form the groove on the inside of each piece to fit the bottom of the box later (see the Drawings for location). Then move to the router table to cut the shallow rabbets on the top inside edges of the front, back and ends that will hold the lid panel in place. from shifting during cutting. I also clamped a stop block to the fence to cut each pair of parts exactly the same length. Be sure to scrape off any dried glue squeeze-out on the box front before you miter its ends, then cut the ends of the back. Reposition and clamp your stop block, and miter the sides now, too. Trim off the ends of the middle strip to bring the drawer face to final size. Make the cuts with a pull saw, and use a block ot wood next to the blade to keep the cuts square. Open the foldout for all the step-by-step directions and detailed drawings! 4' |


