Woodworker's Journal 2006-30-2, страница 50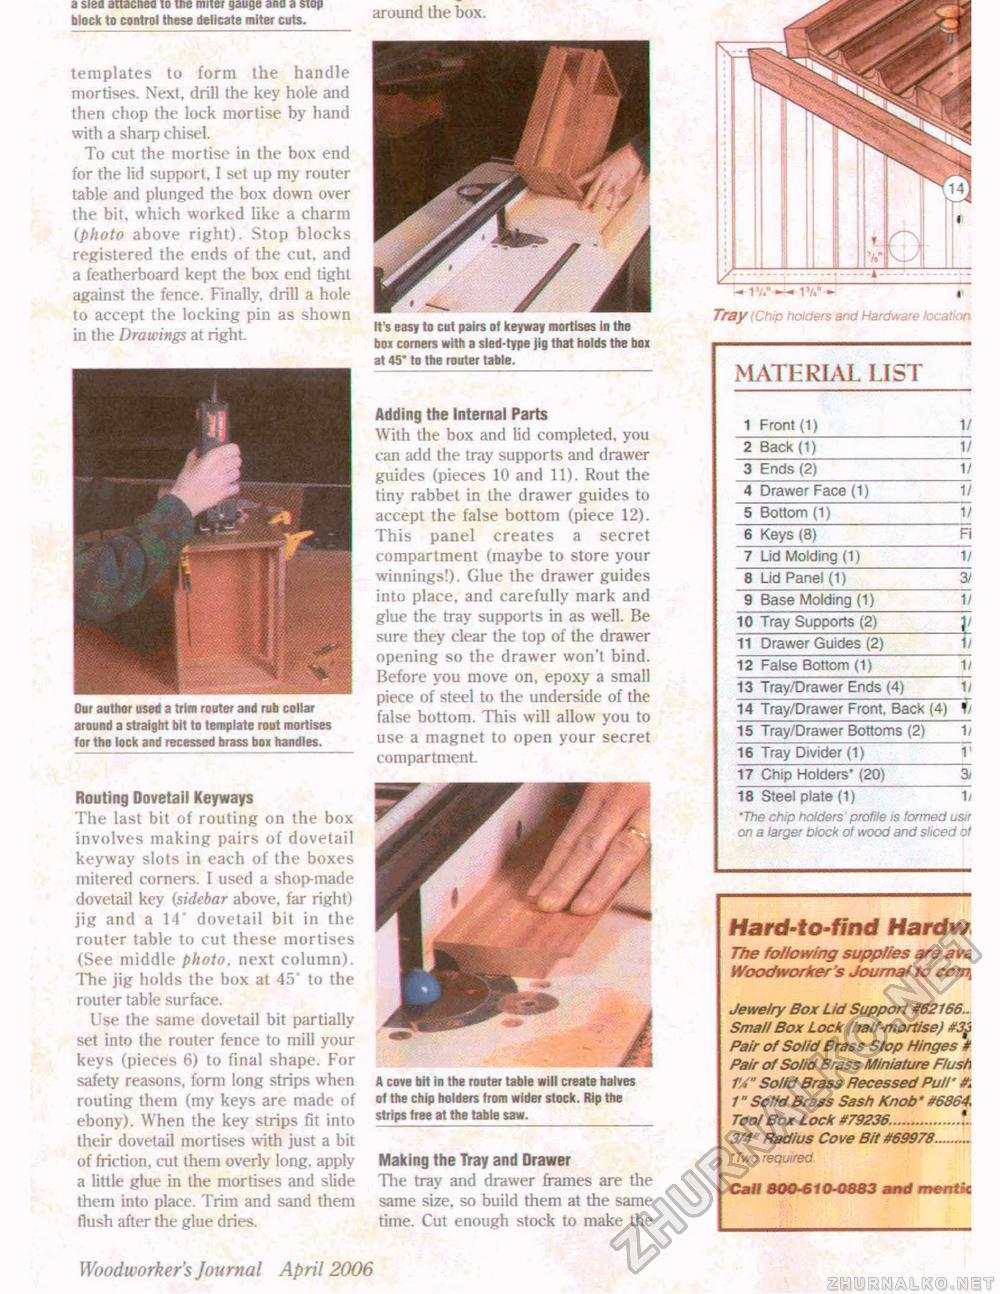
a sieo attacneo io tne mner gauge ana a stop black to control these delicate miter cuts. around the box. templates to form the handle mortises. Next, drill the key hole and then chop the lock mortise by hand with a sharp chisel. To cut the mortise in the box end for the lid support, I set up my router table and plunged the box down over the bit, which worked like a charm (photo above right). Stop blocks registered the ends of the cut, and a featherboard kept the box end tight against the fence. Finally, drill a hole to accept the locking pin as shown in the Drawings at right. Oar author used a trim router and rub collar around a straight bit to template rout mortises for the lock and recessed brass boi handles. Routing Dovetail Keyways The last bit of routing on the box involves making pairs of dovetail keyway slots in each of the boxes mitered corners. f used a shop-made dovetail key (sidebar above, far right) jig and a 14* dovetail bit in the router table to cut these mortises (See middle photo, next column). The jig holds the box at 45* to the router table surface. Use the same dovetail bit partially set into the router fence to mill your keys (pieces 6) to final shape. For safety reasons, form long strips when routing them (my keys are made of ebony). When the key strips fit into their dovetail mortises with just a bit of friction, cut them overly long, apply a little glue in the mortises and slide them into place. Trim and sand them flush after the glue dries. It's easy to cut pairs ot keyway mortises in the boi comers with a sled-type jig that holds the ho* at 45" to the router table. Adding the Internal Parts With the box and lid completed, you can add the tray supports and drawer guides (pieces 10 and 11). Rout the tiny rabbet in the drawer guides to accept the false bottom (piece 12). This panel creates a secret compartment (maybe to store your winnings!). Glue the drawer guides into place, and carefully mark and glue the tray supports in as well. Be sure they clear the lop of the drawer opening so the drawer won't bind. Before you move on, epoxy a small piece of steel to the underside of the false bottom. This will allow you to use a magnet to open your secret compartment. A cove bit in the router table will create halves of the chip holders from wider stock. Rip the strips free at the table saw. Making the Tray and Orawer The tray and drawer frames are the same size, so build them at the same time. Cut enough stock to make the -* t v."—<Vt."*- , Tray (Chip holders and Hardware location MATERIAL IJST
18 Steel plate (t) 'The chip holders ' profile is formed usir on a larger block of wood and sliced of 18 Steel plate (t) 'The chip holders ' profile is formed usir on a larger block of wood and sliced of Hard-to-find Hardw The following supplies are ava Woodworker's Journal to comi Jewelry Box Lid Support #62166.. Small Box Lock (half-mortise) #3j Pair of Solid Brass Stop Hinges it Pair of Solid Brass Miniature Flush TX" Solid Brass Recessed Pull' it. 1" Solid Brass Sash Knob * #6864, Tool Box Lock #79236................*■ 3/4" Radius Cove Bit #69978---------- 'Two required Cat I 800-610-0883 and menfk Woodworker's Journal April 2006 50 |


