Woodworker's Journal 2006-30-5, страница 17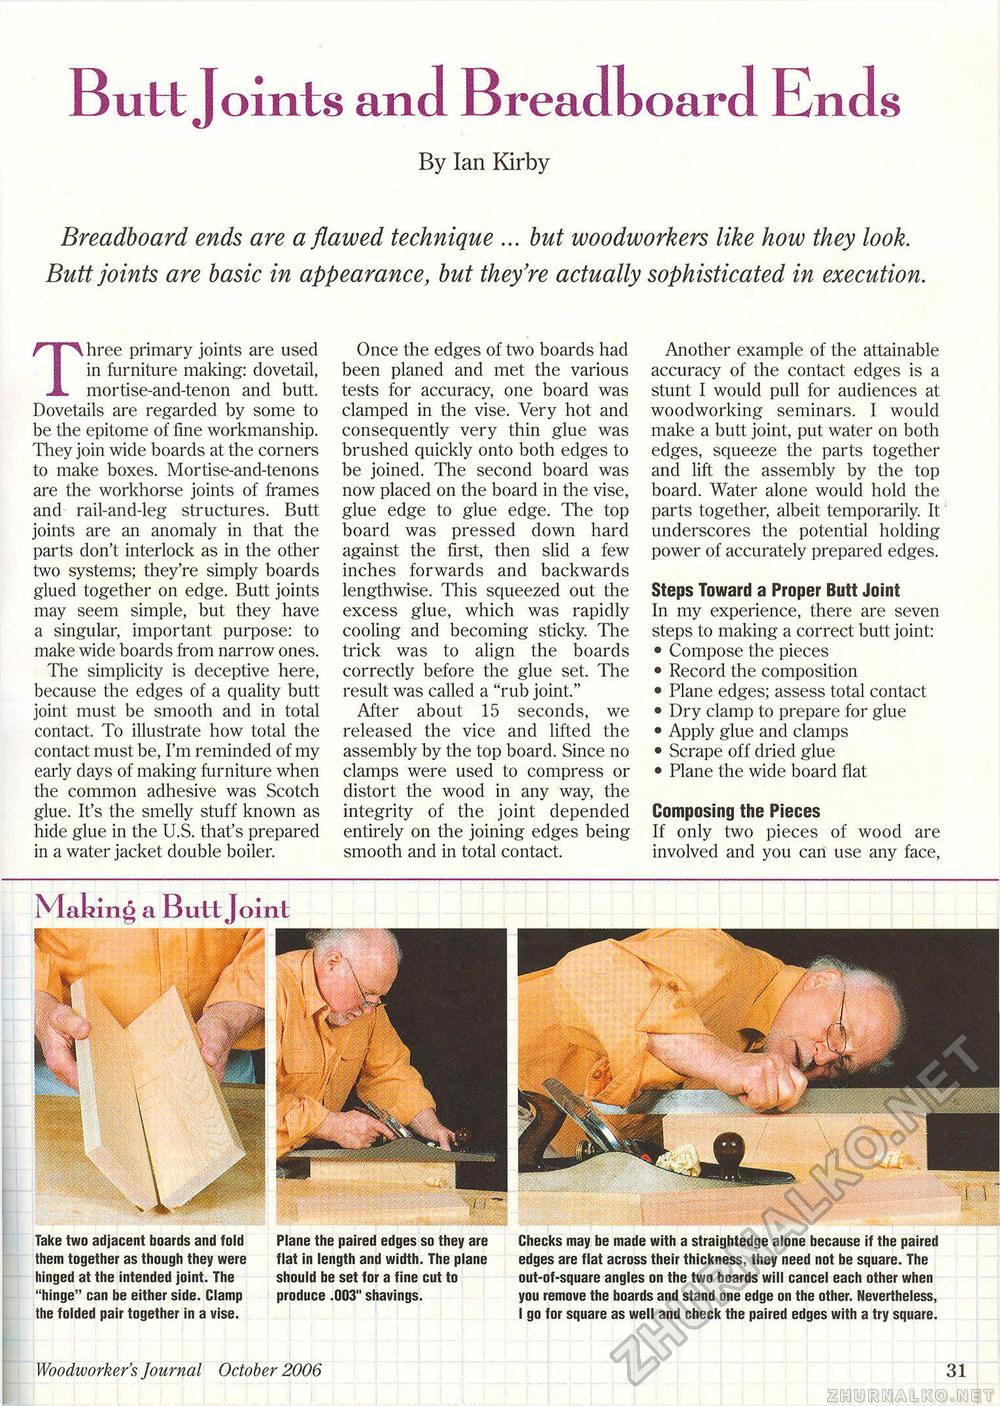
Butt Joints and Breadboard Ends By Ian KirbyBreadboard ends are a flawed technique ... but woodworkers like how they look. Butt joints are basic in appearance, but they're actually sophisticated in execution. Three primary joints are used in furniture making: dovetail, mortise-and-tenon and butt. Dovetails are regarded by some to be the epitome of fine workmanship. They join wide boards at the corners to make boxes. Mortise-and-tenons are the workhorse joints of frames and rail-and-leg structures. Butt joints are an anomaly in that the parts don't interlock as in the other two systems; they're simply boards glued together on edge. Butt joints may seem simple, but they have a singular, important purpose: to make wide boards from narrow ones. The simplicity is deceptive here, because the edges of a quality butt joint must be smooth and in total contact. To illustrate how total the contact must be, I'm reminded of my early days of making furniture when the common adhesive was Scotch glue. It's the smelly stuff known as hide glue in the U.S. that's prepared in a water jacket double boiler. Once the edges of two boards had been planed and met the various tests for accuracy, one board was clamped in the vise. Very hot and consequently very thin glue was brushed quickly onto both edges to be joined. The second board was now placed on the board in the vise, glue edge to glue edge. The top board was pressed down hard against the first, then slid a few inches forwards and backwards lengthwise. This squeezed out the excess glue, which was rapidly cooling and becoming sticky. The trick was to align the boards correctly before the glue set. The result was called a "rub joint." After about 15 seconds, we released the vice and lifted the assembly by the top board. Since no clamps were used to compress or distort the wood in any way, the integrity of the joint depended entirely on the joining edges being smooth and in total contact. Another example of the attainable accuracy of the contact edges is a stunt I would pull for audiences at woodworking seminars. I would make a butt joint, put water on both edges, squeeze the parts together and lift the assembly by the top board. Water alone would hold the parts together, albeit temporarily. It underscores the potential holding power of accurately prepared edges. Steps Toward a Proper Butt Joint In my experience, there are seven steps to making a correct butt joint: • Compose the pieces • Record the composition • Plane edges; assess total contact • Dry clamp to prepare for glue • Apply glue and clamps • Scrape off dried glue • Plane the wide board flat Composing the Pieces If only two pieces of wood are involved and you can use any face, S4M& Making a Butt Joint m Take two adjacent boards and fold them together as though they were hinged at the intended joint. The "hinge" can be either side. Clamp the folded pair together in a vise. Plane the paired edges so they are flat in length and width. The plane should be set for a fine cut to produce .003" shavings. Checks may be made with a straightedge alone because if the paired edges are flat across their thickness, they need not be square. The out-of-square angles on the two boards will cancel each other when you remove the boards and stand one edge on the other. Nevertheless, I go for square as well and check the paired edges with a try square. Woodworker's Journal October 2006 17 |


