Woodworker's Journal 2006-30-5, страница 18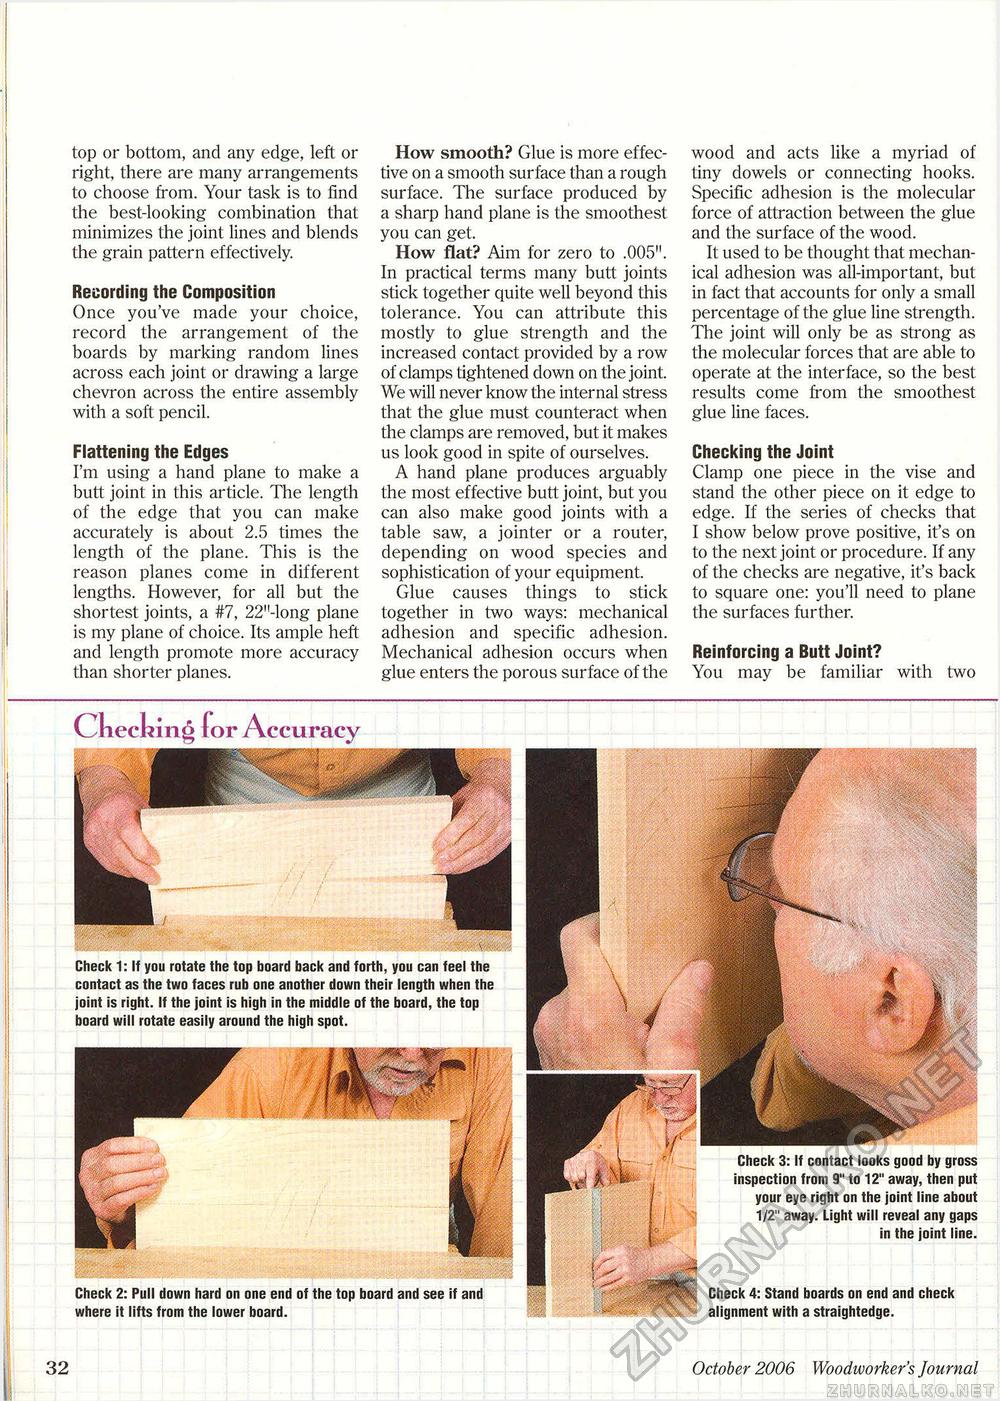
top or bottom, and any edge, left or right, there are many arrangements to choose from. Your task is to find the best-looking combination that minimizes the joint lines and blends the grain pattern effectively. Recording the Composition Once you've made your choice, record the arrangement of the boards by marking random lines across each joint or drawing a large chevron across the entire assembly with a soft pencil. Flattening the Edges I'm using a hand plane to make a butt joint in this article. The length of the edge that you can make accurately is about 2.5 times the length of the plane. This is the reason planes come in different lengths. However, for all but the shortest joints, a #7, 22"-long plane is my plane of choice. Its ample heft and length promote more accuracy than shorter planes. How smooth? Glue is more effective on a smooth surface than a rough surface. The surface produced by a sharp hand plane is the smoothest you can get. How flat? Aim for zero to .005". In practical terms many butt joints stick together quite well beyond this tolerance. You can attribute this mostly to glue strength and the increased contact provided by a row of clamps tightened down on the joint. We will never know the internal stress that the glue must counteract when the clamps are removed, but it makes us look good in spite of ourselves. A hand plane produces arguably the most effective butt joint, but you can also make good joints with a table saw, a jointer or a router, depending on wood species and sophistication of your equipment. Glue causes things to stick together in two ways: mechanical adhesion and specific adhesion. Mechanical adhesion occurs when glue enters the porous surface of the wood and acts like a myriad of tiny dowels or connecting hooks. Specific adhesion is the molecular force of attraction between the glue and the surface of the wood. It used to be thought that mechanical adhesion was all-important, but in fact that accounts for only a small percentage of the glue line strength. The joint will only be as strong as the molecular forces that are able to operate at the interface, so the best results come from the smoothest glue line faces. Checking the Joint Clamp one piece in the vise and stand the other piece on it edge to edge. If the series of checks that I show below prove positive, it's on to the next joint or procedure. If any of the checks are negative, it's back to square one: you'll need to plane the surfaces further. Reinforcing a Butt Joint? You may be familiar with two 1 <f®lil Check 2: Pull down hard on one end of the top board and see if and where it lifts from the lower board. Ckecking (or Accuracy Check 1: If you rotate the top board back and forth, you can feel the contact as the two faces rub one another down their length when the joint is right. If the joint is high in the middle of the board, the top board will rotate easily around the high spot. Check 3: If contact looks good by gross inspection from 9" to 12" away, then put your eye right on the joint line about 1/2" away. Light will reveal any gaps in the joint line. Check 4: Stand boards on end and check alignment with a straightedge. 32 October 2006 Woodivorker's Journal |


