Woodworker's Journal 2006-30-5, страница 20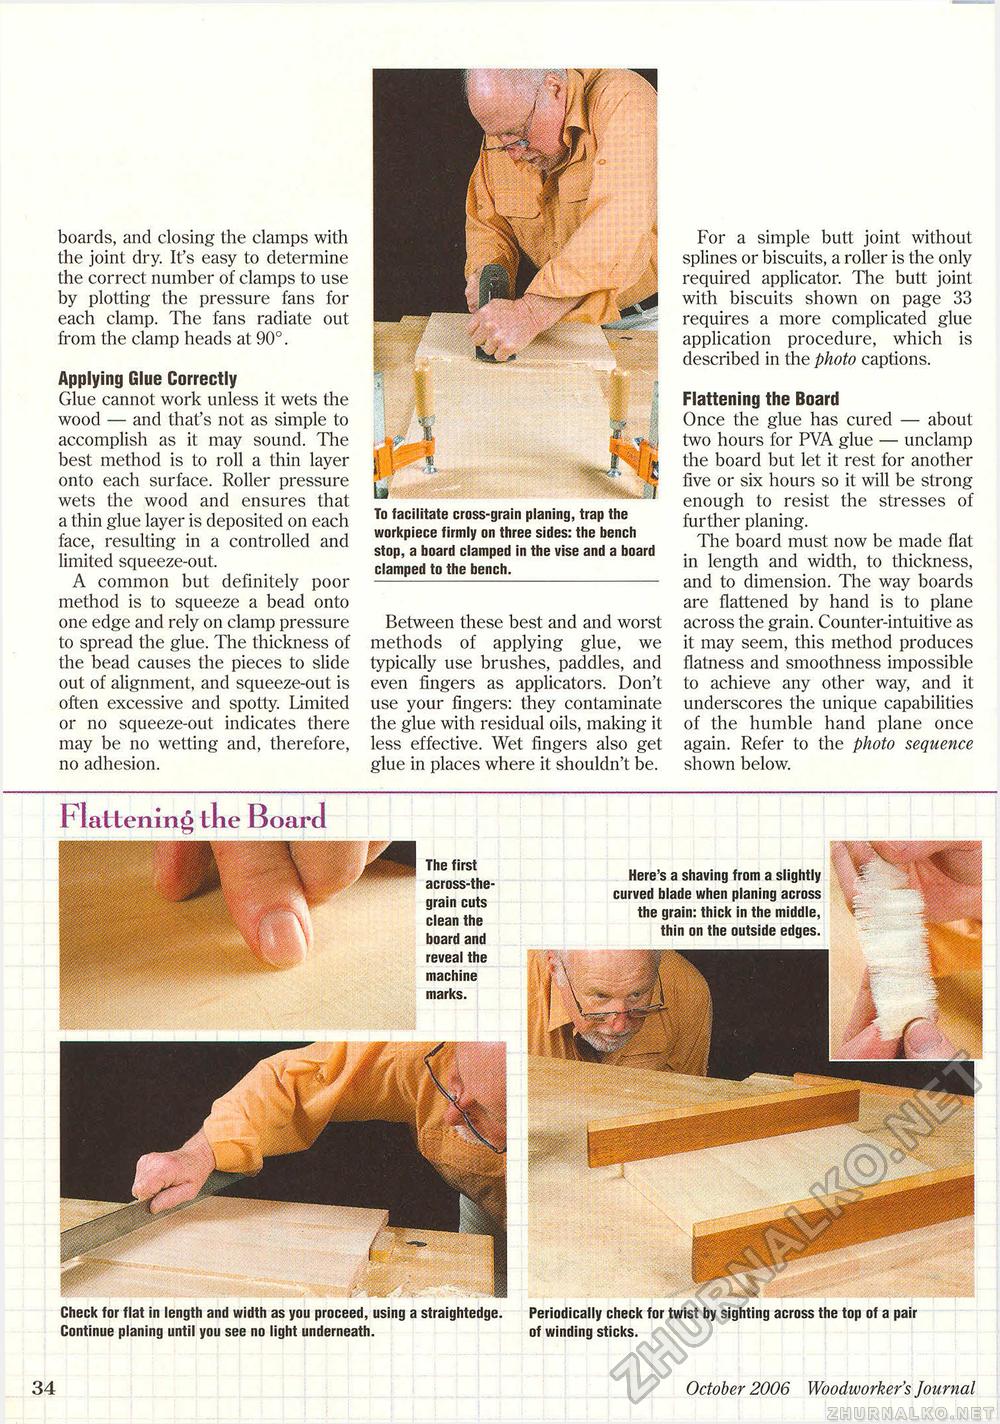
To facilitate cross-grain planing, trap the workpiece firmly on three sides: the bench stop, a board clamped in the vise and a board clamped to the bench. boards, and closing the clamps with the joint dry. It's easy to determine the correct number of clamps to use by plotting the pressure fans for each clamp. The fans radiate out from the clamp heads at 90°. Applying Glue Correctly Glue cannot work unless it wets the wood — and that's not as simple to accomplish as it may sound. The best method is to roll a thin layer onto each surface. Roller pressure wets the wood and ensures that a thin glue layer is deposited on each face, resulting in a controlled and limited squeeze-out. A common but definitely poor method is to squeeze a bead onto one edge and rely on clamp pressure to spread the glue. The thickness of the bead causes the pieces to slide out of alignment, and squeeze-out is often excessive and spotty. Limited or no squeeze-out indicates there may be no wetting and, therefore, no adhesion. Between these best and and worst methods of applying glue, we typically use brushes, paddles, and even fingers as applicators. Don't use your fingers: they contaminate the glue with residual oils, making it less effective. Wet fingers also get glue in places where it shouldn't be. For a simple butt joint without splines or biscuits, a roller is the only required applicator. The butt joint with biscuits shown on page 33 requires a more complicated glue application procedure, which is described in the photo captions. Flattening the Board Once the glue has cured — about two hours for PVA glue — unclamp the board but let it rest for another five or six hours so it will be strong enough to resist the stresses of further planing. The board must now be made flat in length and width, to thickness, and to dimension. The way boards are flattened by hand is to plane across the grain. Counter-intuitive as it may seem, this method produces flatness and smoothness impossible to achieve any other way, and it underscores the unique capabilities of the humble hand plane once again. Refer to the photo sequence shown below. Here's a shaving from a slightly curved blade when planing across the grain: thick in the middle, thin on the outside edges. Periodically check for twist by sighting across the top of a pair of winding sticks. 34 October 2006 Woodivorker's Journal Flattening tke Board The first across-the grain cuts clean the board and reveal the machine marks. Check for flat in length Continue planing until you |


