Woodworker's Journal 2006-30-Winter, страница 49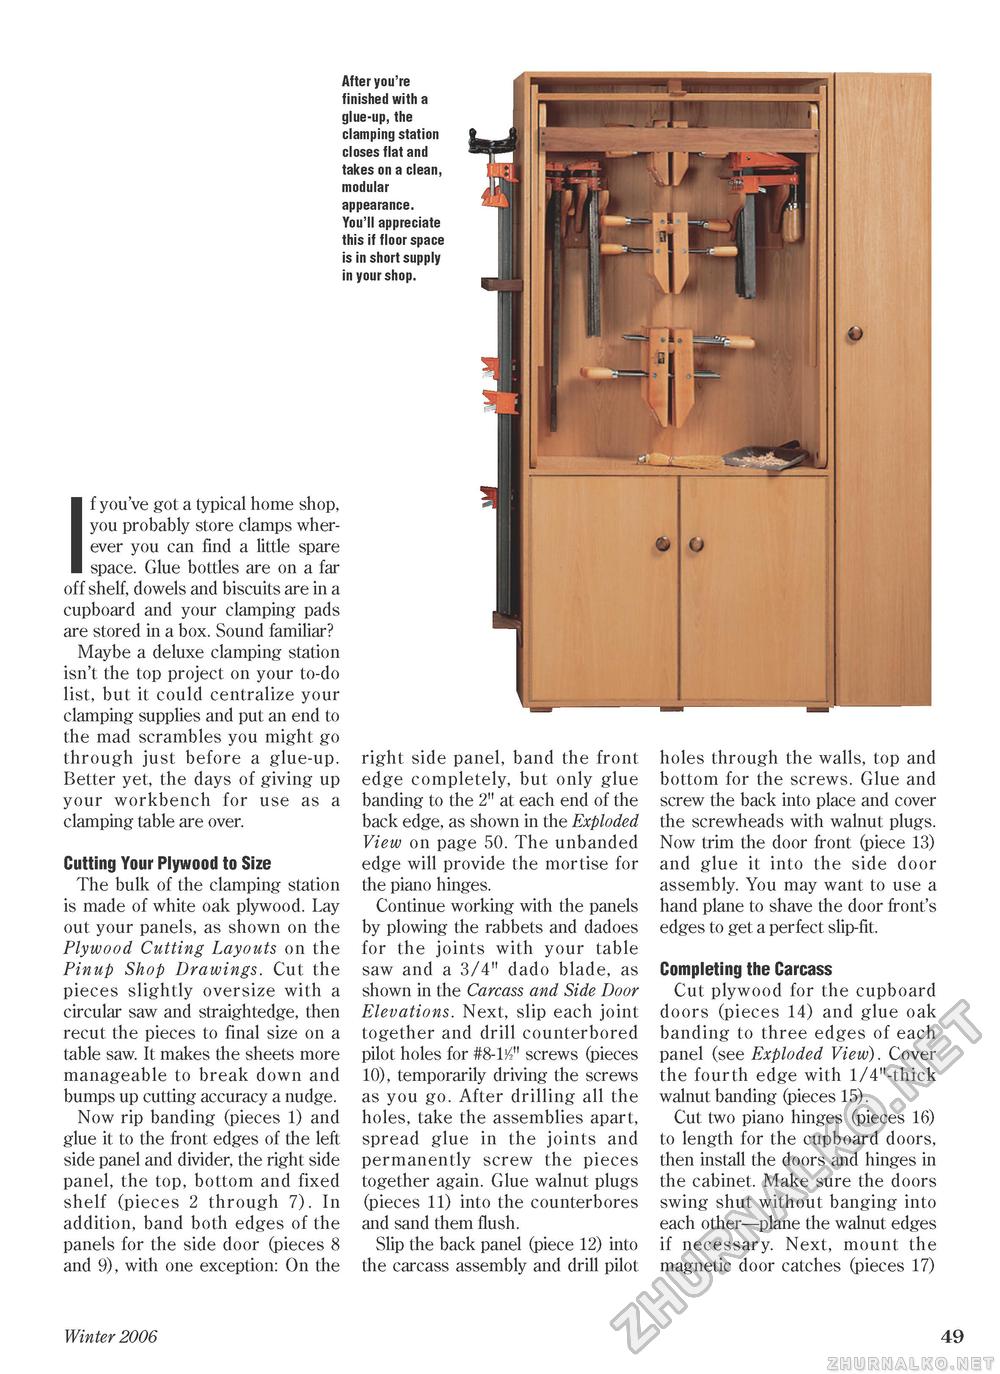
After you're finished with a glue-up, the clamping station closes flat and takes on a clean, modular appearance. You'll appreciate this if floor space is in short supply in your shop. If you've got a typical home shop, you probably store clamps wherever you can find a little spare space. Glue bottles are on a far off shelf, dowels and biscuits are in a cupboard and your clamping pads are stored in a box. Sound familiar? Maybe a deluxe clamping station isn't the top project on your to-do list, but it could centralize your clamping supplies and put an end to the mad scrambles you might go through just before a glue-up. Better yet, the days of giving up your workbench for use as a clamping table are over. Cutting Your Plywood to Size The bulk of the clamping station is made of white oak plywood. Lay out your panels, as shown on the Plywood Cutting Layouts on the Pinup Shop Drawings. Cut the pieces slightly oversize with a circular saw and straightedge, then recut the pieces to final size on a table saw. It makes the sheets more manageable to break down and bumps up cutting accuracy a nudge. Now rip banding (pieces 1) and glue it to the front edges of the left side panel and divider, the right side panel, the top, bottom and fixed shelf (pieces 2 through 7). In addition, band both edges of the panels for the side door (pieces 8 and 9), with one exception: On the right side panel, band the front edge completely, but only glue banding to the 2" at each end of the back edge, as shown in the Exploded View on page 50. The unbanded edge will provide the mortise for the piano hinges. Continue working with the panels by plowing the rabbets and dadoes for the joints with your table saw and a 3/4" dado blade, as shown in the Carcass and Side Door Elevations. Next, slip each joint together and drill counterbored pilot holes for #8-112" screws (pieces 10), temporarily driving the screws as you go. After drilling all the holes, take the assemblies apart, spread glue in the joints and permanently screw the pieces together again. Glue walnut plugs (pieces 11) into the counterbores and sand them flush. Slip the back panel (piece 12) into the carcass assembly and drill pilot holes through the walls, top and bottom for the screws. Glue and screw the back into place and cover the screwheads with walnut plugs. Now trim the door front (piece 13) and glue it into the side door assembly. You may want to use a hand plane to shave the door front's edges to get a perfect slip-fit. Completing the Carcass Cut plywood for the cupboard doors (pieces 14) and glue oak banding to three edges of each panel (see Exploded View). Cover the fourth edge with 1/4"-thick walnut banding (pieces 15). Cut two piano hinges (pieces 16) to length for the cupboard doors, then install the doors and hinges in the cabinet. Make sure the doors swing shut without banging into each other—plane the walnut edges if necessary. Next, mount the magnetic door catches (pieces 17) Winter 2006 49 |


