Woodworker's Journal 2006-30-Winter, страница 51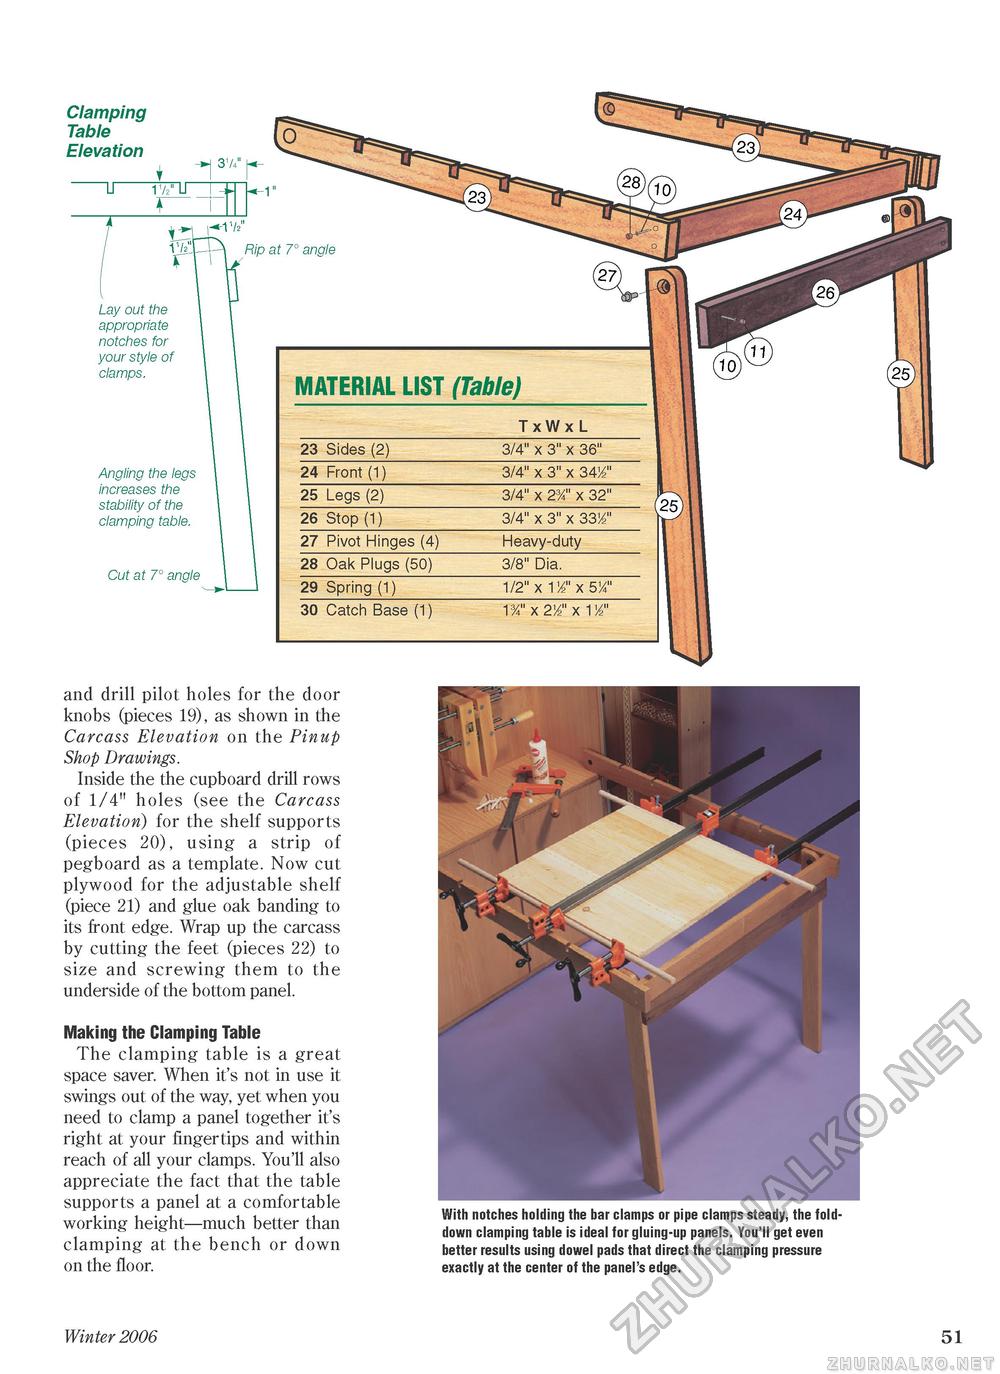
Clamping Table Elevation "TT 31/4" !¥IT Rip at 7° angle Lay out the appropriate notches for your style of clamps. Angling the legs increases the stability of the clamping table. Cut at 7° angle MATERIAL LIST (Table)
and drill pilot holes for the door knobs (pieces 19), as shown in the Carcass Elevation on the Pinup Shop Drawings. Inside the the cupboard drill rows of 1/4" holes (see the Carcass Elevation) for the shelf supports (pieces 20), using a strip of pegboard as a template. Now cut plywood for the adjustable shelf (piece 21) and glue oak banding to its front edge. Wrap up the carcass by cutting the feet (pieces 22) to size and screwing them to the underside of the bottom panel. Making the Clamping Table The clamping table is a great space saver. When it's not in use it swings out of the way, yet when you need to clamp a panel together it's right at your fingertips and within reach of all your clamps. You'll also appreciate the fact that the table supports a panel at a comfortable working height—much better than clamping at the bench or down on the floor. With notches holding the bar clamps or pipe clamps steady, the fold-down clamping table is ideal for gluing-up panels. You'll get even better results using dowel pads that direct the clamping pressure exactly at the center of the panel's edge. Winter 2006 51 |
||||||||||||||||||


