Woodworker's Journal 2006-30-Winter, страница 65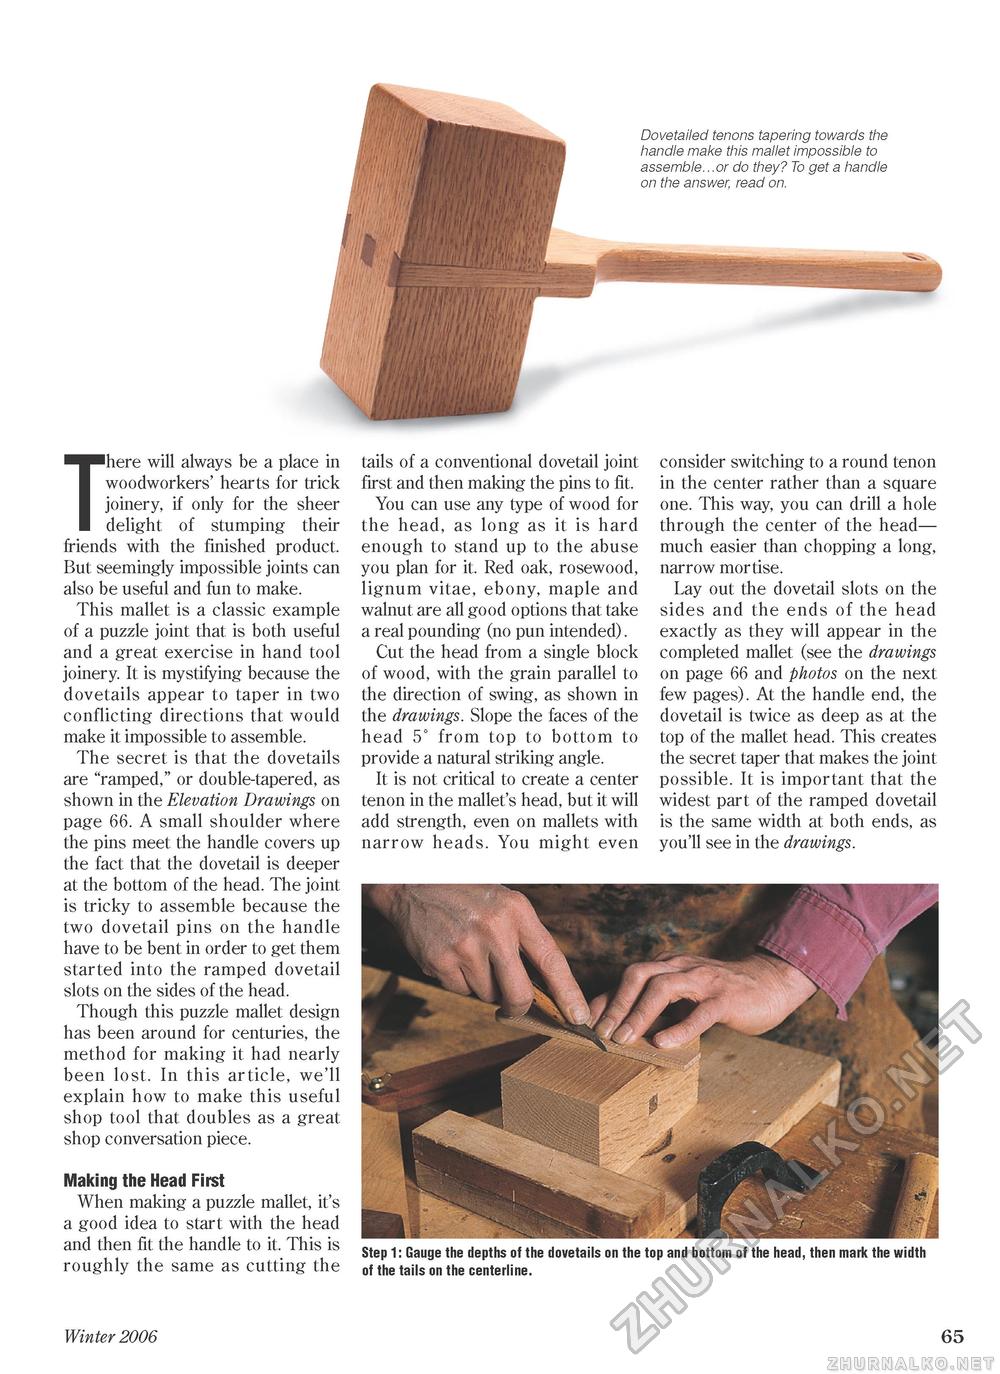
There will always be a place in woodworkers' hearts for trick joinery, if only for the sheer delight of stumping their friends with the finished product. But seemingly impossible joints can also be useful and fun to make. This mallet is a classic example of a puzzle joint that is both useful and a great exercise in hand tool joinery. It is mystifying because the dovetails appear to taper in two conflicting directions that would make it impossible to assemble. The secret is that the dovetails are "ramped," or double-tapered, as shown in the Elevation Drawings on page 66. A small shoulder where the pins meet the handle covers up the fact that the dovetail is deeper at the bottom of the head. The joint is tricky to assemble because the two dovetail pins on the handle have to be bent in order to get them started into the ramped dovetail slots on the sides of the head. Though this puzzle mallet design has been around for centuries, the method for making it had nearly been lost. In this article, we'll explain how to make this useful shop tool that doubles as a great shop conversation piece. Making the Head First When making a puzzle mallet, it's a good idea to start with the head and then fit the handle to it. This is roughly the same as cutting the tails of a conventional dovetail joint first and then making the pins to fit. You can use any type of wood for the head, as long as it is hard enough to stand up to the abuse you plan for it. Red oak, rosewood, lignum vitae, ebony, maple and walnut are all good options that take a real pounding (no pun intended). Cut the head from a single block of wood, with the grain parallel to the direction of swing, as shown in the drawings. Slope the faces of the head 5° from top to bottom to provide a natural striking angle. It is not critical to create a center tenon in the mallet's head, but it will add strength, even on mallets with narrow heads. You might even consider switching to a round tenon in the center rather than a square one. This way, you can drill a hole through the center of the head— much easier than chopping a long, narrow mortise. Lay out the dovetail slots on the sides and the ends of the head exactly as they will appear in the completed mallet (see the drawings on page 66 and photos on the next few pages). At the handle end, the dovetail is twice as deep as at the top of the mallet head. This creates the secret taper that makes the joint possible. It is important that the widest part of the ramped dovetail is the same width at both ends, as you'll see in the drawings. Step 1: Gauge the depths of the dovetails on the top and bottom of the head, then mark the width of the tails on the centerline. Winter 2006 65 |


