Woodworker's Journal 2006-30-Winter, страница 68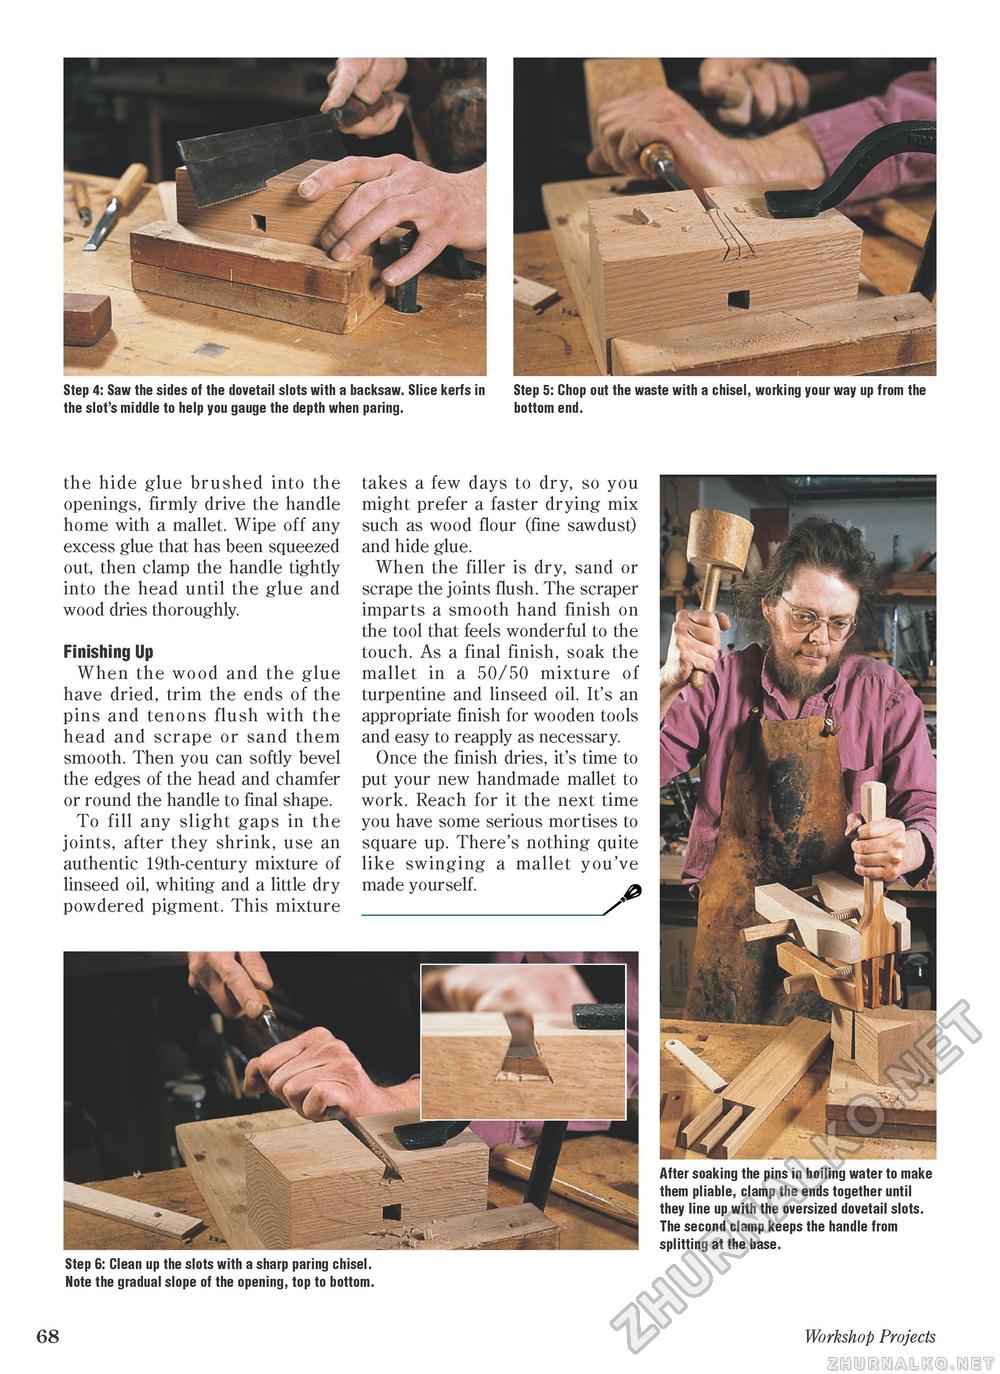
Step 4: Saw the sides of the dovetail slots with a backsaw. Slice kerfs in Step 5: Chop out the waste with a chisel, working your way up from the the slot's middle to help you gauge the depth when paring. bottom end. the hide glue brushed into the openings, firmly drive the handle home with a mallet. Wipe off any excess glue that has been squeezed out, then clamp the handle tightly into the head until the glue and wood dries thoroughly. Finishing Up When the wood and the glue have dried, trim the ends of the pins and tenons flush with the head and scrape or sand them smooth. Then you can softly bevel the edges of the head and chamfer or round the handle to final shape. To fill any slight gaps in the joints, after they shrink, use an authentic 19th-century mixture of linseed oil, whiting and a little dry powdered pigment. This mixture takes a few days to dry, so you might prefer a faster drying mix such as wood flour (fine sawdust) and hide glue. When the filler is dry, sand or scrape the joints flush. The scraper imparts a smooth hand finish on the tool that feels wonderful to the touch. As a final finish, soak the mallet in a 50/50 mixture of turpentine and linseed oil. It's an appropriate finish for wooden tools and easy to reapply as necessary. Once the finish dries, it's time to put your new handmade mallet to work. Reach for it the next time you have some serious mortises to square up. There's nothing quite like swinging a mallet you've made yourself. ^ After soaking the pins in boiling water to make them pliable, clamp the ends together until they line up with the oversized dovetail slots. The second clamp keeps the handle from splitting at the base. Step 6: Clean up the slots with a sharp paring chisel. Note the gradual slope of the opening, top to bottom. 68 Workshop Projects |


