Woodworker's Journal 2006-30-Winter, страница 67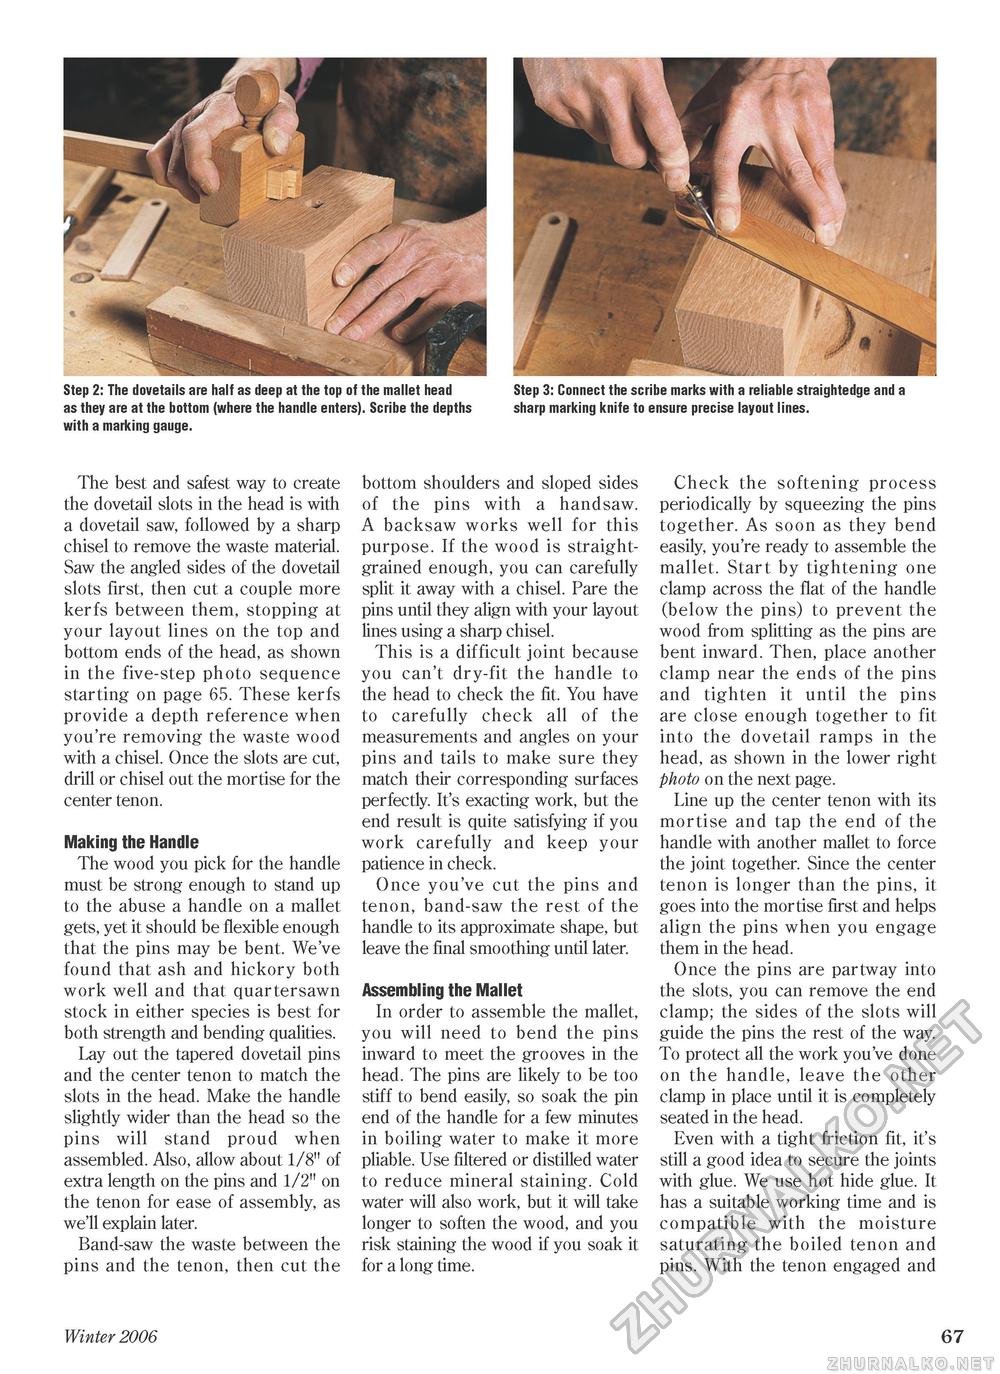
Step 2: The dovetails are half as deep at the top of the mallet head Step 3: Connect the scribe marks with a reliable straightedge and a as they are at the bottom (where the handle enters). Scribe the depths sharp marking knife to ensure precise layout lines. with a marking gauge. The best and safest way to create the dovetail slots in the head is with a dovetail saw, followed by a sharp chisel to remove the waste material. Saw the angled sides of the dovetail slots first, then cut a couple more kerfs between them, stopping at your layout lines on the top and bottom ends of the head, as shown in the five-step photo sequence starting on page 65. These kerfs provide a depth reference when you're removing the waste wood with a chisel. Once the slots are cut, drill or chisel out the mortise for the center tenon. Making the Handle The wood you pick for the handle must be strong enough to stand up to the abuse a handle on a mallet gets, yet it should be flexible enough that the pins may be bent. We've found that ash and hickory both work well and that quartersawn stock in either species is best for both strength and bending qualities. Lay out the tapered dovetail pins and the center tenon to match the slots in the head. Make the handle slightly wider than the head so the pins will stand proud when assembled. Also, allow about 1/8" of extra length on the pins and 1/2" on the tenon for ease of assembly, as we'll explain later. Band-saw the waste between the pins and the tenon, then cut the bottom shoulders and sloped sides of the pins with a handsaw. A backsaw works well for this purpose. If the wood is straight-grained enough, you can carefully split it away with a chisel. Pare the pins until they align with your layout lines using a sharp chisel. This is a difficult joint because you can't dry-fit the handle to the head to check the fit. You have to carefully check all of the measurements and angles on your pins and tails to make sure they match their corresponding surfaces perfectly. It's exacting work, but the end result is quite satisfying if you work carefully and keep your patience in check. Once you've cut the pins and tenon, band-saw the rest of the handle to its approximate shape, but leave the final smoothing until later. Assembling the Mallet In order to assemble the mallet, you will need to bend the pins inward to meet the grooves in the head. The pins are likely to be too stiff to bend easily, so soak the pin end of the handle for a few minutes in boiling water to make it more pliable. Use filtered or distilled water to reduce mineral staining. Cold water will also work, but it will take longer to soften the wood, and you risk staining the wood if you soak it for a long time. Check the softening process periodically by squeezing the pins together. As soon as they bend easily, you're ready to assemble the mallet. Start by tightening one clamp across the flat of the handle (below the pins) to prevent the wood from splitting as the pins are bent inward. Then, place another clamp near the ends of the pins and tighten it until the pins are close enough together to fit into the dovetail ramps in the head, as shown in the lower right photo on the next page. Line up the center tenon with its mortise and tap the end of the handle with another mallet to force the joint together. Since the center tenon is longer than the pins, it goes into the mortise first and helps align the pins when you engage them in the head. Once the pins are partway into the slots, you can remove the end clamp; the sides of the slots will guide the pins the rest of the way. To protect all the work you've done on the handle, leave the other clamp in place until it is completely seated in the head. Even with a tight friction fit, it's still a good idea to secure the joints with glue. We use hot hide glue. It has a suitable working time and is compatible with the moisture saturating the boiled tenon and pins. With the tenon engaged and Winter 2006 67 |


