Woodworker's Journal 2006-30-Winter, страница 78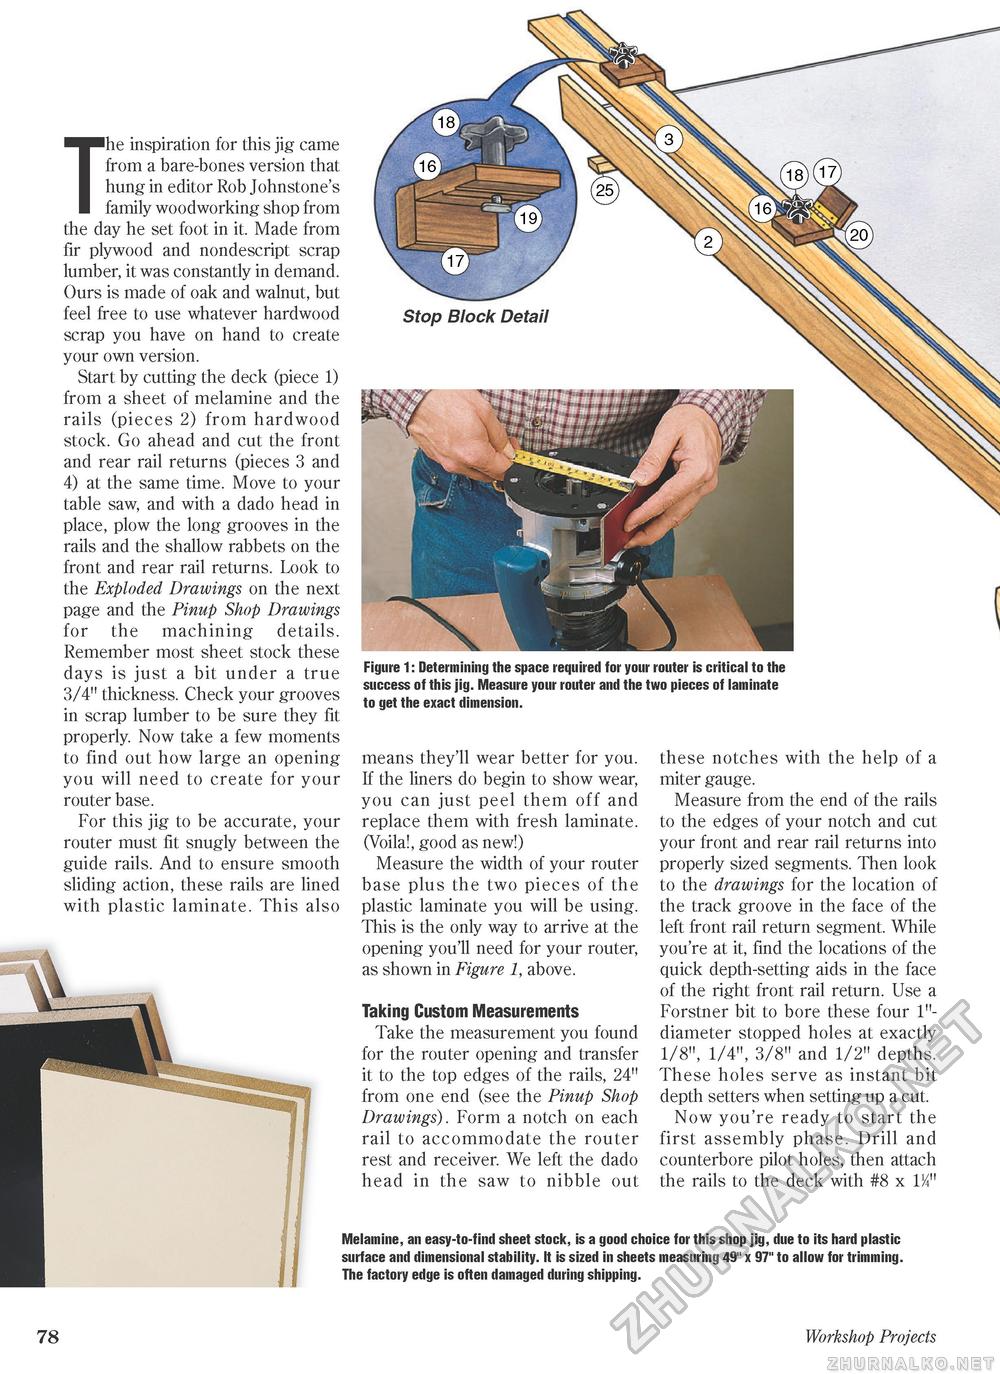
The inspiration for this jig came from a bare-bones version that hung in editor Rob Johnstone's family woodworking shop from the day he set foot in it. Made from fir plywood and nondescript scrap lumber, it was constantly in demand. Ours is made of oak and walnut, but feel free to use whatever hardwood scrap you have on hand to create your own version. Start by cutting the deck (piece 1) from a sheet of melamine and the rails (pieces 2) from hardwood stock. Go ahead and cut the front and rear rail returns (pieces 3 and 4) at the same time. Move to your table saw, and with a dado head in place, plow the long grooves in the rails and the shallow rabbets on the front and rear rail returns. Look to the Exploded Drawings on the next page and the Pinup Shop Drawings for the machining details. Remember most sheet stock these days is just a bit under a true 3/4" thickness. Check your grooves in scrap lumber to be sure they fit properly. Now take a few moments to find out how large an opening you will need to create for your router base. For this jig to be accurate, your router must fit snugly between the guide rails. And to ensure smooth sliding action, these rails are lined with plastic laminate. This also Figure 1: Determining the space required for your router is critical to the success of this jig. Measure your router and the two pieces of laminate to get the exact dimension. means they'll wear better for you. If the liners do begin to show wear, you can just peel them off and replace them with fresh laminate. (Voila!, good as new!) Measure the width of your router base plus the two pieces of the plastic laminate you will be using. This is the only way to arrive at the opening you'll need for your router, as shown in Figure 1, above. Taking Custom Measurements Take the measurement you found for the router opening and transfer it to the top edges of the rails, 24" from one end (see the Pinup Shop Drawings). Form a notch on each rail to accommodate the router rest and receiver. We left the dado head in the saw to nibble out these notches with the help of a miter gauge. Measure from the end of the rails to the edges of your notch and cut your front and rear rail returns into properly sized segments. Then look to the drawings for the location of the track groove in the face of the left front rail return segment. While you're at it, find the locations of the quick depth-setting aids in the face of the right front rail return. Use a Forstner bit to bore these four 1"-diameter stopped holes at exactly 1/8", 1/4", 3/8" and 1/2" depths. These holes serve as instant bit depth setters when setting up a cut. Now you're ready to start the first assembly phase. Drill and counterbore pilot holes, then attach the rails to the deck with #8 x 1J4" Melamine, an easy-to-find sheet stock, is a good choice for this shop jig, due to its hard plastic surface and dimensional stability. It is sized in sheets measuring 49" x 97" to allow for trimming. The factory edge is often damaged during shipping. 78 Workshop Projects |


