Woodworker's Journal 2009-33-1, страница 52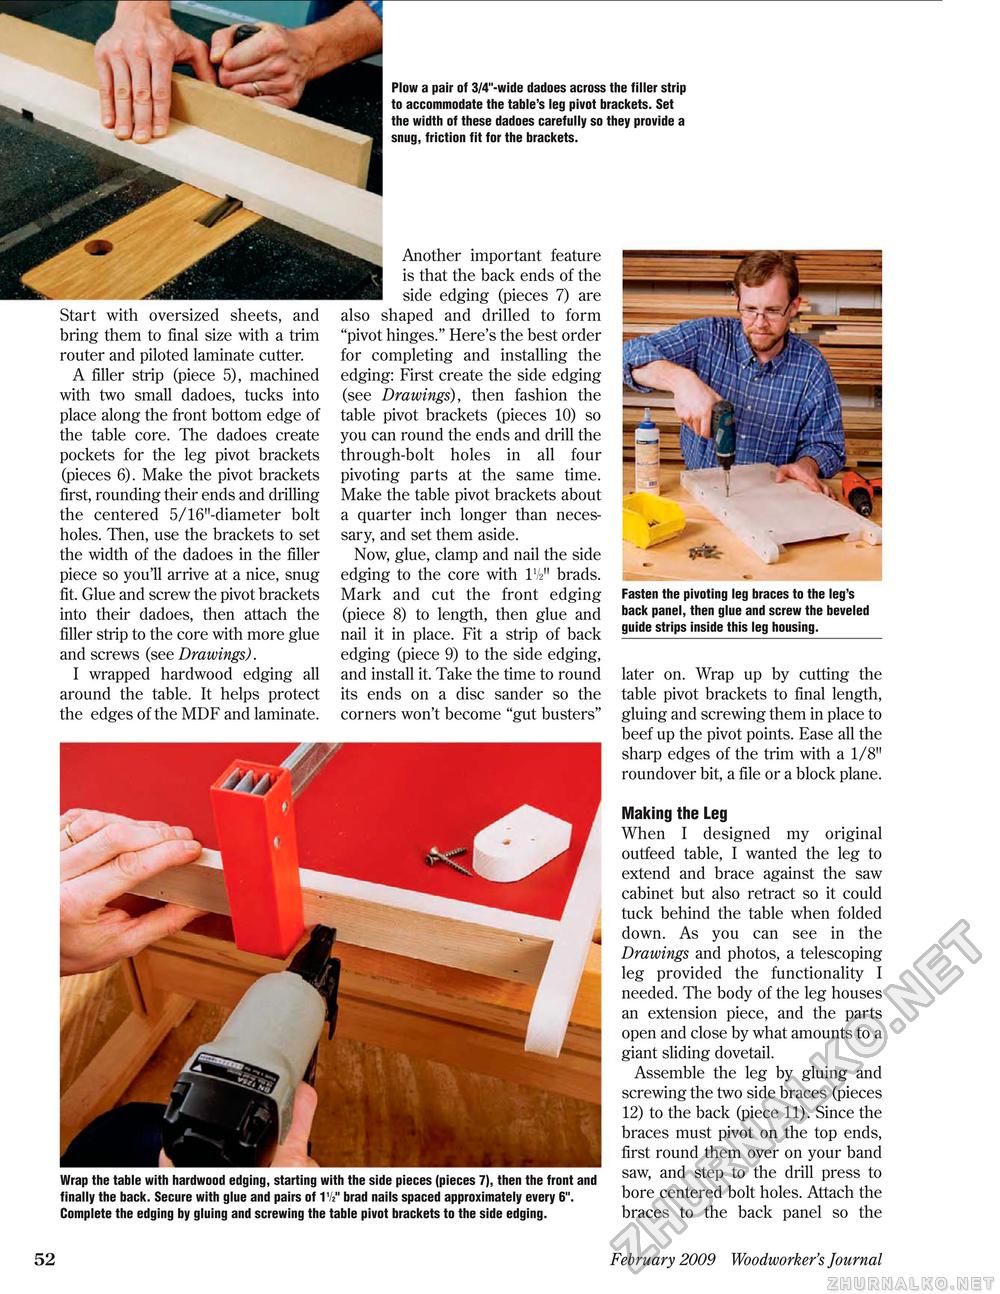
Fasten the pivoting leg braces to the leg's back panel, then glue and screw the beveled guide strips inside this leg housing. later on. Wrap up by cutting the table pivot brackets to final length, gluing and screwing them in place to beef up the pivot points. Ease all the sharp edges of the trim with a 1/8" roundover bit, a file or a block plane. Plow a pair of 3/4"-wide dadoes across the filler strip to accommodate the table's leg pivot brackets. Set the width of these dadoes carefully so they provide a snug, friction fit for the brackets. Start with oversized sheets, and bring them to final size with a trim router and piloted laminate cutter. A filler strip (piece 5), machined with two small dadoes, tucks into place along the front bottom edge of the table core. The dadoes create pockets for the leg pivot brackets (pieces 6). Make the pivot brackets first, rounding their ends and drilling the centered 5/16"-diameter bolt holes. Then, use the brackets to set the width of the dadoes in the filler piece so you'll arrive at a nice, snug fit. Glue and screw the pivot brackets into their dadoes, then attach the filler strip to the core with more glue and screws (see Drawings). I wrapped hardwood edging all around the table. It helps protect the edges of the MDF and laminate. Another important feature is that the back ends of the side edging (pieces 7) are also shaped and drilled to form "pivot hinges." Here's the best order for completing and installing the edging: First create the side edging (see Drawings), then fashion the table pivot brackets (pieces 10) so you can round the ends and drill the through-bolt holes in all four pivoting parts at the same time. Make the table pivot brackets about a quarter inch longer than necessary, and set them aside. Now, glue, clamp and nail the side edging to the core with IV211 brads. Mark and cut the front edging (piece 8) to length, then glue and nail it in place. Fit a strip of back edging (piece 9) to the side edging, and install it. Take the time to round its ends on a disc sander so the corners won't become "gut busters" Wrap the table with hardwood edging, starting with the side pieces (pieces 7), then the front and finally the back. Secure with glue and pairs of IV2" brad nails spaced approximately every 6". Complete the edging by gluing and screwing the table pivot brackets to the side edging. Making the Leg When I designed my original outfeed table, I wanted the leg to extend and brace against the saw cabinet but also retract so it could tuck behind the table when folded down. As you can see in the Drawings and photos, a telescoping leg provided the functionality I needed. The body of the leg houses an extension piece, and the parts open and close by what amounts to a giant sliding dovetail. Assemble the leg by gluing and screwing the two side braces (pieces 12) to the back (piece 11). Since the braces must pivot on the top ends, first round them over on your band saw, and step to the drill press to bore centered bolt holes. Attach the braces to the back panel so the 52 February 2009 Woodworker's Journal |


