Woodworker's Journal 2009-33-1, страница 54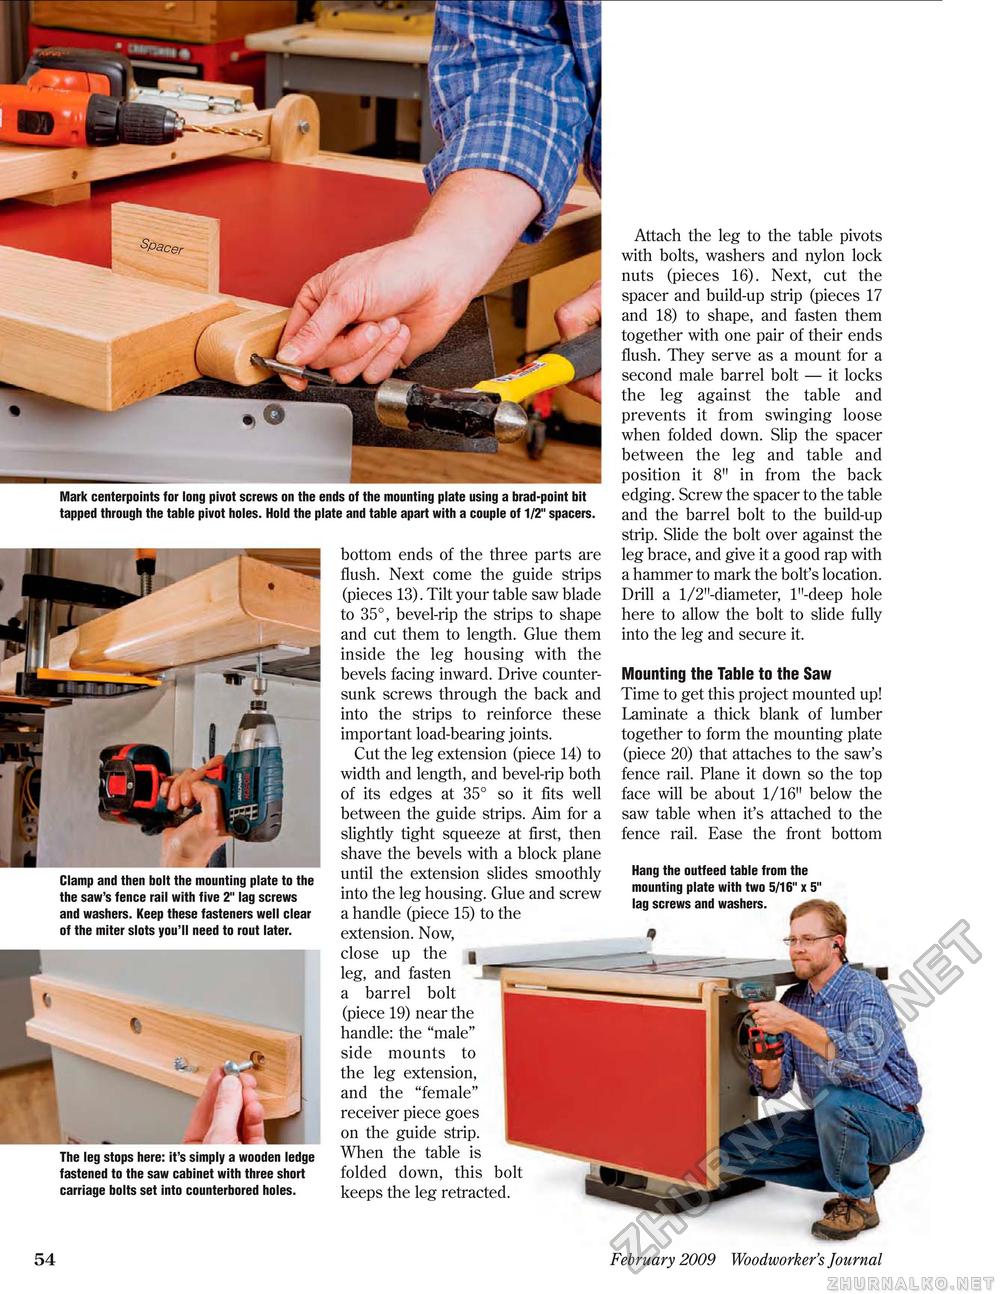
Mark centerpoints for long pivot screws on the ends of the mounting plate using a brad-point bit tapped through the table pivot holes. Hold the plate and table apart with a couple of 1/2" spacers. Clamp and then bolt the mounting plate to the the saw's fence rail with five 2" lag screws and washers. Keep these fasteners well clear of the miter slots you'll need to rout later. r The leg stops here: it's simply a wooden ledge fastened to the saw cabinet with three short carriage bolts set into counterbored holes. bottom ends of the three parts are flush. Next come the guide strips (pieces 13). Tilt your table saw blade to 35°, bevel-rip the strips to shape and cut them to length. Glue them inside the leg housing with the bevels facing inward. Drive countersunk screws through the back and into the strips to reinforce these important load-bearing joints. Cut the leg extension (piece 14) to width and length, and bevel-rip both of its edges at 35° so it fits well between the guide strips. Aim for a slightly tight squeeze at first, then shave the bevels with a block plane until the extension slides smoothly into the leg housing. Glue and screw a handle (piece 15) to the extension. Now, close up the | leg, and fasten a barrel bolt (piece 19) near the handle: the "male" side mounts to the leg extension, and the "female" receiver piece goes on the guide strip. When the table is folded down, this bolt keeps the leg retracted. Attach the leg to the table pivots with bolts, washers and nylon lock nuts (pieces 16). Next, cut the spacer and build-up strip (pieces 17 and 18) to shape, and fasten them together with one pair of their ends flush. They serve as a mount for a second male barrel bolt — it locks the leg against the table and prevents it from swinging loose when folded down. Slip the spacer between the leg and table and position it 8" in from the back edging. Screw the spacer to the table and the barrel bolt to the build-up strip. Slide the bolt over against the leg brace, and give it a good rap with a hammer to mark the bolt's location. Drill a l/2"-diameter, l"-deep hole here to allow the bolt to slide fully into the leg and secure it. Mounting the Table to the Saw Time to get this project mounted up! Laminate a thick blank of lumber together to form the mounting plate (piece 20) that attaches to the saw's fence rail. Plane it down so the top face will be about 1/16" below the saw table when it's attached to the fence rail. Ease the front bottom Hang the outfeed table from the mounting plate with two 5/16" x 5" lag screws and washers. 54 February 2009 Woodworker's Journal |


