Woodworker's Journal 2010-34-1, страница 16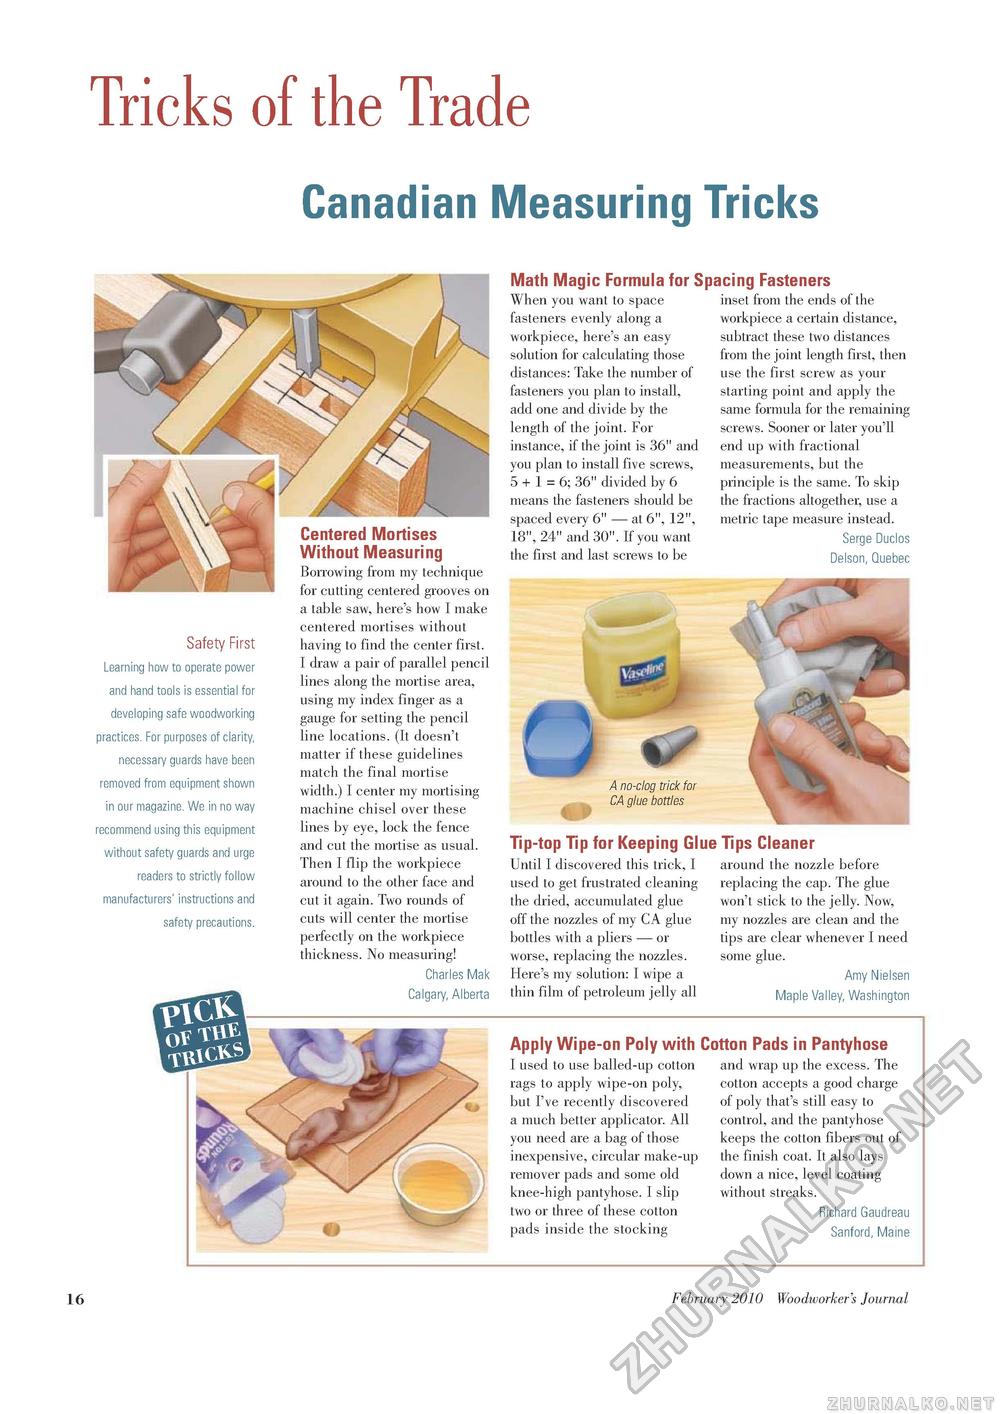
Tricks of the Trade Canadian Measuring Tricks Math Magic Formula for Spacing Fasteners Safety First Learning how to operate power and hand tools is essential for developing safe woodworking practices. For purposes of clarity, necessary guards have been removed from equipment shown in our magazine. We in no way recommend using this equipment without safety guards and urge readers to strictly follow manufacturers' instructions and safety precautions. Centered Mortises Without Measuring Borrowing from my technique for cutting centered grooves on a table saw, here's how I make centered mortises without having to find the center first. I draw a pair of parallel pencil lines along the mortise area, using my index finger as a gauge for setting the pencil line locations. (It doesn't matter if these guidelines match the final mortise width.) I center my mortising machine chisel over these lines by eye, lock the fence and cut the mortise as usual. Then I flip the workpiece around to the other face and cut it again. Two rounds of cuts will center the mortise perfectly on the workpiece thickness. No measuring! Charles Mak Calgary, Alberta When you want to space fasteners evenly along a workpiece, here's an easy solution for calculating those distances: Take the number of fasteners you plan to install, add one and divide by the length of the joint. For instance, if the joint is 36" and you plan to install five screws, 5 + 1 = 6; 36" divided by 6 means the fasteners should be spaced every 6" — at 6", 12", 18", 24" and 30". If you want the first and last screws to be inset from the ends of the workpiece a certain distance, subtract these two distances from the joint length first, then use the first screw as your starting point and apply the same formula for the remaining screws. Sooner or later you'll end up with fractional measurements, but the principle is the same. To skip the fractions altogether, use a metric tape measure instead. Serge Duclos Delson, Quebec 0 » A no-clog trick for CA glue bottles Tip-top Tip for Keeping Glue Until I discovered this trick, I used to get frustrated cleaning the dried, accumulated glue off the nozzles of my CA glue bottles with a pliers — or worse, replacing the nozzles. Here's my solution: I wipe a thin film of petroleum jelly all Tips Cleaner around the nozzle before replacing the cap. The glue won't stick to the jelly. Now, my nozzles are clean and the tips are clear whenever I need some glue. Amy Nielsen Maple Valley, Washington Apply Wipe-on Poly with I used to use balled-up cotton rags to apply wipe-on poly, but I've recently discovered a much better applicator. All you need are a bag of those inexpensive, circular make-up remover pads and some old knee-high pantyhose. I slip two or three of these cotton pads inside the stocking Cotton Pads in Pantyhose and wrap up the excess. The cotton accepts a good charge of poly that's still easy to control, and the pantyhose keeps the cotton fibers out of the finish coat. It also lays down a nice, level coating without streaks. Richard Gaudreau Sanford, Maine 16 February 2010 Woodworker's Journal |


