Woodworker's Journal 2010-34-1, страница 29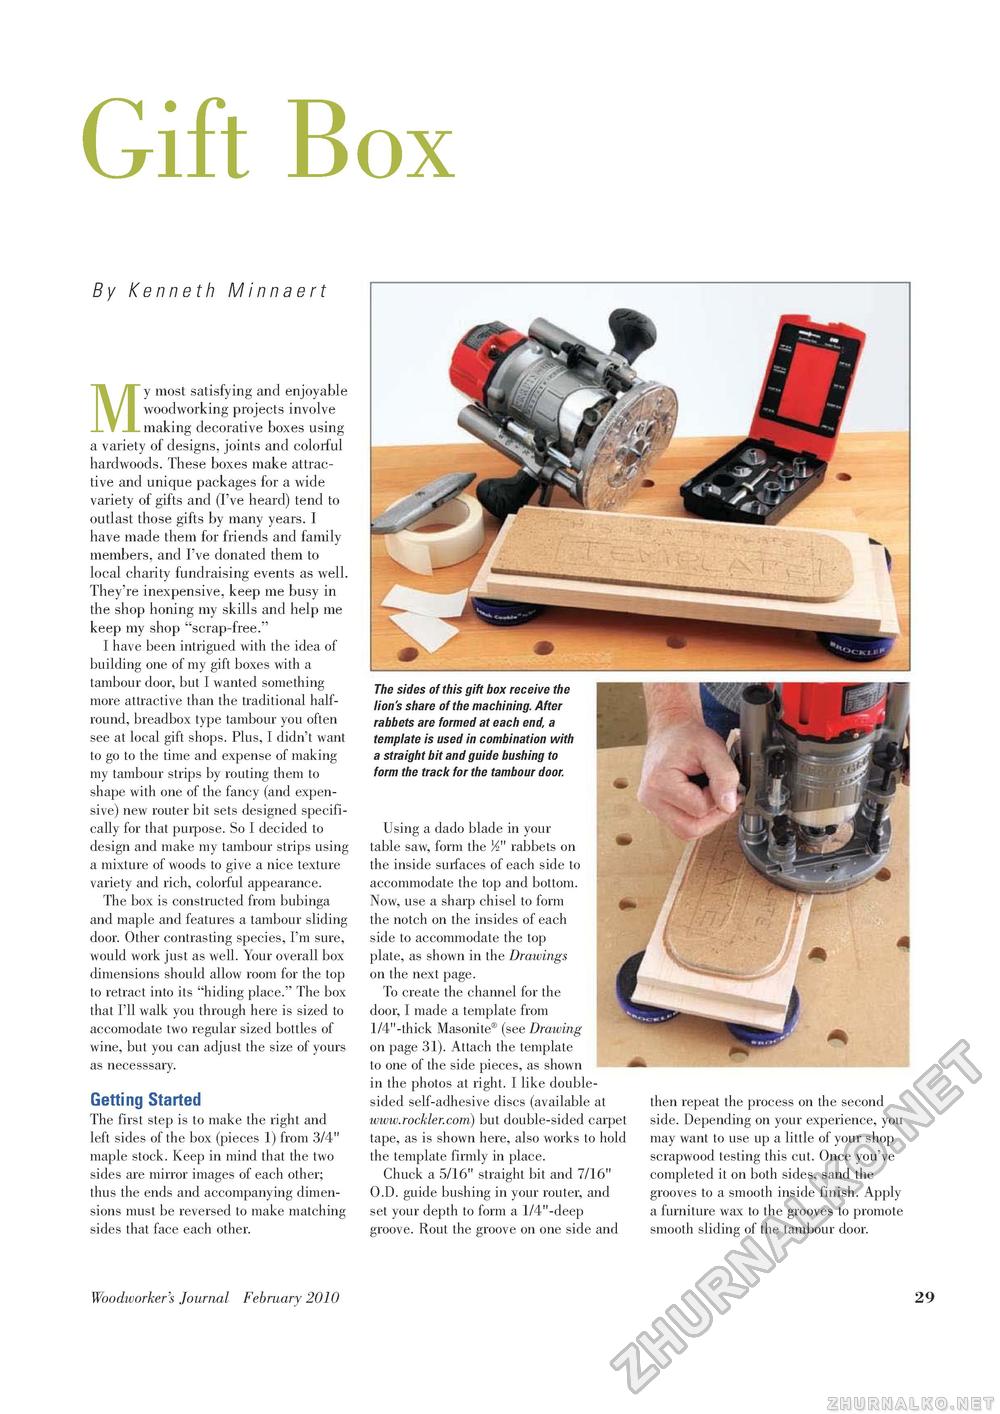
Gift BoxBy Kenneth M i nna ert M y most satisfying and enjoyable woodworking projects involve making decorative boxes using a variety of designs, joints and colorful hardwoods. These boxes make attractive and unique packages for a wide variety of gifts and (I've heard) tend to outlast those gifts by many years. I have made them for friends and family members, and I've donated them to local charity fundraising events as well. They're inexpensive, keep me busy in the shop honing my skills and help me keep my shop "scrap-free." I have been intrigued with the idea of building one of my gift boxes with a tambour door, but I wanted something more attractive than the traditional half-round, breadbox type tambour you often see at local gift shops. Plus, I didn't want to go to the time and expense of making my tambour strips by routing them to shape with one of the fancy (and expensive) new router bit sets designed specifically for that purpose. So I decided to design and make my tambour strips using a mixture of woods to give a nice texture variety and rich, colorful appearance. The box is constructed from bubinga and maple and features a tambour sliding door. Other contrasting species, I'm sure, would work just as well. Your overall box dimensions should allow room for the top to retract into its "hiding place." The box that I'll walk you through here is sized to accomodate two regular sized bottles of wine, but you can adjust the size of yours as necesssary. Getting Started The first step is to make the right and left sides of the box (pieces 1) from 3/4" maple stock. Keep in mind that the two sides are mirror images of each other; thus the ends and accompanying dimensions must be reversed to make matching sides that face each other. The sides of this gift box receive the lion's share of the machining. After rabbets are formed at each end, a template is used in combination with a straight bit and guide bushing to form the track for the tambour door. Using a dado blade in your table saw, form the M" rabbets on the inside surfaces of each side to accommodate the top and bottom. Now, use a sharp chisel to form the notch on the insides of each side to accommodate the top plate, as shown in the Drawings on the next page. To create the channel for the door, I made a template from 1/4"-thick Masonite® (see Drawing on page 31). Attach the template to one of the side pieces, as shown in the photos at right. I like double-sided self-adhesive discs (available at www.rockler.com) but double-sided carpet tape, as is shown here, also works to hold the template firmly in place. Chuck a 5/16" straight bit and 7/16" O.D. guide bushing in your router, and set your depth to form a 1/4"-deep groove. Rout the groove on one side and then repeat the process on the second side. Depending on your experience, you may want to use up a little of your shop scrapwood testing this cut. Once you've completed it on both sides, sand the grooves to a smooth inside finish. Apply a furniture wax to the grooves to promote smooth sliding of the tambour door. Woodworker's Journal Ferbruary 2010 29 |


