Woodworker's Journal 2010-34-1, страница 32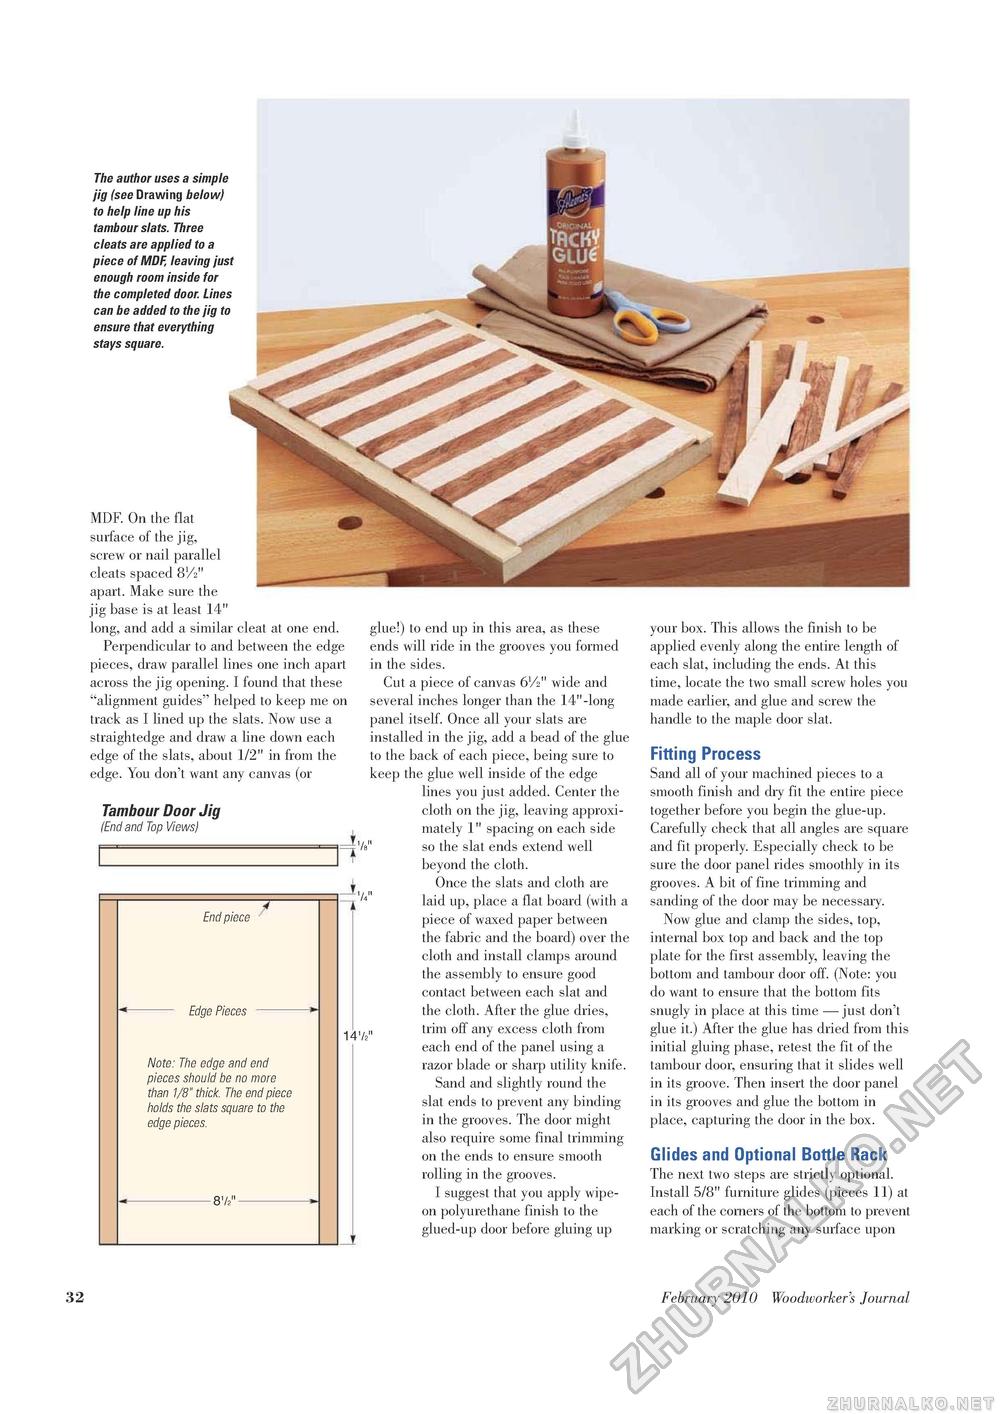
The author uses a simple jig (see Drawing below) to help line up his tambour slats. Three cleats are applied to a piece of MDF, leaving just enough room inside for the completed door. Lines can be added to the jig to ensure that everything stays square. MDF. On the flat surface of the jig, screw or nail parallel cleats spaced 8V2" apart. Make sure the jig base is at least 14" long, and add a similar cleat at one end. Perpendicular to and between the edge pieces, draw parallel lines one inch apart across the jig opening. I found that these "alignment guides" helped to keep me on track as I lined up the slats. Now use a straightedge and draw a line down each edge of the slats, about 1/2" in from the edge. You don't want any canvas (or Tambour Door Jig (End and Top Views) End piece Edge Pieces Note: The edge and end pieces should be no more than 1/8" thick The end piece holds the slats square to the edge pieces. 81/2" 1472 glue!) to end up in this area, as these ends will ride in the grooves you formed in the sides. Cut a piece of canvas 61/2" wide and several inches longer than the 14"-long panel itself. Once all your slats are installed in the jig, add a bead of the glue to the back of each piece, being sure to keep the glue well inside of the edge lines you just added. Center the cloth on the jig, leaving approximately 1" spacing on each side " so the slat ends extend well beyond the cloth. Once the slats and cloth are " laid up, place a flat board (with a piece of waxed paper between the fabric and the board) over the cloth and install clamps around the assembly to ensure good contact between each slat and the cloth. After the glue dries, trim off any excess cloth from each end of the panel using a razor blade or sharp utility knife. Sand and slightly round the slat ends to prevent any binding in the grooves. The door might also require some final trimming on the ends to ensure smooth rolling in the grooves. I suggest that you apply wipe-on polyurethane finish to the glued-up door before gluing up your box. This allows the finish to be applied evenly along the entire length of each slat, including the ends. At this time, locate the two small screw holes you made earlier, and glue and screw the handle to the maple door slat. Fitting Process Sand all of your machined pieces to a smooth finish and dry fit the entire piece together before you begin the glue-up. Carefully check that all angles are square and fit properly. Especially check to be sure the door panel rides smoothly in its grooves. A bit of fine trimming and sanding of the door may be necessary. Now glue and clamp the sides, top, internal box top and back and the top plate for the first assembly, leaving the bottom and tambour door off. (Note: you do want to ensure that the bottom fits snugly in place at this time — just don't glue it.) After the glue has dried from this initial gluing phase, retest the fit of the tambour door, ensuring that it slides well in its groove. Then insert the door panel in its grooves and glue the bottom in place, capturing the door in the box. Glides and Optional Bottle Rack The next two steps are strictly optional. Install 5/8" furniture glides (pieces 11) at each of the corners of the bottom to prevent marking or scratching any surface upon 1 32 February 2010 Woodworker's Journal |


