Woodworker's Journal 2010-34-1, страница 44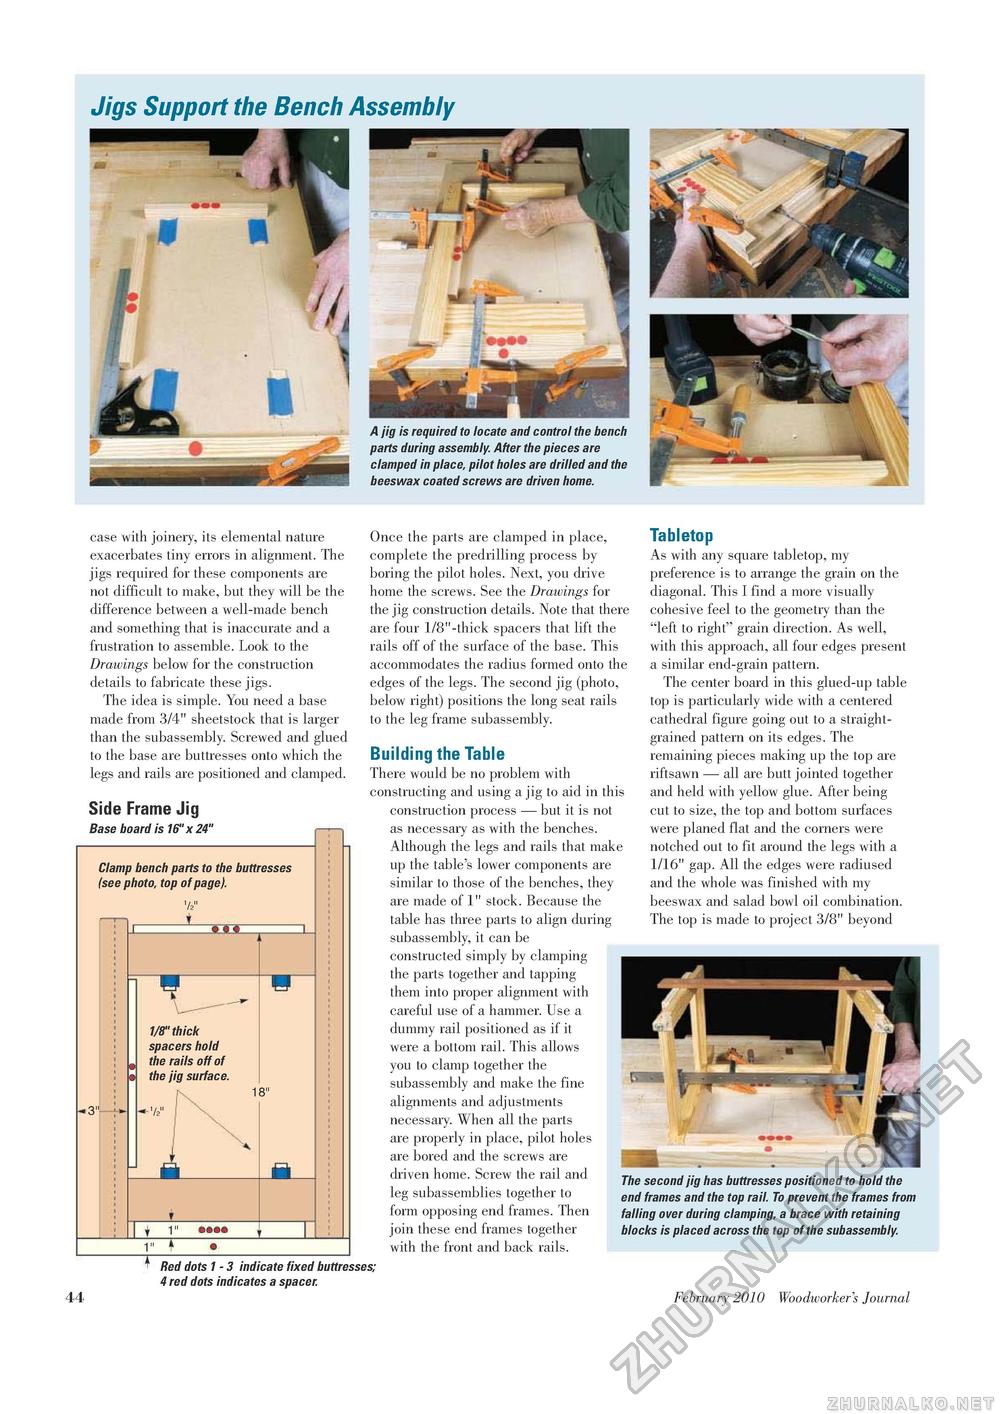
Jigs Support the Bench Assembly case with joinery, its elemental nature exacerbates tiny errors in alignment. The jigs required for these components are not difficult to make, but they will be the difference between a well-made bench and something that is inaccurate and a frustration to assemble. Look to the Drawings below for the construction details to fabricate these jigs. The idea is simple. You need a base made from 3/4" sheetstock that is larger than the subassembly. Screwed and glued to the base are buttresses onto which the legs and rails are positioned and clamped. Side Frame Jig Base board is 16" x 24" Clamp bench parts to the buttresses (see photo, top of page). 72" t 1/8" thick spacers hold the rails off of the jig surface. 72" Once the parts are clamped in place, complete the predrilling process by boring the pilot holes. Next, you drive home the screws. See the Drawings for the jig construction details. Note that there are four 1/8"-thick spacers that lift the rails off of the surface of the base. This accommodates the radius formed onto the edges of the legs. The second jig (photo, below right) positions the long seat rails to the leg frame subassembly. Building the Table There would be no problem with constructing and using a jig to aid in this construction process — but it is not as necessary as with the benches. Although the legs and rails that make up the table's lower components are similar to those of the benches, they are made of 1" stock. Because the table has three parts to align during subassembly, it can be constructed simply by clamping the parts together and tapping them into proper alignment with careful use of a hammer. Use a dummy rail positioned as if it were a bottom rail. This allows you to clamp together the subassembly and make the fine alignments and adjustments necessary. When all the parts are properly in place, pilot holes are bored and the screws are driven home. Screw the rail and leg subassemblies together to form opposing end frames. Then join these end frames together with the front and back rails. Tabletop As with any square tabletop, my preference is to arrange the grain on the diagonal. This I find a more visually cohesive feel to the geometry than the "left to right" grain direction. As well, with this approach, all four edges present a similar end-grain pattern. The center board in this glued-up table top is particularly wide with a centered cathedral figure going out to a straight-grained pattern on its edges. The remaining pieces making up the top are riftsawn — all are butt jointed together and held with yellow glue. After being cut to size, the top and bottom surfaces were planed flat and the corners were notched out to fit around the legs with a 1/16" gap. All the edges were radiused and the whole was finished with my beeswax and salad bowl oil combination. The top is made to project 3/8" beyond 44 Red dots 1 - 3 indicate fixed buttresses; 4 red dots indicates a spacer. The second jig has buttresses positioned to hold the end frames and the top rail. To prevent the frames from falling over during clamping, a brace with retaining blocks is placed across the top of the subassembly. February 2010 Woodworker's Journal |


