Woodworker's Journal 2010-34-1, страница 42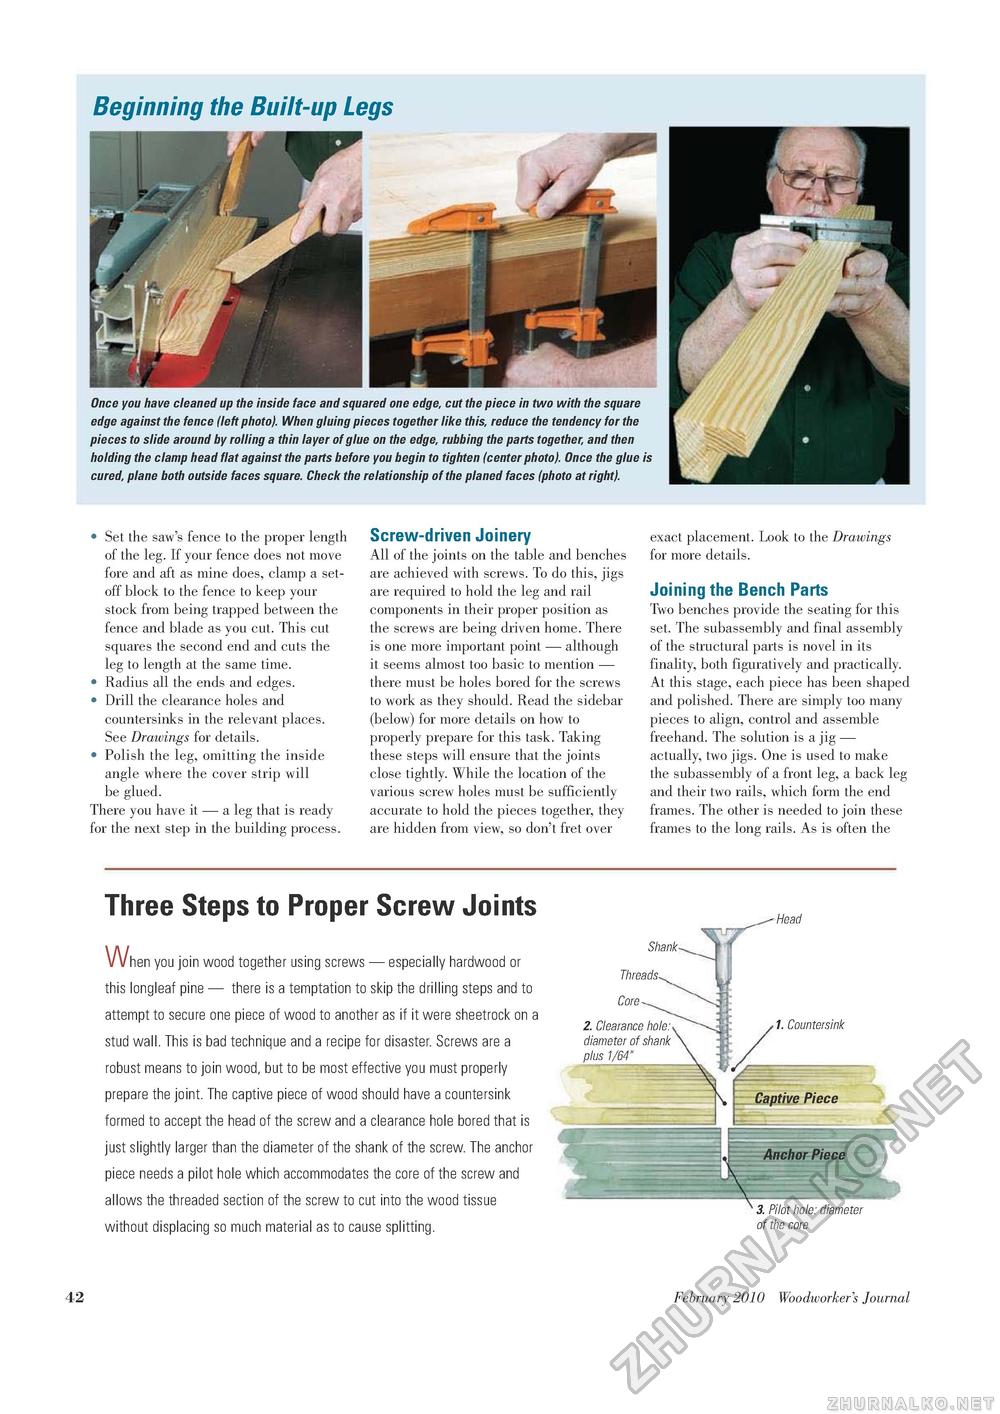
Beginning the Built-up Legs Once you have cleaned up the inside face and squared one edge, cut the piece in two with the square edge against the fence (left photo). When gluing pieces together like this, reduce the tendency for the pieces to slide around by rolling a thin layer of glue on the edge, rubbing the parts together, and then holding the clamp head flat against the parts before you begin to tighten (center photo). Once the glue is cured, plane both outside faces square. Check the relationship of the planed faces (photo at right). • Set the saw's fence to the proper length of the leg. If your fence does not move fore and aft as mine does, clamp a set-off block to the fence to keep your stock from being trapped between the fence and blade as you cut. This cut squares the second end and cuts the leg to length at the same time. • Radius all the ends and edges. • Drill the clearance holes and countersinks in the relevant places. See Drawings for details. • Polish the leg, omitting the inside angle where the cover strip will be glued. There you have it — a leg that is ready for the next step in the building process. Screw-driven Joinery All of the joints on the table and benches are achieved with screws. To do this, jigs are required to hold the leg and rail components in their proper position as the screws are being driven home. There is one more important point — although it seems almost too basic to mention — there must be holes bored for the screws to work as they should. Read the sidebar (below) for more details on how to properly prepare for this task. Taking these steps will ensure that the joints close tightly. While the location of the various screw holes must be sufficiently accurate to hold the pieces together, they are hidden from view, so don't fret over exact placement. Look to the Drawings for more details. Joining the Bench Parts Two benches provide the seating for this set. The subassembly and final assembly of the structural parts is novel in its finality, both figuratively and practically. At this stage, each piece has been shaped and polished. There are simply too many pieces to align, control and assemble freehand. The solution is a jig — actually, two jigs. One is used to make the subassembly of a front leg, a back leg and their two rails, which form the end frames. The other is needed to join these frames to the long rails. As is often the Three Steps to Proper Screw Joints ^Vhen you join wood together using screws — especially hardwood or this longleaf pine — there is a temptation to skip the drilling steps and to attempt to secure one piece of wood to another as if it were sheetrock on a stud wall. This is bad technique and a recipe for disaster. Screws are a robust means to join wood, but to be most effective you must properly prepare the joint. The captive piece of wood should have a countersink formed to accept the head of the screw and a clearance hole bored that is just slightly larger than the diameter of the shank of the screw. The anchor piece needs a pilot hole which accommodates the core of the screw and allows the threaded section of the screw to cut into the wood tissue without displacing so much material as to cause splitting. Head Threads Core 2. Clearance hole diameter of shank plus 1/64" 3. Pilot hole: diameter of the core 42 February 2010 Woodworker's Journal |


