Woodworker's Journal 2010-34-1, страница 39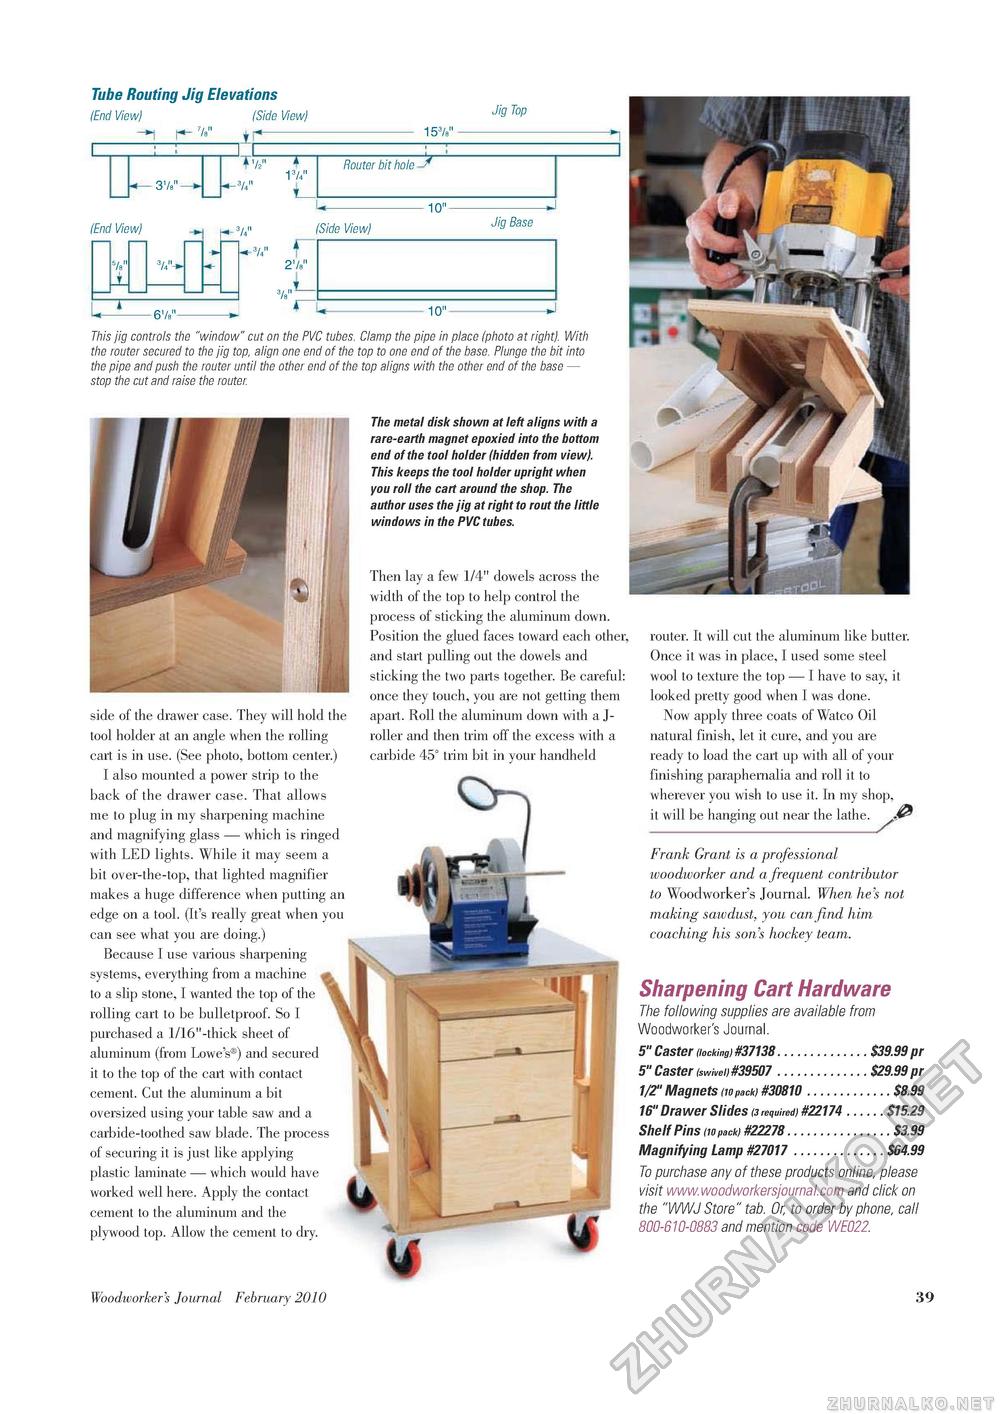
Tube Routing Jig Elevations (End View) (Side View) Jig Top t M '53/ (End View) 3'/s" 3/4" : '/2" 3/4" '3/4" Router bit hole ' '0" 3/4" (Side View) Jig Base T 3/4" 2'k" 4 6'/s" 1 G 10" J This jig controls the "window" cut on the PVC tubes. Clamp the pipe in place (photo at right). With the router secured to the jig top, align one end of the top to one end of the base. Plunge the bit into the pipe and push the router until the other end of the top aligns with the other end of the base — stop the cut and raise the router The metal disk shown at left aligns with a rare-earth magnet epoxied into the bottom end of the tool holder (hidden from view). This keeps the tool holder upright when you roll the cart around the shop. The author uses the jig at right to rout the little windows in the PVCtubes. Then lay a few 1/4" dowels across the width of the top to help control the process of sticking the aluminum down. Position the glued faces toward each other, and start pulling out the dowels and sticking the two parts together. Be careful: once they touch, you are not getting them apart. Roll the aluminum down with a J-roller and then trim off the excess with a carbide 45° trim bit in your handheld side of the drawer case. They will hold the tool holder at an angle when the rolling cart is in use. (See photo, bottom center.) I also mounted a power strip to the back of the drawer case. That allows me to plug in my sharpening machine and magnifying glass — which is ringed with LED lights. While it may seem a bit over-the-top, that lighted magnifier makes a huge difference when putting an edge on a tool. (It's really great when you can see what you are doing.) Because I use various sharpening systems, everything from a machine to a slip stone, I wanted the top of the rolling cart to be bulletproof. So I purchased a 1/16"-thick sheet of aluminum (from Lowe's®) and secured it to the top of the cart with contact cement. Cut the aluminum a bit oversized using your table saw and a carbide-toothed saw blade. The process of securing it is just like applying plastic laminate — which would have worked well here. Apply the contact cement to the aluminum and the plywood top. Allow the cement to dry. router. It will cut the aluminum like butter. Once it was in place, I used some steel wool to texture the top — I have to say, it looked pretty good when I was done. Now apply three coats of Watco Oil natural finish, let it cure, and you are ready to load the cart up with all of your finishing paraphernalia and roll it to wherever you wish to use it. In my shop, it will be hanging out near the lathe. Frank Grant is a professional woodworker and a frequent contributor to Woodworker's Journal. When he's not making sawdust, you can find him coaching his son's hockey team. Sharpening Cart Hardware The following supplies are available from Woodworker's Journal. 5" Caster (locking) #37138..............$39.99pr 5" Caster (swivel) #39507 ..............$29.99pr 1/2" Magnets (10 pack) #30810.............$8.99 16' Drawer Slides (3required)#22174......$15.29 Shelf Pins (10 pack) #22278................$3.99 Magnifying Lamp #27017 ..............$64.99 To purchase any of these products online, please visit www.woodworkersjournal.com and click on the "WWJ Store" tab. Or, to order by phone, call 800-610-0883 and mention code WE02;. Woodworker's Journal Ferbruary 2010 39 |


