Woodworker's Journal 2010-34-1, страница 36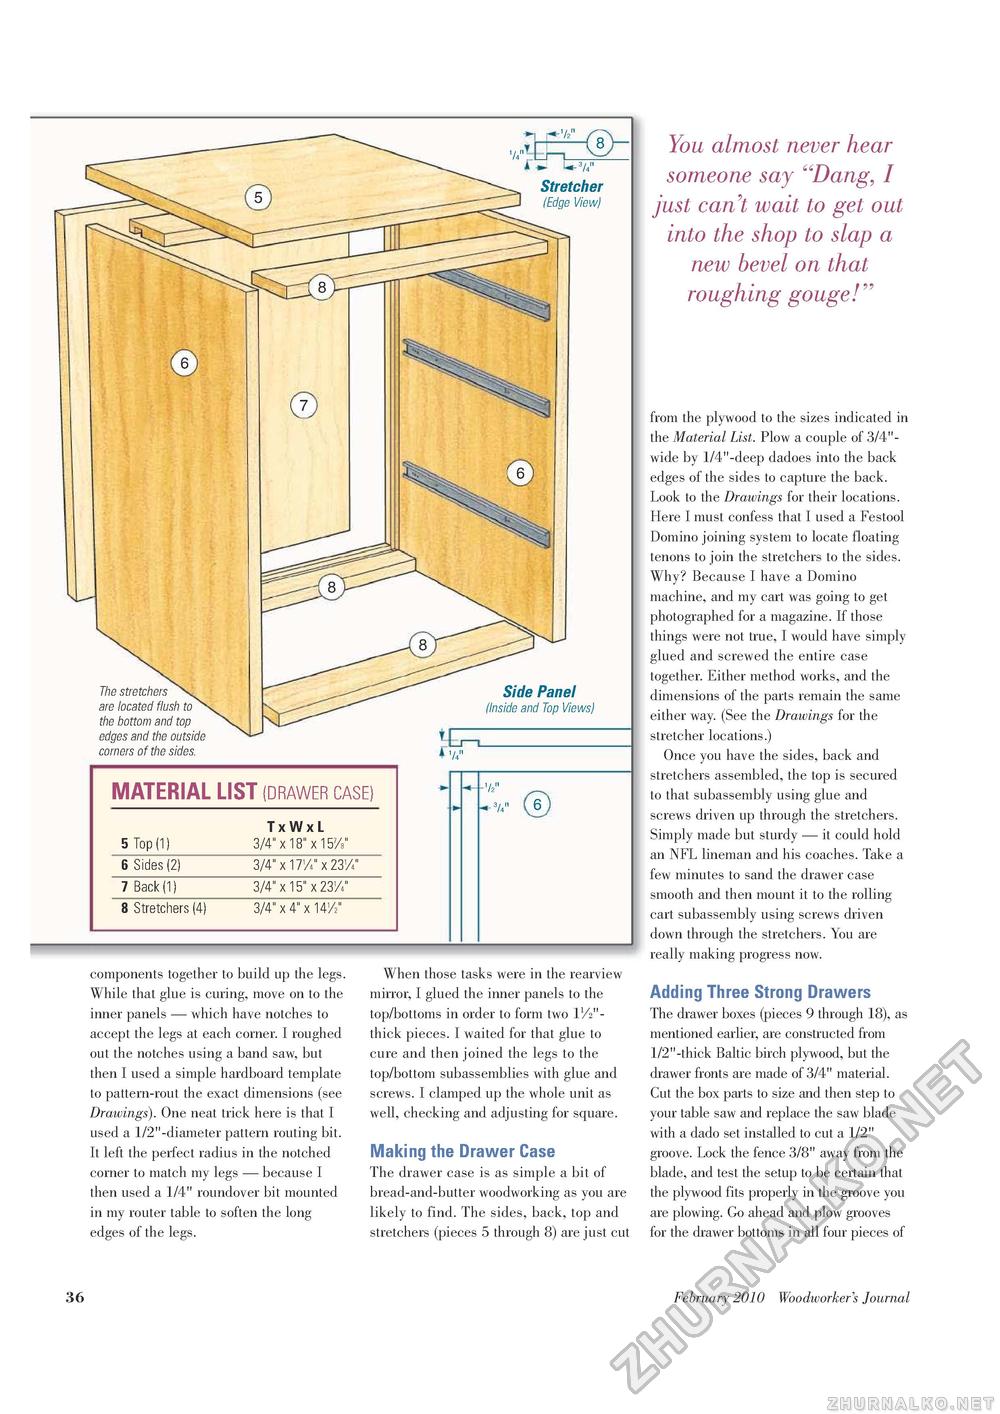
k*. U-3/4" 5: Stretcher (Edge View) The stretchers are located flush to the bottom and top edges and the outside corners of the sides. Side Panel (Inside and Top Views) ' 74"
-3/4" (V) 'A?" components together to build up the legs. While that glue is curing, move on to the inner panels — which have notches to accept the legs at each corner. I roughed out the notches using a band saw, but then I used a simple hardboard template to pattern-rout the exact dimensions (see Drawings). One neat trick here is that I used a 1/2"-diameter pattern routing bit. It left the perfect radius in the notched corner to match my legs — because I then used a 1/4" roundover bit mounted in my router table to soften the long edges of the legs. When those tasks were in the rearview mirror, I glued the inner panels to the top/bottoms in order to form two IV2"-thick pieces. I waited for that glue to cure and then joined the legs to the top/bottom subassemblies with glue and screws. I clamped up the whole unit as well, checking and adjusting for square. Making the Drawer Case The drawer case is as simple a bit of bread-and-butter woodworking as you are likely to find. The sides, back, top and stretchers (pieces 5 through 8) are just cut You almost never hear someone say "Dang, I just can't wait to get out into the shop to slap a new bevel on that roughing gouge!" from the plywood to the sizes indicated in the Material List. Plow a couple of 3/4"-wide by 1/4"-deep dadoes into the back edges of the sides to capture the back. Look to the Drawings for their locations. Here I must confess that I used a Festool Domino joining system to locate floating tenons to join the stretchers to the sides. Why? Because I have a Domino machine, and my cart was going to get photographed for a magazine. If those things were not true, I would have simply glued and screwed the entire case together. Either method works, and the dimensions of the parts remain the same either way. (See the Drawings for the stretcher locations.) Once you have the sides, back and stretchers assembled, the top is secured to that subassembly using glue and screws driven up through the stretchers. Simply made but sturdy — it could hold an NFL lineman and his coaches. Take a few minutes to sand the drawer case smooth and then mount it to the rolling cart subassembly using screws driven down through the stretchers. You are really making progress now. Adding Three Strong Drawers The drawer boxes (pieces 9 through 18), as mentioned earlier, are constructed from 1/2"-thick Baltic birch plywood, but the drawer fronts are made of 3/4" material. Cut the box parts to size and then step to your table saw and replace the saw blade with a dado set installed to cut a 1/2" groove. Lock the fence 3/8" away from the blade, and test the setup to be certain that the plywood fits properly in the groove you are plowing. Go ahead and plow grooves for the drawer bottoms in all four pieces of 36 February 2010 Woodworker's Journal |
||||||||||||


