Woodworker's Journal fall-2008, страница 45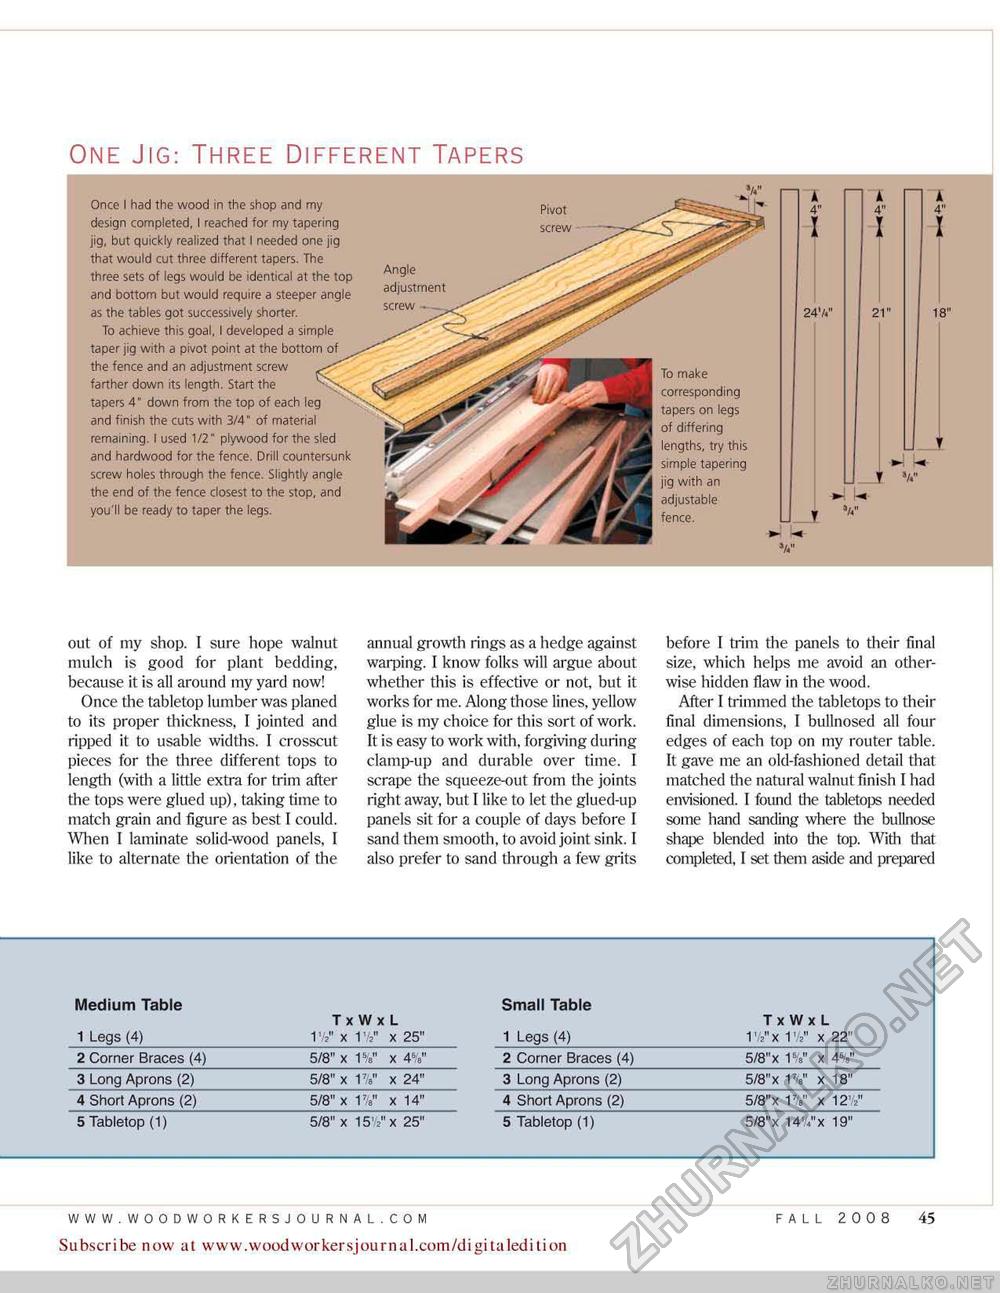
One Jig: Three Different Tapers To make corresponding tapers on tegs of differing lengths, try this simple tapering jig with an adjustable fence. Once 1 had the wood in the shop and my design completed, I reached for my tapering jig, but quickly realized that I needed one jig that would cut three different tapers. The three sets of legs would be identical at the top and bottom but would require a steeper angle as the tables got successively shorter. To achieve this goal, I developed a simple taper jig with a pivot point at the bottom of the fence and an adjustment screw farther down its length. Start the tapers 4" down from the top of each leg and finish the cuts with 3/4" of material remaining. I used 1/2" plywood for the sied and hardwood for the fence. Drill countersunk screw holes through the fence. Slightly angle the end of the fence closest to the stop, and you'll be ready to taper the legs. Angle adjustment screw Pivot screw out of my shop. [ sure hope walnut mulch is good for plant bedding, because it is all around my yard now! Once the tabletop lumber was planed to its proper thickness, I jointed and ripped it to usable widths. I crosscut pieces for the three different tops to length (with a little extra for trim after the tops were glued up), taking time to match grain and figure as best I could. When I laminate solid-wood panels, 1 like to alternate the orientation of the annual growth rings as a hedge against warping, I know folks will argue about whether this is effective or not, but it works for me. Along those lines, yellow glue is my choice for this sort of work. It is easy to work with, forgiving during clamp-up and durable over time. I scrape the squeeze-out from the joints right away, but I like to let the glued-up panels sit for a couple of days before I sand them smooth, to avoid joint sink. I also prefer to sand through a few grits before I trim the panels to their final size, which helps me avoid an otherwise hidden flaw in the wood. After I trimmed the tabletops to their final dimensions, f builnosed all four edges of each top on my router table. It gave me an old-fashioned detail that matched die natural walnut finish I had envisioned. T found die tabletop needed some hand sanding where the bullnose shape blended into the top. With that completed, I set them aside and prepared
Subscribe now at www.woodwoirkersjournal.com/digitaledition FALL 2008 45 |


