Woodworker's Journal fall-2008, страница 54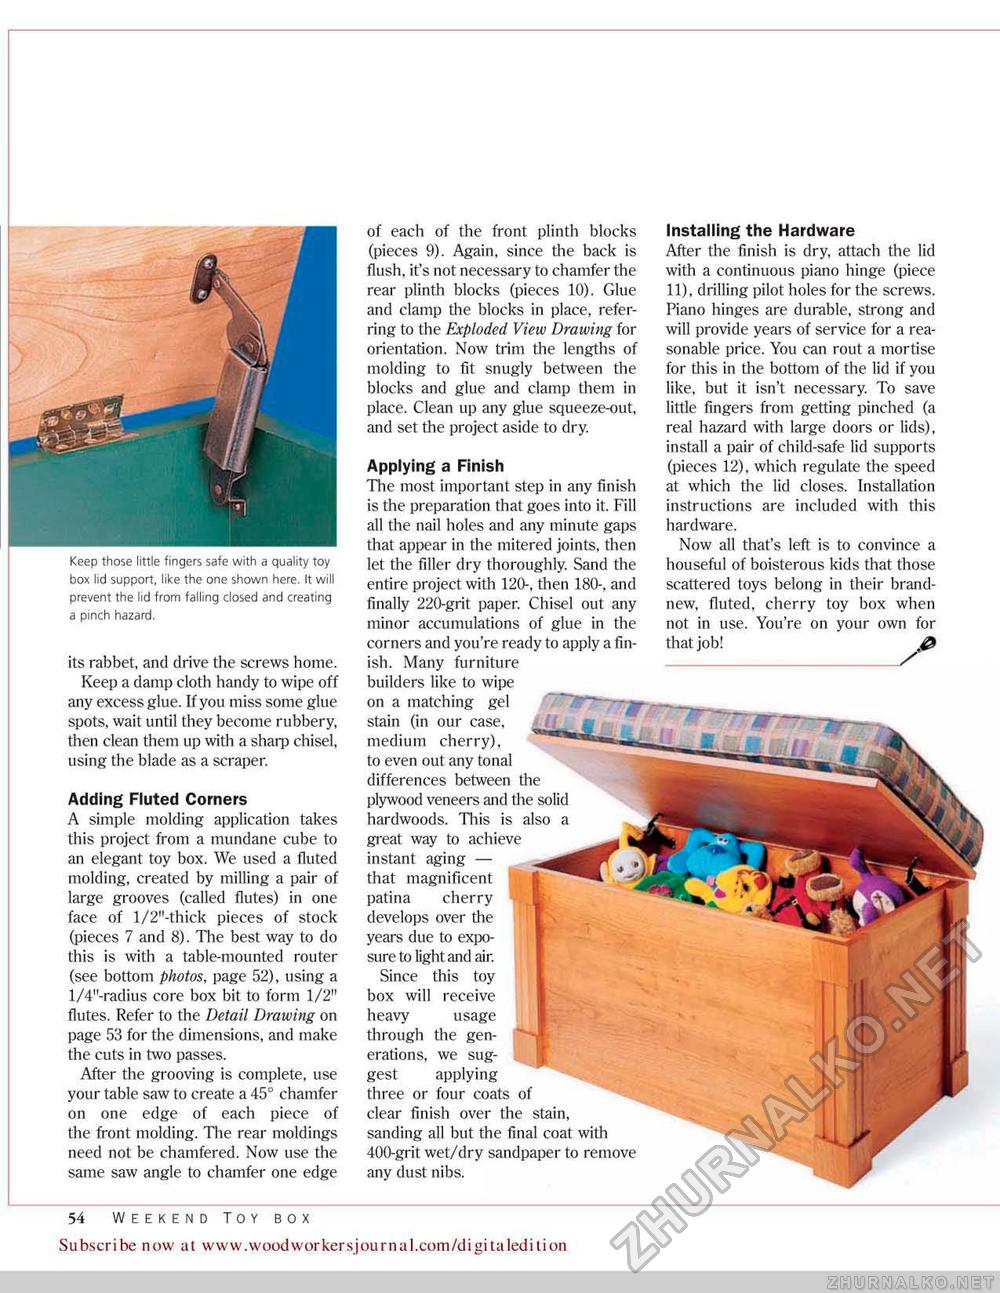
Keep those little fingers safe with a quality toy box lid support, like the one shown here. It will prevent the lid from falling closed and creating a pinch hazard. its rabbet, and drive the screws home. Keep a damp cloth handy to wipe off any excess glue. If you miss some glue spots, wait until they become rubbery, then clean them up with a sharp chisel, using the blade as a scraper. Adding Fluted Corners A simple molding application takes this project from a mundane cube to an elegant toy box. We used a fluted molding, created by milling a pair of large grooves (called flutes) in one face of l/2"-thick pieces of stock (pieces 7 and 8). The best way to do this is with a table-mounted router (see bottom photos, page 52), using a l/4"-radius core box bit to form 1/2" flutes. Refer to the Detail Drawing on page 53 for the dimensions, and make the cuts in two passes. After the grooving is complete, use your table saw to create a 45° chamfer on one edge of each piece of the front molding. The rear moldings need not be chamfered- Now use the same saw angle to chamfer one edge 54 ArtS & CrAFTS STYLE SiDE TABLE Subscribe now at www.woodworkersjournal.com/digitaledition of each of the front plinth blocks (pieces 9). Again, since the back is flush, it's not necessary to chamfer the rear plinth blocks (pieces 10). Glue and clamp the blocks in place, referring to the Exploded View Drawing for orientation. Now trim the lengths of molding to fit snugly between the blocks and glue and clamp them in place. Clean up any glue squeeze-out, and set the project aside to dry. Applying a Finish The most important step in any finish is the preparation that goes into it. Fill all the nail holes and any minute gaps that appear in the mitered joints, then let the filler dry thoroughly. Sand the entire project with 120, then 180-. and finally 220-grit paper. Chisel out any minor accumulations of glue in the corners and you're ready to apply a finish. Many furniture builders like to wipe on a matching gel stain (in our case, medium cherry), to even out any tonal differences between the plywood veneers and the solid hardwoods. This is also a great way to achieve instant aging — that magnificent patina cherry develops over the years due to exposure to light and air. Since this toy box will receive heavy usage through the generations, we suggest applying three or four coats of clear finish over the stain, sanding all but the final coat with 400-grit wet/dry sandpaper to remove any dust nibs. Installing the Hardware After the finish is dry, attach the lid with a continuous piano hinge (piece 11), drilling pilot holes for the screws. Piano hinges are durable, strong and will provide years of service for a reasonable price. You can rout a mortise for this in the bottom of the lid if you like, but it isn't necessary. To save little fingers from getting pinched (a real hazard with large doors or lids), install a pair of child-safe lid supports (pieces 12), which regulate the speed at which the lid closes. Installation instructions are included with this hardware. Now all that's left is to convince a houseful of boisterous kids that those scattered toys belong in their brand-new, fluted, cherry toy box when not in use. You're on your own for that job! p |


