Woodworker's Journal fall-2008, страница 52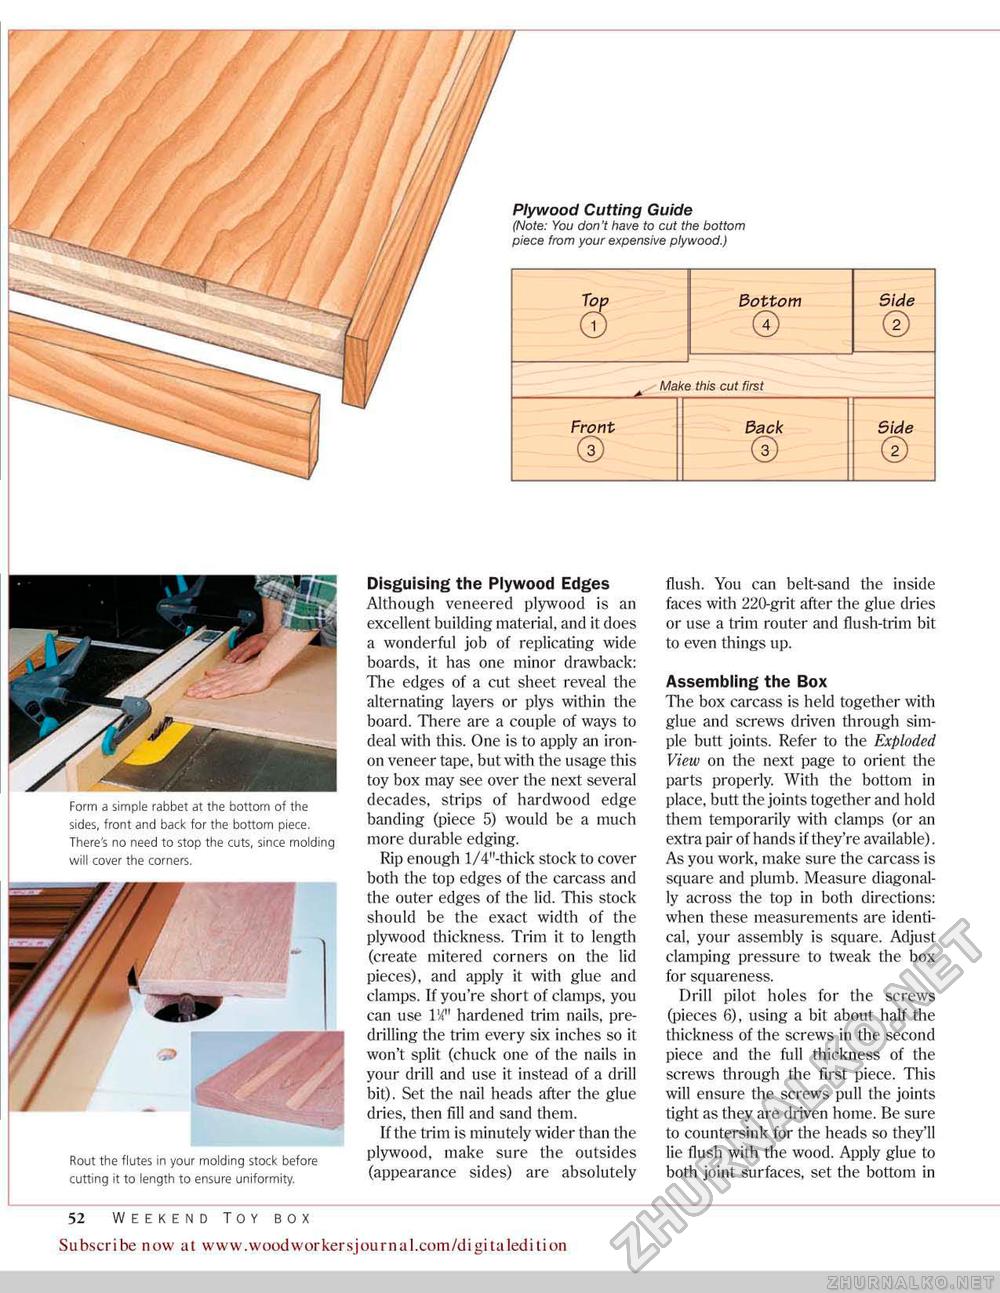
Plywood Cutting Guide (Note: You don't have to cut the bottom piece from your expensive plywood.)
Plywood Cutting Guide (Note: You don't have to cut the bottom piece from your expensive plywood.) Form a simple rabbet at the bottom of the sides, front and back for the bottom piece. There's no need to stop the cuts, since molding will cover the corners. Rout the flutes in your molding stock before cutting it to length to ensure uniformity. 52 WEEKEND TOY BOX Disguising the Plywood Edges Although veneered plywood is an excellent building material, and it does a wonderful job of replicating wide boards, it has one minor drawback: The edges of a cut sheet reveal the alternating layers or plys within the board. There are a couple of ways to deal with this. One is to apply an iron-on veneer tape, but with the usage this toy box may see over the next several decades, strips of hardwood edge banding {piece 5) would be a much more durable edging. Rip enough l/4"-thick stock to cover both the top edges of the carcass and the outer edges of the lid. This stock should he the exact width of the plywood thickness. Trim it to length (create mitered corners on the lid pieces), and apply it with glue and clamps. If you're short of clamps, you can use IV hardened trim nails, pre drilling the trim every six inches so it won't split (chuck one of the nails in your drill and use it instead of a drill bit). Set the nail heads after the glue dries, then fill and sand them. If the trim is minutely wider than the plywood, make sure the outsides (appearance sides) are absolutely flush. You can belt-sand the inside faces with 220-grit after the glue dries or use a trim router and flush-trim bit to even things up. Assembling the Box The box carcass is held together with glue and screws driven through simple butt joints. Refer to the Exploded View on the next page to orient the parts properly With the bottom in place, butt the joints together and hold them temporarily with clamps (or an extra pair of hands if they're available). As you work, make sure the carcass is square and plumb. Measure diagonally across the top in both directions: when these measurements are identical, your assembly is square. Adjust clamping pressure to tweak the box for squareness. Drill pilot holes for the screws (pieces 6), using a bit about half the thickness of the screws in the second piece and the full thickness of the screws through the first piece. This will ensure the screws pull the joints tight as they are driven home. Be sure to countersink for the heads so they'll lie flush with the wood. Apply glue to both joint surfaces, set the bottom in Subscribe now at www.wpodwoirkersjournal.com/digitaledition |
|||||||||


