Woodworker's Journal fall-2008, страница 51
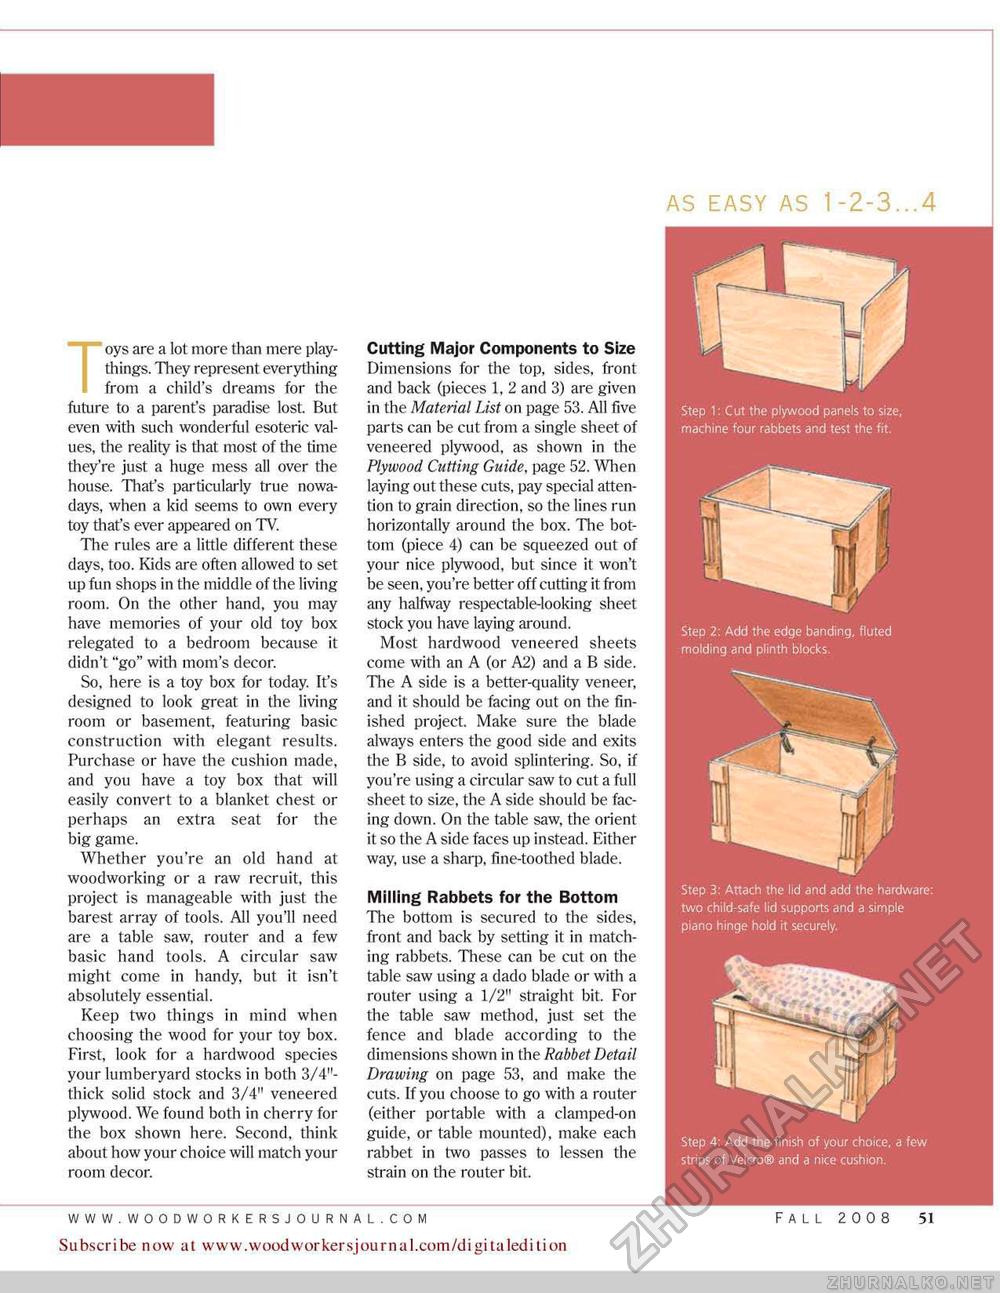
as easy as 1 -2-3...4 oys are a lot more than mere playthings. They represent everything from a child's dreams for the future to a parent's paradise lost. But even with such wonderful esoteric values, the reality is that most of the time they're just a huge mess all over the house. That's particularly true nowadays, wfien a kid seems to own every toy that's ever appeared on TV. The rules are a little different these days, too. Kids are often allowed to set up fun shops in the middle of the living room. On the other hand, you may have memories of your old toy box relegated to a bedroom because it didn't "go" with mom's decor. So, here is a toy box for today. It's designed to look great in the living room or basement, featuring basic construction with elegant results. Purchase or have the cushion made, and you have a toy box that will easily convert to a blanket chest or perhaps an extra seat for the big game. Whether you're an old hand at woodworking or a raw recruit, this project is manageable with just the barest array of tools. All you'll need are a table saw, router and a few basic hand tools. A circular saw might come in handy, but it isn't absolutely essential. Keep two things in mind when choosing the wood for your toy box. First, look for a hardwood species your lumberyard stocks in both 3/4"-thick solid stock and 3/4" veneered plywood. We found both in cherry for the box shown here. Second, think about how your choice will match your room decor. Cutting Major Components to Size Dimensions for the top, sides, front and back (pieces 1, 2 and 3) are given in the Material List on page 53. All five parts can be cut from a single sheet of veneered plywood, as shown in the Plywood Cutting Guide, page 52. When laying out these cuts, pay special attention to grain direction, so the lines run horizontally around the box. The bottom (piece 4} can be squeezed out of your nice plywood, but since it won't be seen, you're better off cutting it from any halfway respectable-looking sheet stock you have laying around. Most hardwood veneered sheets come with an A (or A2) and a B side. The A side is a better-quality veneer, and it should be facing out on the finished project. Make sure the blade always enters the good side and exits the B side, to avoid splintering. So, if you're using a circular saw to cut a full sheet to size, the A side should he facing down. On the table saw, the orient it so the A side faces up instead. Either way use a sharp, fine-toothed blade. Milling Rabbets for the Bottom The bottom is secured to the sides, front and back by setting it in matching rabbets. These can be cut on the table saw using a dado blade or with a router using a 1/2" straight bit. For the table saw method, just set the fence and blade according to the dimensions shown in the Rabbet Detail Drawing on page 53, and make the cuts. If you choose to go with a router (either portable with a clamped-on guide, or table mounted), make each rabbet in two passes to lessen the strain on the router bit. Step 4: Add the finish of your choice, a few strips of Veicro® and a nice cushion. Subscribe now at www.woodwoirkersjournal.com/digitaledition FALL 2008 51 |


