Woodworker's Journal fall-2008, страница 80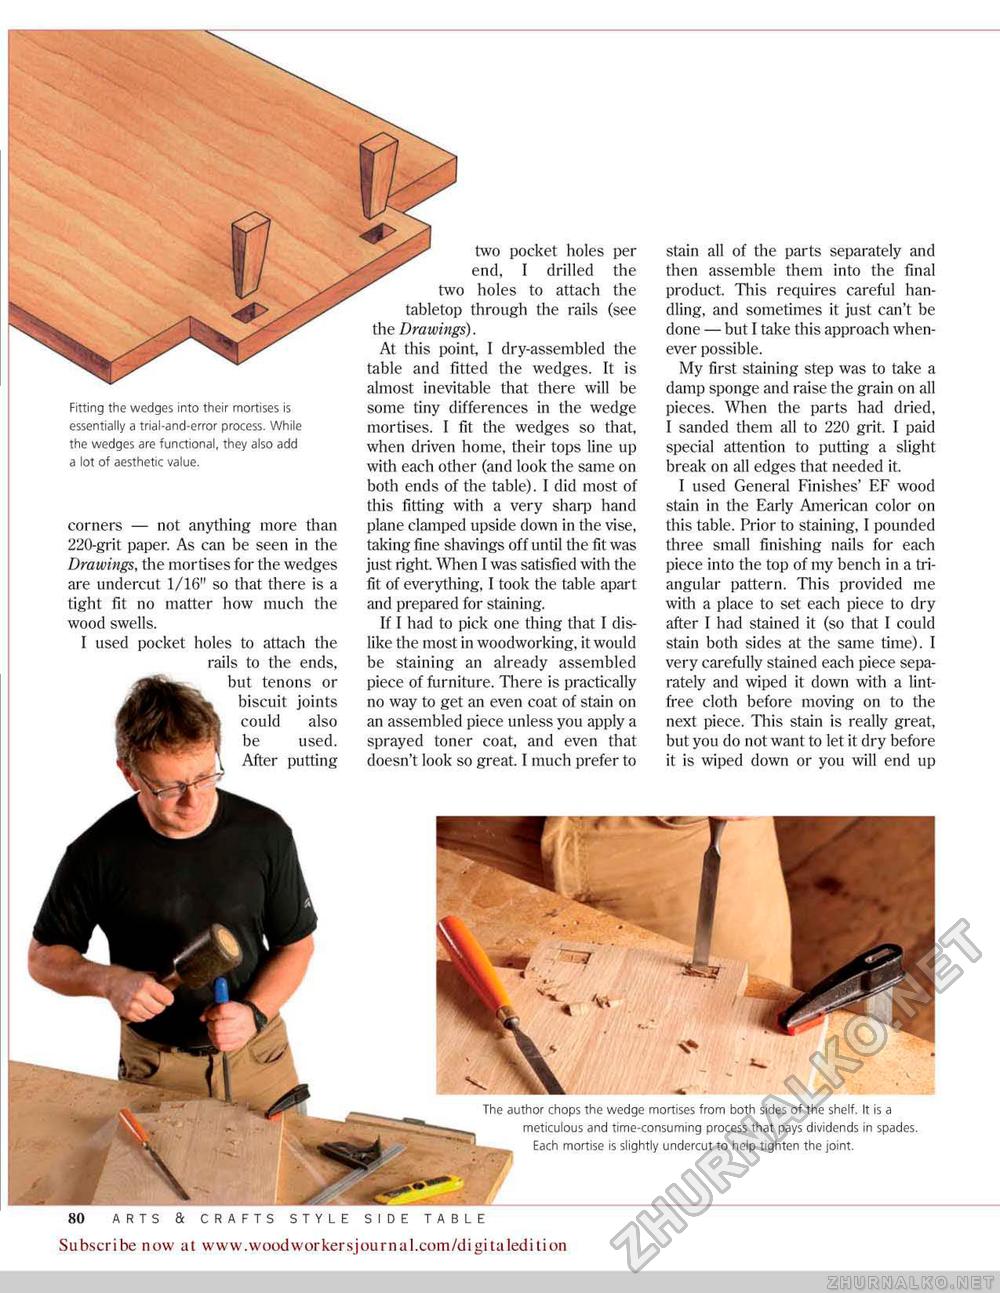
two pocket holes per end, I drilled the two holes to attach the tabletop through the rails (see the Drawings). At this point, I dry-assembled the table and fitted the wedges. It is almost inevitable that there will be some tiny differences in the wedge mortises. I fit the wedges so that, when driven home, their tops line up with each other (and look the same on both ends of the table). I did most of this fitting with a very sharp hand plane clamped upside down in the vise, taking fine shavings off until the fit was just right. When I was satisfied with the fit of everything, I took the table apart and prepared for staining. If I had to pick one thing that I dislike the most in woodworking, it would be staining an already assembled piece of furniture. There is practically no way to get an even coat of stain on an assembled piece unless you apply a sprayed toner coat, and even that doesn't look so great. I much prefer to stain all of the parts separately and then assemble them into the final product. This requires careful handling. and sometimes it just can't be done — but I fake this approach whenever possible. My first staining step was to take a damp sponge and raise the grain on all pieces. When the parts had dried, I sanded them all to 220 grit. I paid special attention to putting a slight break on all edges that needed it. I used General Finishes' EF wood stain in the Early American color on this table. Prior to staining, I pounded three small finishing nails for each piece into the top of my bench in a triangular pattern. This provided me with a place to set each piece to dry after I had stained it (so that I could stain both sides at the same time). I very carefully stained each piece separately and wiped it down with a lint-free cloth before moving on to the next piece. This stain is really great, but you do not want to let it dry before it is wiped down or you will end up The author chops the wedge mortises from both sides of the shelf. It is a meticulous and time-consuming process that pays dividends in spades. Each mortise is slightly undercut to help tighten the joint. Fitting the wedges into their mortises is essentially a trial-and-error process. While the wedges are functional, they also add a lot of aesthetic value. corners — not anything more than 220-grit paper. As can be seen in the Drawings, the mortises for the wedges are undercut 1/16" so that there is a tight fit no matter how much the wood swells. I used pocket holes to attach the rails to the ends, but tenons or biscuit joints could also be used. After putting Subscribe now at www.wpodwoirkersjournal.com/digitaledition |


