Woodworker's Journal fall-2008, страница 81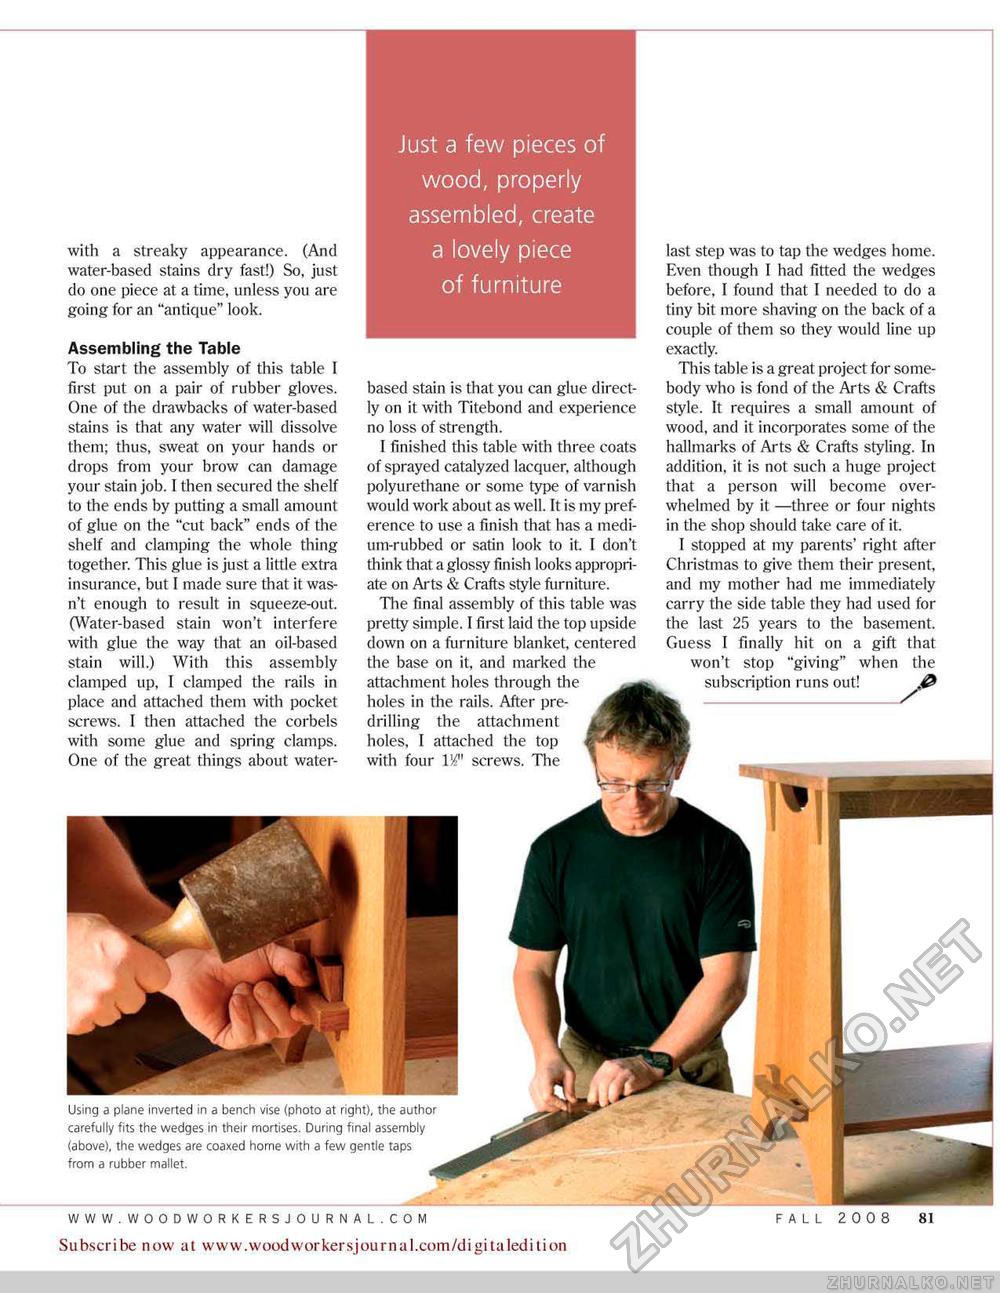
WWW.WOODWORKERSJOURNAL.COM FALL 2 00 8 81 Subscribe now at www.woodwoirkersjouriial.com/digitaledition Just a few pieces of wood, properly assembled, create a lovely piece of furniture with a streaky appearance. (And water-based stains dry fast!) So, just do one piece at a time, unless you are going for an "antique" look. Assembling the Table To start the assembly of this table 1 first put on a pair of rubber gloves. One of the drawbacks of water-based stains is that any water will dissolve them; thus, sweat on your hands or drops from your brow can damage your stain job. 1 then secured the shelf to the ends by putting a small amount of glue on the "cut back" ends of the shelf and clamping the whole thing together. This glue is just a little extra insurance, but I made sure that it wasn't enough to result in squeeze-out. (Water-based stain won't interfere with glue the way that an oil-based stain will.) With this assembly clamped up, I clamped the rails in place and attached them with pocket screws. I then attached the corbels with some glue and spring clamps. One of the great things about water- based stain is that you can glue directly on it with Titebond and experience no loss of strength. I finished this table with three coats of sprayed catalyzed lacquer, although polyurethane or some type of varnish would work about as well. It is my preference to use a finish that has a medium-rubbed or satin look to it. I don't think that a glossy finish looks appropriate on Arts & Crafts style furniture. The final assembly of this table was pretty simple. I first laid the top upside down on a furniture blanket, centered the base on it, and marked the attachment holes through the holes in the rails. After pre-drilling the attachment holes, I attached the top with four 1^" screws. The last step was to tap the wedges home. Even though I had fitted the wedges before, I found that I needed to do a tiny bit more shaving on the back of a couple of them so they would line up exactly. This table is a great project for somebody who is fond of the Arts & Crafts style. It requires a small amount of wood, and it incorporates some of the hallmarks of Arts & Crafts styling. In addition, it is not such a huge project that a person wi 11 become overwhelmed by it —three or four nights in the shop should take care of it. I stopped at my parents' right after Christmas to give them their present, and my mother had me immediately carry the side table they had used for the last 25 years to the basement. Guess I finally hit on a gift that won't stop "giving" when the subscription runs out! @ Using a plane inverted in a bench vise (photo at right), the author carefully fits the wedges in their mortises. During final assembly (above), the wedges are coaxed home with a few gentle taps from a rubber maiiet. |


