Woodworker's Journal fall-2008, страница 79
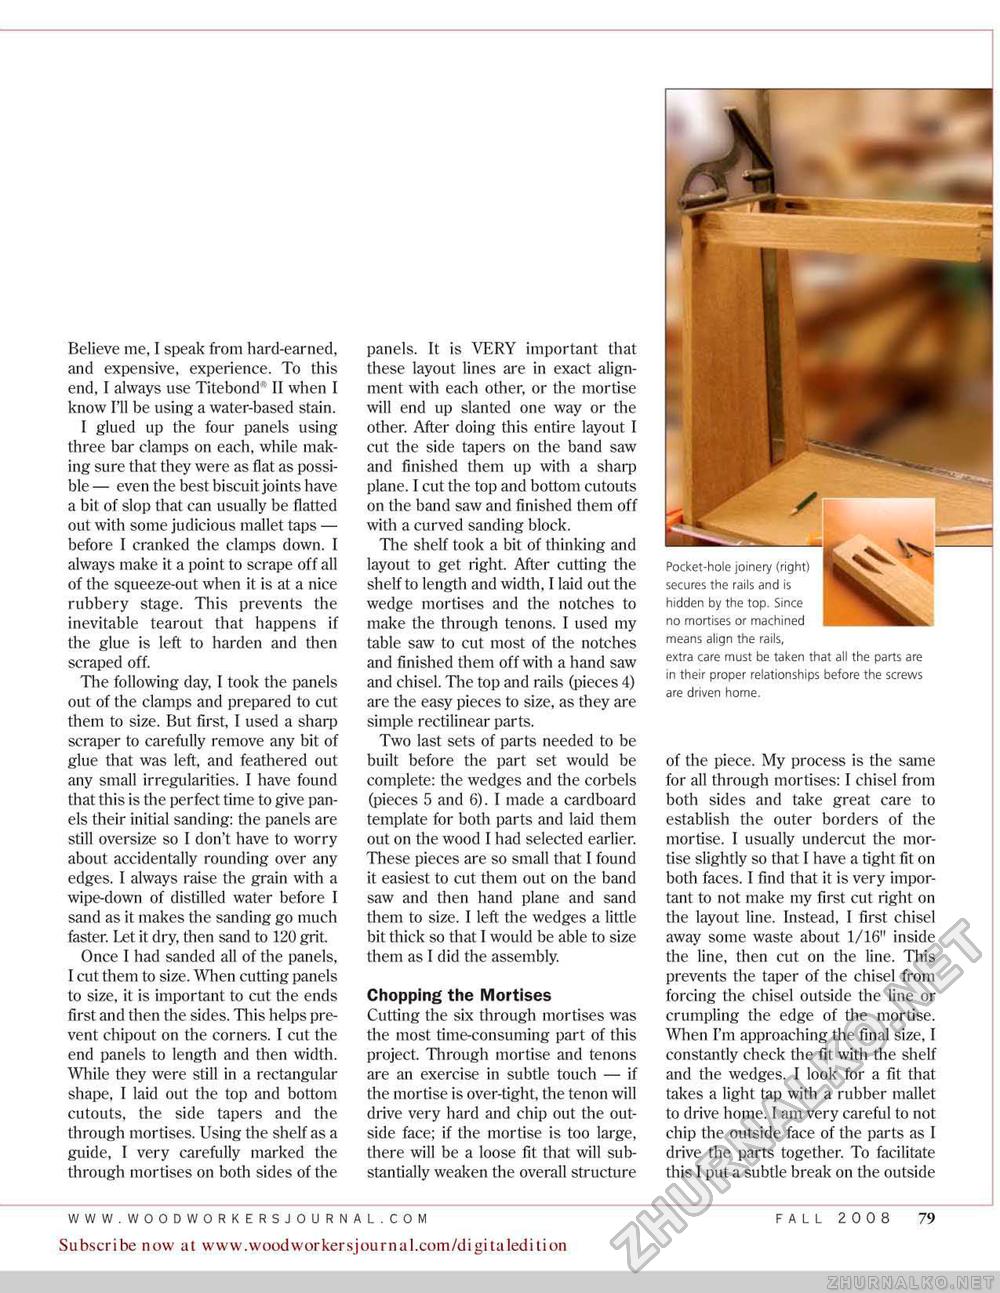
Believe me, I speak from hard-earned, and expensive, experience. To this end, I always use Titebond II when I know I'll be using a water-based stain. I glued up the four panels using three bar clamps on each, while making sure that they were as flat as possible— even the best biscuit joints have a bit of slop that can usually be flatted out with some judicious mallet taps — before I cranked the clamps down. I always make it a point to scrape off all of the squeeze-out when it is at a nice rubbery stage. This prevents the inevitable tearout that happens if the glue is left to harden and then scraped off. The following day, I took the panels out of the clamps and prepared to cut them to size. But first, I used a sharp scraper to carefully remove any bit of glue that was left, and feathered out any small irregularities. I have found that this is the perfect time to give panels their initial sanding: the panels are still oversize so I don't have to worry about accidentally rounding over any edges. I always raise the grain with a wipe-down of distilled water before I sand as it makes the sanding go much faster, let it dry. then sand to 120 grit. Once I had sanded all of the panels, I cut them to size. When cutting panels to size, it is important to cut the ends first and then the sides. This helps prevent chipout on the corners. I cut the end panels to length and then width. While they were still in a rectangular shape, I laid out the top and bottom cutouts, the side tapers and the through mortises. Using the shelf as a guide, I very carefully marked the through mortises on both sides of the panels. It is VERY important that these layout lines are in exact alignment with each other, or the mortise will end up slanted one way or the other. After doing this entire layout I cut the side tapers on the band saw and finished them up with a sharp plane. I cut the top and bottom cutouts on the band saw and finished them off with a curved sanding block. The shelf took a bit of thinking and layout to get right. After cutting the shelf to length and width, I laid out the wedge mortises and the notches to make the through tenons. I used my table saw to cut most of the notches and finished them off with a hand saw and chisel. The top and rails (pieces 4) are the easy pieces to size, as they are simple rectilinear parts. Two last sets of parts needed to be built before the part set would be complete: the wedges and the corbels {pieces 5 and 6). I made a cardboard template for both parts and laid them out on the wood I had selected earlier. These pieces are so small that I found it easiest to cut them out on the band saw and then hand plane and sand them to size. I left the wedges a little bit thick so that I would be able to size them as I did the assembly Chopping the Mortises Cutting the six through mortises was the most time-consuming part of this project. Through mortise and tenons are an exercise in subtle touch — if the mortise is over-tight, the tenon will drive very hard and chip out the outside face; if the mortise is too large, there will be a loose fit that will substantially weaken the overall structure Pocket-hole joinery (right) secures the rails and is hidden by the top. Since no mortises or machined means align the rails, extra care must be taken that all the parts are in their proper relationships before the screws are driven home. of the piece. My process is the same for all through mortises: I chisel from both sides and take great care to establish the outer borders of the mortise. I usually undercut the mortise slightly so that I have a tight fit on both faces. I find that it is very important to not make my first cut right on the layout line. Instead. I first chisel away some waste about 1/16" inside the line, then cut on die line. This prevents the taper of the chisel from forcing the chisel outside the line or crumpling the edge of the mortise, When I'm approaching the final size, I constantly check the fit with the shelf and the wedges, I look tor a fit that takes a light tap with a rubber mallet to drive home. I am very careful to not chip the outside face of the parts as I drive the parts together. To facilitate this I put a subtle break on the outside Subscribe now at www.woodwoirkersjournal.com/digitaledition FALL 2008 79 |


