Woodworker's Journal fall-2009, страница 34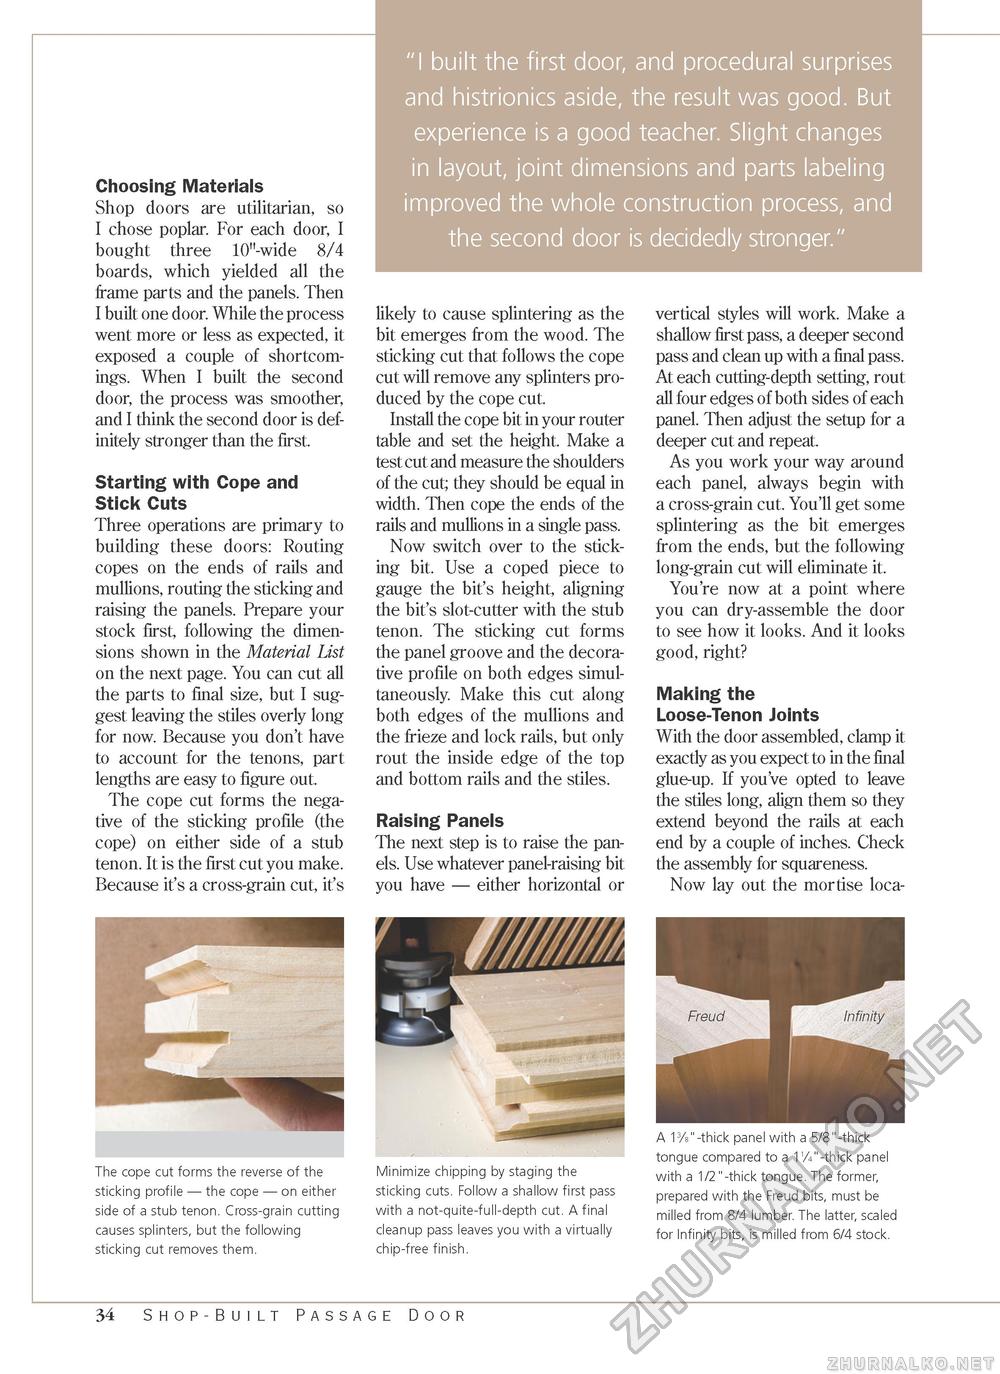
"I built the first door, and procedural surprises and histrionics aside, the result was good. But experience is a good teacher. Slight changes in layout, joint dimensions and parts labeling improved the whole construction process, and the second door is decidedly stronger." Choosing Materials Shop doors are utilitarian, so I chose poplar. For each door, I bought three 10"-wide 8/4 boards, which yielded all the frame parts and the panels. Then I built one door. While the process went more or less as expected, it exposed a couple of shortcomings. When I built the second door, the process was smoother, and I think the second door is definitely stronger than the first. Starting with Cope and Stick Cuts Three operations are primary to building these doors: Routing copes on the ends of rails and mullions, routing the sticking and raising the panels. Prepare your stock first, following the dimensions shown in the Material List on the next page. You can cut all the parts to final size, but I suggest leaving the stiles overly long for now. Because you don't have to account for the tenons, part lengths are easy to figure out. The cope cut forms the negative of the sticking profile (the cope) on either side of a stub tenon. It is the first cut you make. Because it's a cross-grain cut, it's The cope cut forms the reverse of the sticking profile — the cope — on either side of a stub tenon. Cross-grain cutting causes splinters, but the following sticking cut removes them. likely to cause splintering as the bit emerges from the wood. The sticking cut that follows the cope cut will remove any splinters produced by the cope cut. Install the cope bit in your router table and set the height. Make a test cut and measure the shoulders of the cut; they should be equal in width. Then cope the ends of the rails and mullions in a single pass. Now switch over to the sticking bit. Use a coped piece to gauge the bit's height, aligning the bit's slot-cutter with the stub tenon. The sticking cut forms the panel groove and the decorative profile on both edges simultaneously. Make this cut along both edges of the mullions and the frieze and lock rails, but only rout the inside edge of the top and bottom rails and the stiles. Raising Panels The next step is to raise the panels. Use whatever panel-raising bit you have — either horizontal or Minimize chipping by staging the sticking cuts. Follow a shallow first pass with a not-quite-full-depth cut. A final cleanup pass leaves you with a virtually chip-free finish. vertical styles will work. Make a shallow first pass, a deeper second pass and clean up with a final pass. At each cutting-depth setting, rout all four edges of both sides of each panel. Then adjust the setup for a deeper cut and repeat. As you work your way around each panel, always begin with a cross-grain cut. You'll get some splintering as the bit emerges from the ends, but the following long-grain cut will eliminate it. You're now at a point where you can dry-assemble the door to see how it looks. And it looks good, right? Making the Loose-Tenon Joints With the door assembled, clamp it exactly as you expect to in the final glue-up. If you've opted to leave the stiles long, align them so they extend beyond the rails at each end by a couple of inches. Check the assembly for squareness. Now lay out the mortise loca- A 13/s"-thick panel with a 5/8"-thick tongue compared to a 1 W-thick panel with a 1/2"-thick tongue. The former, prepared with the Freud bits, must be milled from 8/4 lumber. The latter, scaled for Infinity bits, is milled from 6/4 stock. 34 Shop-Built Passage Door |


