Woodworker's Journal fall-2009, страница 37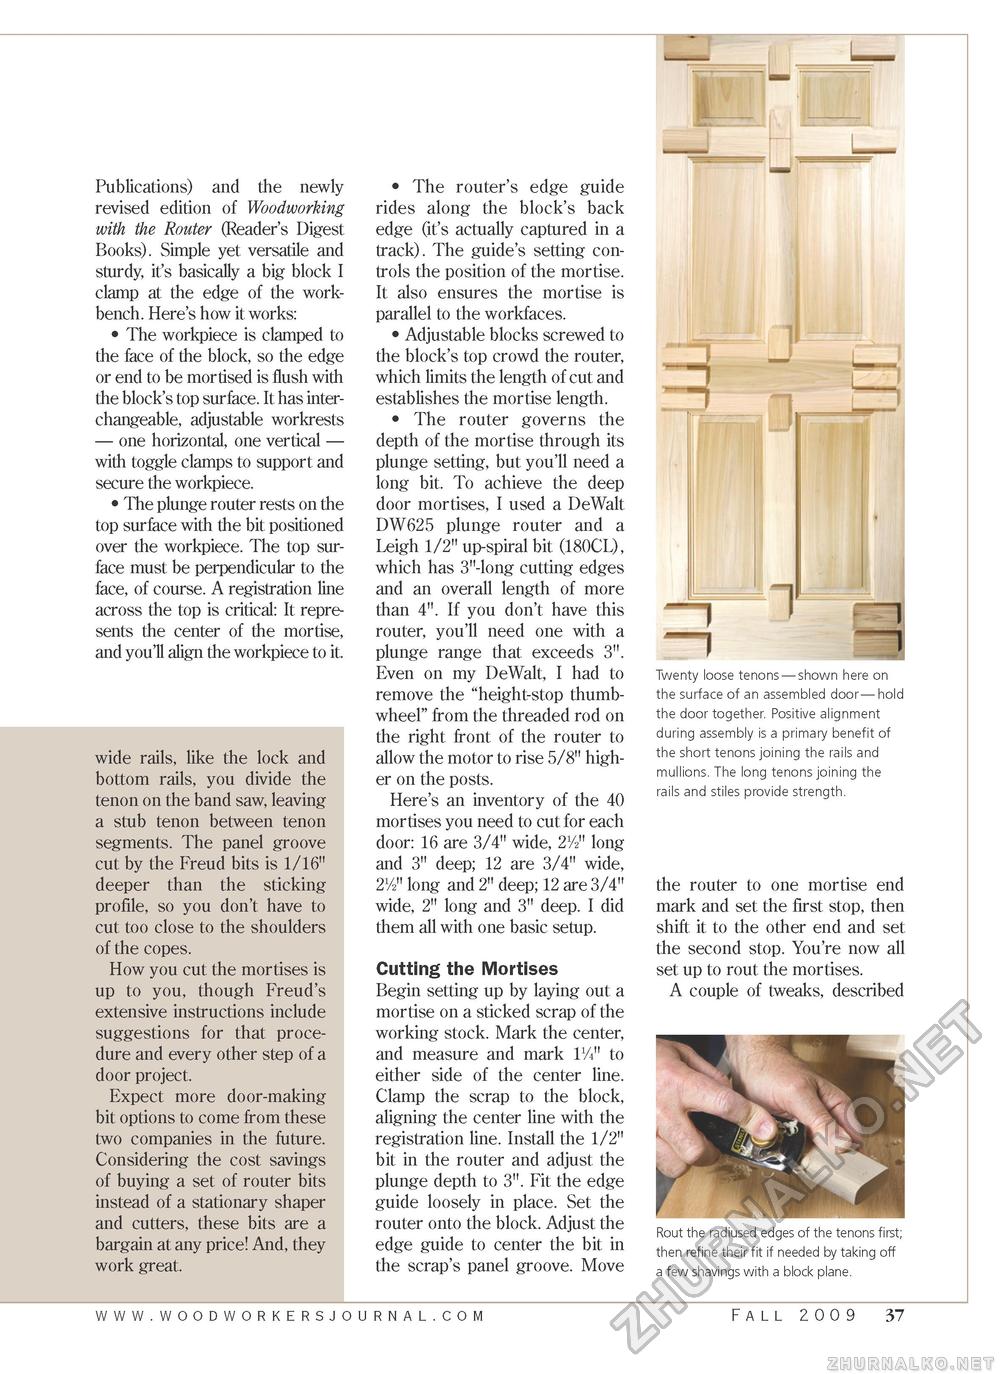
Publications) and the newly revised edition of Woodworking with the Router (Reader's Digest Books). Simple yet versatile and sturdy, it's basically a big block I clamp at the edge of the workbench. Here's how it works: • The workpiece is clamped to the face of the block, so the edge or end to be mortised is flush with the block's top surface. It has interchangeable, adjustable workrests — one horizontal, one vertical — with toggle clamps to support and secure the workpiece. • The plunge router rests on the top surface with the bit positioned over the workpiece. The top surface must be perpendicular to the face, of course. A registration line across the top is critical: It represents the center of the mortise, and you'll align the workpiece to it. wide rails, like the lock and bottom rails, you divide the tenon on the band saw, leaving a stub tenon between tenon segments. The panel groove cut by the Freud bits is 1/16" deeper than the sticking profile, so you don't have to cut too close to the shoulders of the copes. How you cut the mortises is up to you, though Freud's extensive instructions include suggestions for that procedure and every other step of a door project. Expect more door-making bit options to come from these two companies in the future. Considering the cost savings of buying a set of router bits instead of a stationary shaper and cutters, these bits are a bargain at any price! And, they work great. • The router's edge guide rides along the block's back edge (it's actually captured in a track). The guide's setting controls the position of the mortise. It also ensures the mortise is parallel to the workfaces. • Adjustable blocks screwed to the block's top crowd the router, which limits the length of cut and establishes the mortise length. • The router governs the depth of the mortise through its plunge setting, but you'll need a long bit. To achieve the deep door mortises, I used a DeWalt DW625 plunge router and a Leigh 1/2" up-spiral bit (180CL), which has 3"-long cutting edges and an overall length of more than 4". If you don't have this router, you'll need one with a plunge range that exceeds 3". Even on my DeWalt, I had to remove the "height-stop thumbwheel" from the threaded rod on the right front of the router to allow the motor to rise 5/8" higher on the posts. Here's an inventory of the 40 mortises you need to cut for each door: 16 are 3/4" wide, 2V2" long and 3" deep; 12 are 3/4" wide, 2y2" long and 2" deep; 12 are 3/4" wide, 2" long and 3" deep. I did them all with one basic setup. Cutting the Mortises Begin setting up by laying out a mortise on a sticked scrap of the working stock. Mark the center, and measure and mark 1%" to either side of the center line. Clamp the scrap to the block, aligning the center line with the registration line. Install the 1/2" bit in the router and adjust the plunge depth to 3". Fit the edge guide loosely in place. Set the router onto the block. Adjust the edge guide to center the bit in the scrap's panel groove. Move Twenty loose tenons — shown here on the surface of an assembled door—hold the door together. Positive alignment during assembly is a primary benefit of the short tenons joining the rails and mullions. The long tenons joining the rails and stiles provide strength. the router to one mortise end mark and set the first stop, then shift it to the other end and set the second stop. You're now all set up to rout the mortises. A couple of tweaks, described Rout the radiused edges of the tenons first; then refine their fit if needed by taking off a few shavings with a block plane. Fall 2009 37 |


