Woodworker's Journal fall-2009, страница 53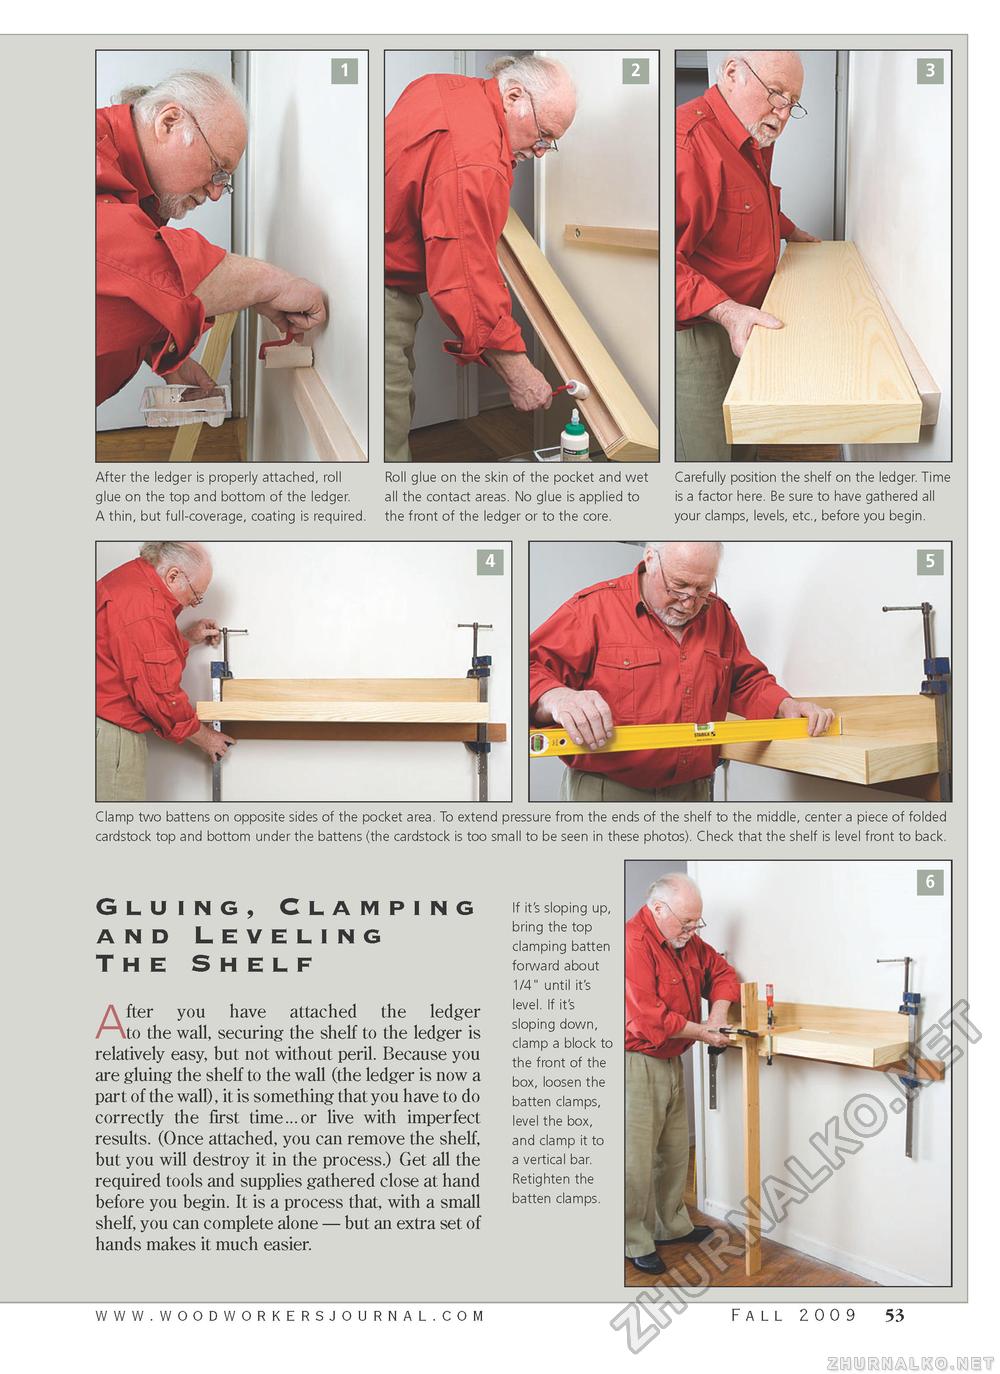
After the ledger is properly attached, roll glue on the top and bottom of the ledger. Roll glue on the skin of the pocket and wet Carefully position the shelf on the ledger. Time all the contact areas. No glue is applied to is a factor here. Be sure to have gathered all A thin, but full-coverage, coating is required. the front of the ledger or to the core. your clamps, levels, etc., before you begin. Clamp two battens on opposite sides of the pocket area. To extend pressure from the ends of the shelf to the middle, center a piece of folded cardstock top and bottom under the battens (the cardstock is too small to be seen in these photos). Check that the shelf is level front to back. Gluing, Clamping and Leveling The Shelf After you have attached the ledger to the wall, securing the shelf to the ledger is relatively easy, but not without peril. Because you are gluing the shelf to the wall (the ledger is now a part of the wall), it is something that you have to do correctly the first time...or live with imperfect results. (Once attached, you can remove the shelf, but you will destroy it in the process.) Get all the required tools and supplies gathered close at hand before you begin. It is a process that, with a small shelf, you can complete alone — but an extra set of hands makes it much easier. If it's sloping up, bring the top clamping batten forward about 1/4" until it's level. If it's sloping down, clamp a block to the front of the box, loosen the batten clamps, level the box, and clamp it to a vertical bar. Retighten the batten clamps. Fall 2009 53 |


